-
Dry Falls

Dry Falls. Copyright © 2018 Gary Allman, all rights reserved. We’ve never seen more than a trickle pouring over these falls. They obviously run well when it rains, even if only briefly. Today, the shade offered a nice respite from the heat.
-
Twin Trunks

Twin Trunks I loved the way the light caught these two trees on either side of the creek bed.
-
Woods Fork – Panorama

Woods Fork I’m enjoying the way these multi-image panoramas capture more of the feeling and impression of the places where I hike. This one is four stitched images.
-
Woods Fork – Busiek State Forest and Wildlife Area

Woods Fork near the southern Yellow Trail creek crossing. Copyright © 2018 Gary Allman, all rights reserved. 
I walked downstream from the Yellow Trail Shortcut creek crossing to find somewhere shady to have some lunch. Copyright © 2018 Gary Allman, all rights reserved. -
Pees Hollow, Counter-Clockwise For a Change

Near the end of the hike. Setting up the camera, I didn’t notice that I’d be standing in full sun while Ginger was in the shade. The last time Ginger and I went backpacking together was in August 2017. Family events, work, and lethargy have gotten in the way. Ginger’s only other recent backpacking trip was backpacking with our eldest daughter (Piney Creek) in 2016. This year I’ve made an effort to go solo backpacking; but thus far we’ve not got out together. Last Sunday/Monday (May 6 & 7) we remedied that.
For this trip, Ginger chose the trail — Hercules Glades Wilderness, Pees Hollow trail, and I chose the route — Counter-clockwise. I’ve never hiked this trail in that direction, and it is arguably the most difficult route to follow. Ginger attempted the trail counter-clockwise last year but got lured off course by a heavily used unofficial trail.
As I’ve only just hiked Pees Hollow, I didn’t take a lot of pictures, though you do get a different view of things ‘going backwards’. For example, the road is much more visible when you are heading north along the trail, I hadn’t noticed that going south. When I was here four weeks ago there were no leaves on the trees. This time I was surprised by the rich green of the forest canopy.

I wanted a picture to show the greening of the trees. It’s a huge change since I was here four weeks ago. 
Looking north-west, the trees were spectacular. When we got to the misplaced trail marker I found on my last trip, I realized I’d forgotten to bring a sharpie with me, so I scratched an arrow into it, hopefully that will be visible enough to help people to take the correct trail.

One glade was carpeted with these tiny white flowers. The storm clouds to the north were real. We had rain, thunder and lightning within the hour. Rain and thunder were predicted for 2:00 p.m. onwards, and right on time the sky darkened, and we had a thunderstorm. We decided to hike through the rain, only pausing to put on pack covers. With rain in the forecast, I had decided to wear a lightweight utility kilt which dries very quickly — unlike the heavy cotton denim kilts. It stopped raining by the time we had arrived at the Cab, and we went off-trail along ‘Cab Creek’ and set up camp at the fire ring I’d found and used four weeks earlier. The small supply of wood I’d left was still stacked to one side. By the time the tent and hammock were up we’d both dried off.

We camped at a spot I’d found on my last visit (April 9&10). This was Ginger’s first time out with my small solo tent. It’s cozy but functional. The fire ring is quite close to the creek, and we camped closer than the 100′ restriction on camping near to water sources. However, the hollow isn’t very wide here, the hill starts to climb up immediately behind where we camped. Where we set up camp was clear of brush, and a lot less damaging place to camp than up the hill in the brush.

Standard feet in front of the fire shot, only this time with added headlamp lighting. The night was surprisingly cold and quite damp. We were both warm enough in our respective abodes. Ginger in our Sierra Designs Lighting XT 1, one person tent, and me in my hammock. I woke at 6:00 a.m. (as I do every day — sigh), fortunately, I went back to sleep until 8:00 a.m. We had coffee, breakfast, took some pictures, and packed up camp. The hike back from here is uphill a lot of the way. It’s only a couple of miles but you climb nearly 1,000 feet.

This is the reaction you get when you crouch down to take a picture while wearing a kilt.  Ginger gives me ‘that look’ as I interrupt her breakfast to take pictures. Copyright © 2018 Gary Allman, all rights reserved.
 Watching the creek. Copyright © 2018 Gary Allman, all rights reserved.
 I am going to be sooo glad to retire this tarp. I’m told my new tarp will be sent out some time around May 16. Copyright © 2018 Gary Allman, all rights reserved.
Looking west. ‘Cab Creek’ has become a tangled jungle. 
The trees and undergrowth are really filling in. The campsite is a bit close to the creek, but we are careful to not leave any mess or sign that we’ve been there – apart from some wood we collected and didn’t use. 
I wanted a better picture to replace the one we took here on February 17, 2016. 
Looking Across the Glades – Pees Hollow Trail The hike out took us a little under two hours. At the trailhead, we met the Wilderness Ranger, who was replenishing the sign-up sheets and trail maps. We had a great chat about the various wildernesses she patrols, and she gave us a couple of excellent ideas, which we’ll be following up on later in the year. Kristyn looks after all of the trails in the Cassville and Ava area, that’s a lot of trails, and what a great job!
During our conversation, we learned the importance of signing in when you visit a wilderness. Funding is directly related to the number of visitors, which is determined from the sign-in sheets. So, please make sure you sign in.
She confirmed my hunch that all the new trail signs and marks had been put in place as a direct result of search and rescue operations that took place recently. Wilderness trails are not supposed to be marked, and the trails are not maintained. Trees fall, trails shift, and creeks can be difficult to cross after rain. Despite the warnings, maps, and information at the trailhead, people still venture out totally unprepared, cannot read maps, and rely on non-existent cell phone coverage. Signs and trail markers are a lot cheaper than search and rescue operations.
Because of a road closure (Hwy 125 is closed at Swan Creek), we had a much longer drive home.
Oops
Update: The problem with proofing your own writing is that sometimes the obvious errors go unnoticed. Originally I wrote that we hiked the loop clockwise. No. We hiked it counter-clockwise, taking the eastern half of the loop first. I also got our last backpacking outing wrong, forgetting we did a one-nighter to watch the eclipse in 2017. I’ve made all the necessary corrections. (I hope!)
This is an edited and abridged version of a post that first appeared on Ozarks Walkabout.
-
Looking Across the Glades – Pees Hollow Trail
Looking Across the Glades – Pees Hollow Trail -
Gary and the Truck Cab on the Pees Hollow Trail

Gary and the Truck Cab on the Pees Hollow Trail. Copyright © 2018 Ginger Allman, all rights reserved. 
Gary on the Hercules Glades, Tower Trail (March 2018). Copyright © 2018 Gary Allman, all rights reserved. I wanted a better picture of me by the cab to replace the one we took here on February 17, 2016.
Am I mistaken or do I look a little bit less chubby than I was back in March?
2016

Gary on the Pees Hollow Trail (February 2016). Copyright © 2016 Ginger Allman, all rights reserved. -
‘Cab Creek’
Looking west, ‘Cab Creek’ has become a tangled jungle.
-
That’s One Way to Get Ginger to Laugh

This is the reaction you get when you crouch down to take a picture while wearing a kilt. -
Solo Backpacking at Piney Creek Wilderness

My little slice of Piney Creek heaven. I turned west on Piney Creek, and lost the trail at a feeder creek crossing. So I went down stream until it joined Piney Creek and started exploring. I found this spot and decided not to go any further. I’m camped a bit too close to the creek, but the underbrush was dense further back and there was a lack of trees until you got to the hill at the edge of the hollow. Two frame panorama. Copyright © 2018 Gary Allman, all rights reserved. Sunday morning I was ready for a change. During the week we’d had a whole bunch of server issues, I was heartily sick of preparing for GDPR, and researching and writing Microsoft Teams Training.
After a short chat with Ginger, I decided to pack my rucksack and head off out on a trip to the Wilderness. I’m busy, but I’ve been putting in some hours to buy myself some ‘Wilderness time.’ Even so, I could only afford to be away Sunday through Monday.
I had a destination in mind. It took an hour or so to get ready, pack my backpack and be on the road to Piney Creek Wilderness. My plan was non-existent. I hadn’t decided where in the wilderness I was going to go, though I had picked a trail to start with. The Tower Trail, when I got to the end of that, I’d have to make up my mind, whether to go east to Table Rock Lake or west on a part of the Piney Creek Trail I’ve not hiked before.
To make things ‘interesting’ I decided to only use a one-liter water container. However, I packed a second liter as an emergency supply and stuffed it into the lost recesses of the bottom of my pack. My idea was to filter water whenever I needed it and forget about the extra liter. I did remember to weigh my pack this time, 26lbs — including food, snacks, and 4.4lbs of water (that’s what two liters of water weighs 🙂 ). I’m slowly paring the weight down, and I’m not sacrificing comforts. For food, I had one dehydrated dinner, breakfast cereal, snacks, and coffee. I was ready to go.
Day One
Piney Creek Wilderness is just over an hour’s drive from Springfield. I arrived at the appropriately named Pines Overlook trailhead at midday. There was one other vehicle in the parking lot, and according to the registration sheets, I’d have the whole wilderness to myself.

Parked at the Pines View Trailhead at Piney Creek Wilderness. Copyright © 2018 Gary Allman, all rights reserved. 
Start of the Tower Trail which leads down to Piney Creek, after an easy ridge walk, it’s a rough descent. Copyright © 2018 Gary Allman, all rights reserved. As I was hiking down the Tower Trail to Piney Creek, I was still weighing up where I was going to go. In the end, I didn’t make the decision until I got to the trail junction. The first part of the Tower Trail lulled me into a feeling of false security as I walked along the ridge, stopping only to inspect some old building foundations. When I got to the drop-off, I was reminded of what a steep trail this is. The going gets really steep, and I was glad I had my hiking pole to steady myself.

Once you drop off of the ridge, you can follow the official trail up to the top of the next ridge (right of frame. This is a 80′-100′ climb) or take the unmarked trail that follows the creek(left of frame). Three-frame panorama. Copyright © 2018 Gary Allman, all rights reserved. When I’d got to the bottom of the ridge, I had a choice of routes to Piney Creek. There’s an easy route following a feeder creek down to where it joins Piney Creek, or there’s the tougher route climbing up the next ridge 80′-100′ and then hiking along the edge of the adjacent hollow.
I decided to stick with the official trail and take the tougher route. Climbing out of the hollow was hard! Once up on the ridge, the going was easy, but the trail down from the ridge was a lot rougher than I remembered. At the bottom of the ridge there is a fire ring, and it’s a great example of why people shouldn’t be allowed out into the wilderness. Nearby trees had been cut down for firewood, and the area near to the fire ring had been picked clean. It’s a testament to peoples’ laziness and selfishness. It’d be a great place to put up ‘Leave no Trace’ posters — except they’d be the next thing on the fire.

Fire ring at the bottom of the Tower Trail. It’s always a huge disappointment to see how people wantonly wreck an area. Note the tree stump in the foreground that’s been recently cut down. Generally it’s because people are too lazy to forage a little further afield for wood for their fire. Copyright © 2018 Gary Allman, all rights reserved. About two hundred feet from the fire ring, the Tower Trail meets Piney Creek, and the Piney Creek Trail runs East and West on the far side. A picturesque campsite next to Table Rock Lake called out to me, but I decided to go west instead and explore for a short while before turning around and heading east to the lake. That way I could do some exploring and spend the evening by the lake (that, however, wasn’t going to be the way things panned out).
Spring has finally sprung in the Ozarks, and the undergrowth is sprouting with wild abandon. The western trail is much less used, and having met a Timber Rattlesnake on Piney Creeks trails before, I was keeping a weather eye out for snakes. The trail was quite clear at first, then the trail crossed Piney Creek, and it became harder to follow, and there were a lot of cat briars. Finally, the trail crossed the dry bed of a ‘feeder creek’ and I couldn’t find where the trail picked up again on the far side. I thought about giving up and heading back to the lake but decided to follow the creek bed down to where it Joined Piney Creek and explore a bit more. I gave myself until 3 p.m. to look around.
The area to the South of Piney Creek was obviously fields at some point, now it is very overgrown, and the creek itself is lined by lots of big trees. The sound of running water and clear space under the trees looked like it might be a great place to stop so I kept on wandering west. I was looking for suitable trees to hang my hammock from– without any potential ‘widow makers’ nearby.
I came to a spot where there was a rocky outcrop in the middle of the creek — and noticed some nice big pools just upstream. The ground to the south of the creek was an ‘overflow creek bed’ which meant the vegetation wasn’t as dense, and I found two trees, a fair distance apart, but parallel to the creek. I was near to my time to turn around. I decided to make camp here and enjoy the scenery. I could hike to the lake tomorrow.

Rocky Outcrop in Piney Creek. Copyright © 2018 Gary Allman, all rights reserved. Hanging the hammock was challenging as the trees were over 24′ apart. At least I remembered that the further apart the trees were, the higher I had to set the hammock suspension. That meant the hammock suspension had to be fixed a long way up the tree’s trunks, way above my head. After a bit of trial and error, I got it sorted.
 Dutchware Chameleon Hammock set up at around 24′ between trees. I had fun getting the suspension high enough for the span. Copyright © 2018 Gary Allman, all rights reserved.
 Dutchware Chameleon Hammock set up at around 24′ between trees. I had fun getting the suspension high enough for the span. Copyright © 2018 Gary Allman, all rights reserved.
 My little slice of Piney Creek heaven. I turned west on Piney Creek, and lost the trail at a feeder creek crossing. So I went down stream until it joined Piney Creek and started exploring. I found this spot and decided not to go any further. I’m camped a bit too close to the creek, but the underbrush was dense further back and there was a lack of trees until you got to the hill at the edge of the hollow. Two frame panorama. Copyright © 2018 Gary Allman, all rights reserved.
On this trip, I was using some new tarp tie downs, and they had an unexpected issue. They include some elastic to even the pull on the tarp. But, as I discovered, if a stake pulls out, the elastic turns them into projectiles, firing the stakes off into the undergrowth. I am going to have to look at ways of tying the stakes to the tie-out line so that their range is limited. Fortunately, I found the two stakes that whistled past my ear on their trajectory into the wilderness.
Hammock set up, I spent some time taking pictures and bravely decided to try out the bathing pool. It was bloody cold, and I’ll admit I didn’t get fully immersed. Bracing, I think is the word. Well, one of the more polite words. I collected some dead wood for a fire and pottered around for the rest of the afternoon.

Me posing with the bathing pool in the background. Yes, I tried it out. Yes, it was bloody cold. And no, I opted not to go for total immersion after getting in up to my waist. Copyright © 2018 Gary Allman, all rights reserved.  Looking up Piney Creek. Copyright © 2018 Gary Allman, all rights reserved.
 My little slice of Piney Creek heaven. I turned west on Piney Creek, and lost the trail at a feeder creek crossing. So I went down stream until it joined Piney Creek and started exploring. I found this spot and decided not to go any further. I’m camped a bit too close to the creek, but the underbrush was dense further back and there was a lack of trees until you got to the hill at the edge of the hollow. Copyright © 2018 Gary Allman, all rights reserved.
 My personal bathing pool. Copyright © 2018 Gary Allman, all rights reserved.
I found a convenient tree root to act as a tripod. I collected a small amount of deadwood for a fire that was more decorative than functional. Copyright © 2018 Gary Allman, all rights reserved. I had a late dinner and enjoyed bringing my journal up to date sitting by the campfire. There was a nice bright moon to keep me company.
 Mountain House dehydrated meal for dinner. Copyright © 2018 Gary Allman, all rights reserved.
 Mountain House dehydrated meal for dinner. Copyright © 2018 Gary Allman, all rights reserved.
 Mountain House dehydrated meal for dinner. Copyright © 2018 Gary Allman, all rights reserved.
 Mountain House dehydrated meal for dinner. Copyright © 2018 Gary Allman, all rights reserved.
Sitting by the campfire bringing my journal up to date. Copyright © 2018 Gary Allman, all rights reserved.  Copyright © 2018 Gary Allman, all rights reserved.
 Sitting by the campfire bringing my journal up to date.
Just before turning in I was disturbed by a very noisy armadillo. I’ve seen evidence of feral hogs at Piney Creek, and in the darkness my mind amplified the snuffling of said armadillo into a herd or rampaging hogs. It took a while with my headlamp to locate the source of all the noise, and assure myself that it was just an innocent armadillo and nothing more (we’ve also seen evidence of large cats — Mountain Lion sized — at Piney Creek, so my caution can be justified). At night, solo backpacking, it seems all noises get bigger and grow teeth to match.
Day Two
 I survived another night in the wilderness. My only overnight visitor was a very noisy armadillo. Copyright © 2018 Gary Allman, all rights reserved.
 Morning view from my hammock. Copyright © 2018 Gary Allman, all rights reserved.
Apart from the errant armadillo, the night passed without incident, and I spent a lazy Monday morning taking pictures (and video), having breakfast, and packing up camp.
I was on my way before midday, and I had a plan to hike to the lake, eat lunch, hike the ‘Farm Trail’ to the top of the ridge, and then, instead of taking the road back to the trailhead, hike the last part of the Lake Trail back to the tower (Pines View Trailhead). This was a brave (or stupid) idea. Brave because there are some steep descents and climbs on that bit of trail that the road route avoids.

the underbrush is growing in quickly. This is what Ginger calls ‘Snakey’ conditions. I kept my eyes open, and only spotted one small snake who slivered off before I could identify what sort of snake it was. We’ve met a big Timber Rattlesnake sunning itself on this trail. Copyright © 2018 Gary Allman, all rights reserved. Ginger and Katie hiked the east side of the Piney Creek Trail a couple of years ago and reported that floods had decimated the trail and area, so I was expecting some trouble keeping to the trail. The rapidly growing vegetation was already encroaching on the trail in lots of places, which made keeping an eye out for snakes difficult. I was pleased to actually spot the one snake I did encounter before it saw me, and slinked off. I did lose the trail a couple of times, but I headed off in the general direction I needed to go in and picked it up again.
I arrived at Table Rock Lake just after 1 p.m.

Table Rock Lake From Piney Creek Wilderness. Copyright © 2018 Gary Allman, all rights reserved. 
Table Rock Lake From Piney Creek Wilderness. An approx. 180° view from north to south. Six-frame panorama. Copyright © 2018 Gary Allman, all rights reserved. The campsite next to the lake is a mess. Over-use has ruined it. I’m glad I didn’t head down here for the night. I had my lunch by the lake, and, as I finally had cell service (Verizon) I caught up with work and stuff. I finished off my water – that was my third liter of filtered water I’d consumed so far during the trip.

Unfortunately, a rather typical Ozarks wilderness campsite. Copyright © 2018 Gary Allman, all rights reserved. I had emptied out my emergency supply that morning, as I’d proved I could manage with just one liter and filtering more as I needed it, and I welcomed the 2.2lb reduction in my pack weight.

Where Piney Creek runs into Table Rock Lake. Copyright © 2018 Gary Allman, all rights reserved. After lunch I headed back, stopping only to filter another liter of water before climbing up the ‘Farm Trail’. I’ve not hiked this trail in many years. There are a lot of trees down across the trail now and it struck me that the trail now goes a slightly different route. But that’s just a feeling I had. I tried to find a tree that was down across the trail back in 2011 — it would have made a good photo opportunity, but with so many trees down, I couldn’t be sure which was the right one so I gave up on my picture taking plans.
 The ‘Farm Trail’ runs along a creek in places. Here a tree is blocking the trail (looking down-trail — south). I went under the tree. Copyright © 2018 Gary Allman, all rights reserved.
 The ‘Farm Trail’ leaves the creek bed. Copyright © 2018 Gary Allman, all rights reserved.
Gary and Ginger stop for a drink and snack on the way back to the Tower trailhead. Copyright © 2012 Gary Allman, all rights reserved. 
Rest stop – Piney Creek Wilderness. Copyright © 2012 Gary Allman, all rights reserved. By 3 p.m. I had climbed (okay, staggered gasping) up to the ridge, and started walking the nice even trail back to the tower and trailhead.
I decided to stick with my plan to hike the last bit of the Lake Trail and not use the easier route along the road. Not many people do this, and it’s no surprise. It took me several minutes to find a trail marker for the start of the trail, and few minutes longer to be sure I’d found the trail after that. Even then it seems somehow I left the trail ‘proper’. The only way to work out how I did that will be to hike the trail in the opposite direction. The drop into and climb out of the hollow was worse than I expected, very steep. And then I realized there were two hollows to cross. Feeling really pleased that I’d managed all the extra climbs, I then discovered the trail crossed a third hollow. Oh well, there was only one way out, and that was up.
 The almost impossible to find Trail Marker for the start of the last part of the Lake Trail leading to the Pines View trailhead. Copyright © 2018 Gary Allman, all rights reserved.
 I knew the trail dropped into a hollow, I didn’t realise it crossed another two ridges, that was a lot of climbing in the last mail or so of the trail. Copyright © 2018 Gary Allman, all rights reserved.
 I have a knack of finding stock ponds … Copyright © 2018 Gary Allman, all rights reserved.
I finally got back to the trailhead at 4 p.m., having hiked 4.76 miles and climbed nearly 1,300′. It doesn’t sound like a lot, but the uncertain and often rocky and rough Ozarks trails make it feel like a whole lot more.

Finally back at the trailhead. Copyright © 2018 Gary Allman, all rights reserved. Lessons Learned
- I really don’t need to carry a lot of water if I’m in a wilderness with water sources.
- It seems a lot of people are awful, selfish pigs, who shouldn’t be allowed out into the wilderness.
- I need to do something about the tie-down stakes. I cannot have stakes catapulted off into the undergrowth. Apart from losing the darned things, they could be dangerous. In future I’ll need to tie the stakes to the tie-outs, which will hopefully stop them getting loose.
- Coil loose line in a figure of eight, and not loops. It seems to tangle a lot less when coiled in this fashion.
What Worked
- I’ve got my gear pretty much sorted out, so everything seemed to work well.
- Filtering water wasn’t a problem, and in future I’ll carry less when I’m places with lots of water sources.
- Once again the Utility Kilt was really comfortable. I wish they were more ‘socially acceptable’, and less likely to draw unwanted attention. That said, I didn’t meet a single person on the trail so whoop-de-do. Who cares?
What Didn’t
- I had my first major Xero Shoes, sandal failure. The footbed doesn’t have any grip, so it becomes slippery when wet, and the heal strap is only Velcro. Going up a steep slope after crossing a creek the Velcro failed when my foot slid around. For a few minutes I thought I’d be engineering some alternative way of fastening them. I might carry a pair of Huaraches with me in future. At 4oz. for a pair it’s not going to be a big burden.
- I’m still very slow setting up the hammock. We can set up a tent in ten minutes, I’ve not set up the hammock in less than 45 minutes so far.
What I took and didn’t use
- Long pants
- Base layer pants
- Emergency kit (good!)
- Fire steel
- Rain poncho.
This is an edited and abridged version of a post that first appeared on Ozarks Walkabout.
-
Kanuga Hiking Selfies

Gary taking a break.
This afternoon I went on a short afternoon hike on Kanuga’s Red Trail.I was feeling pretty pleased with how well I coped with the climbs. That was until a group of eight(ish) year-olds came running up the trail.
Gary on an afternoon hike on Kanuga’s trails. 
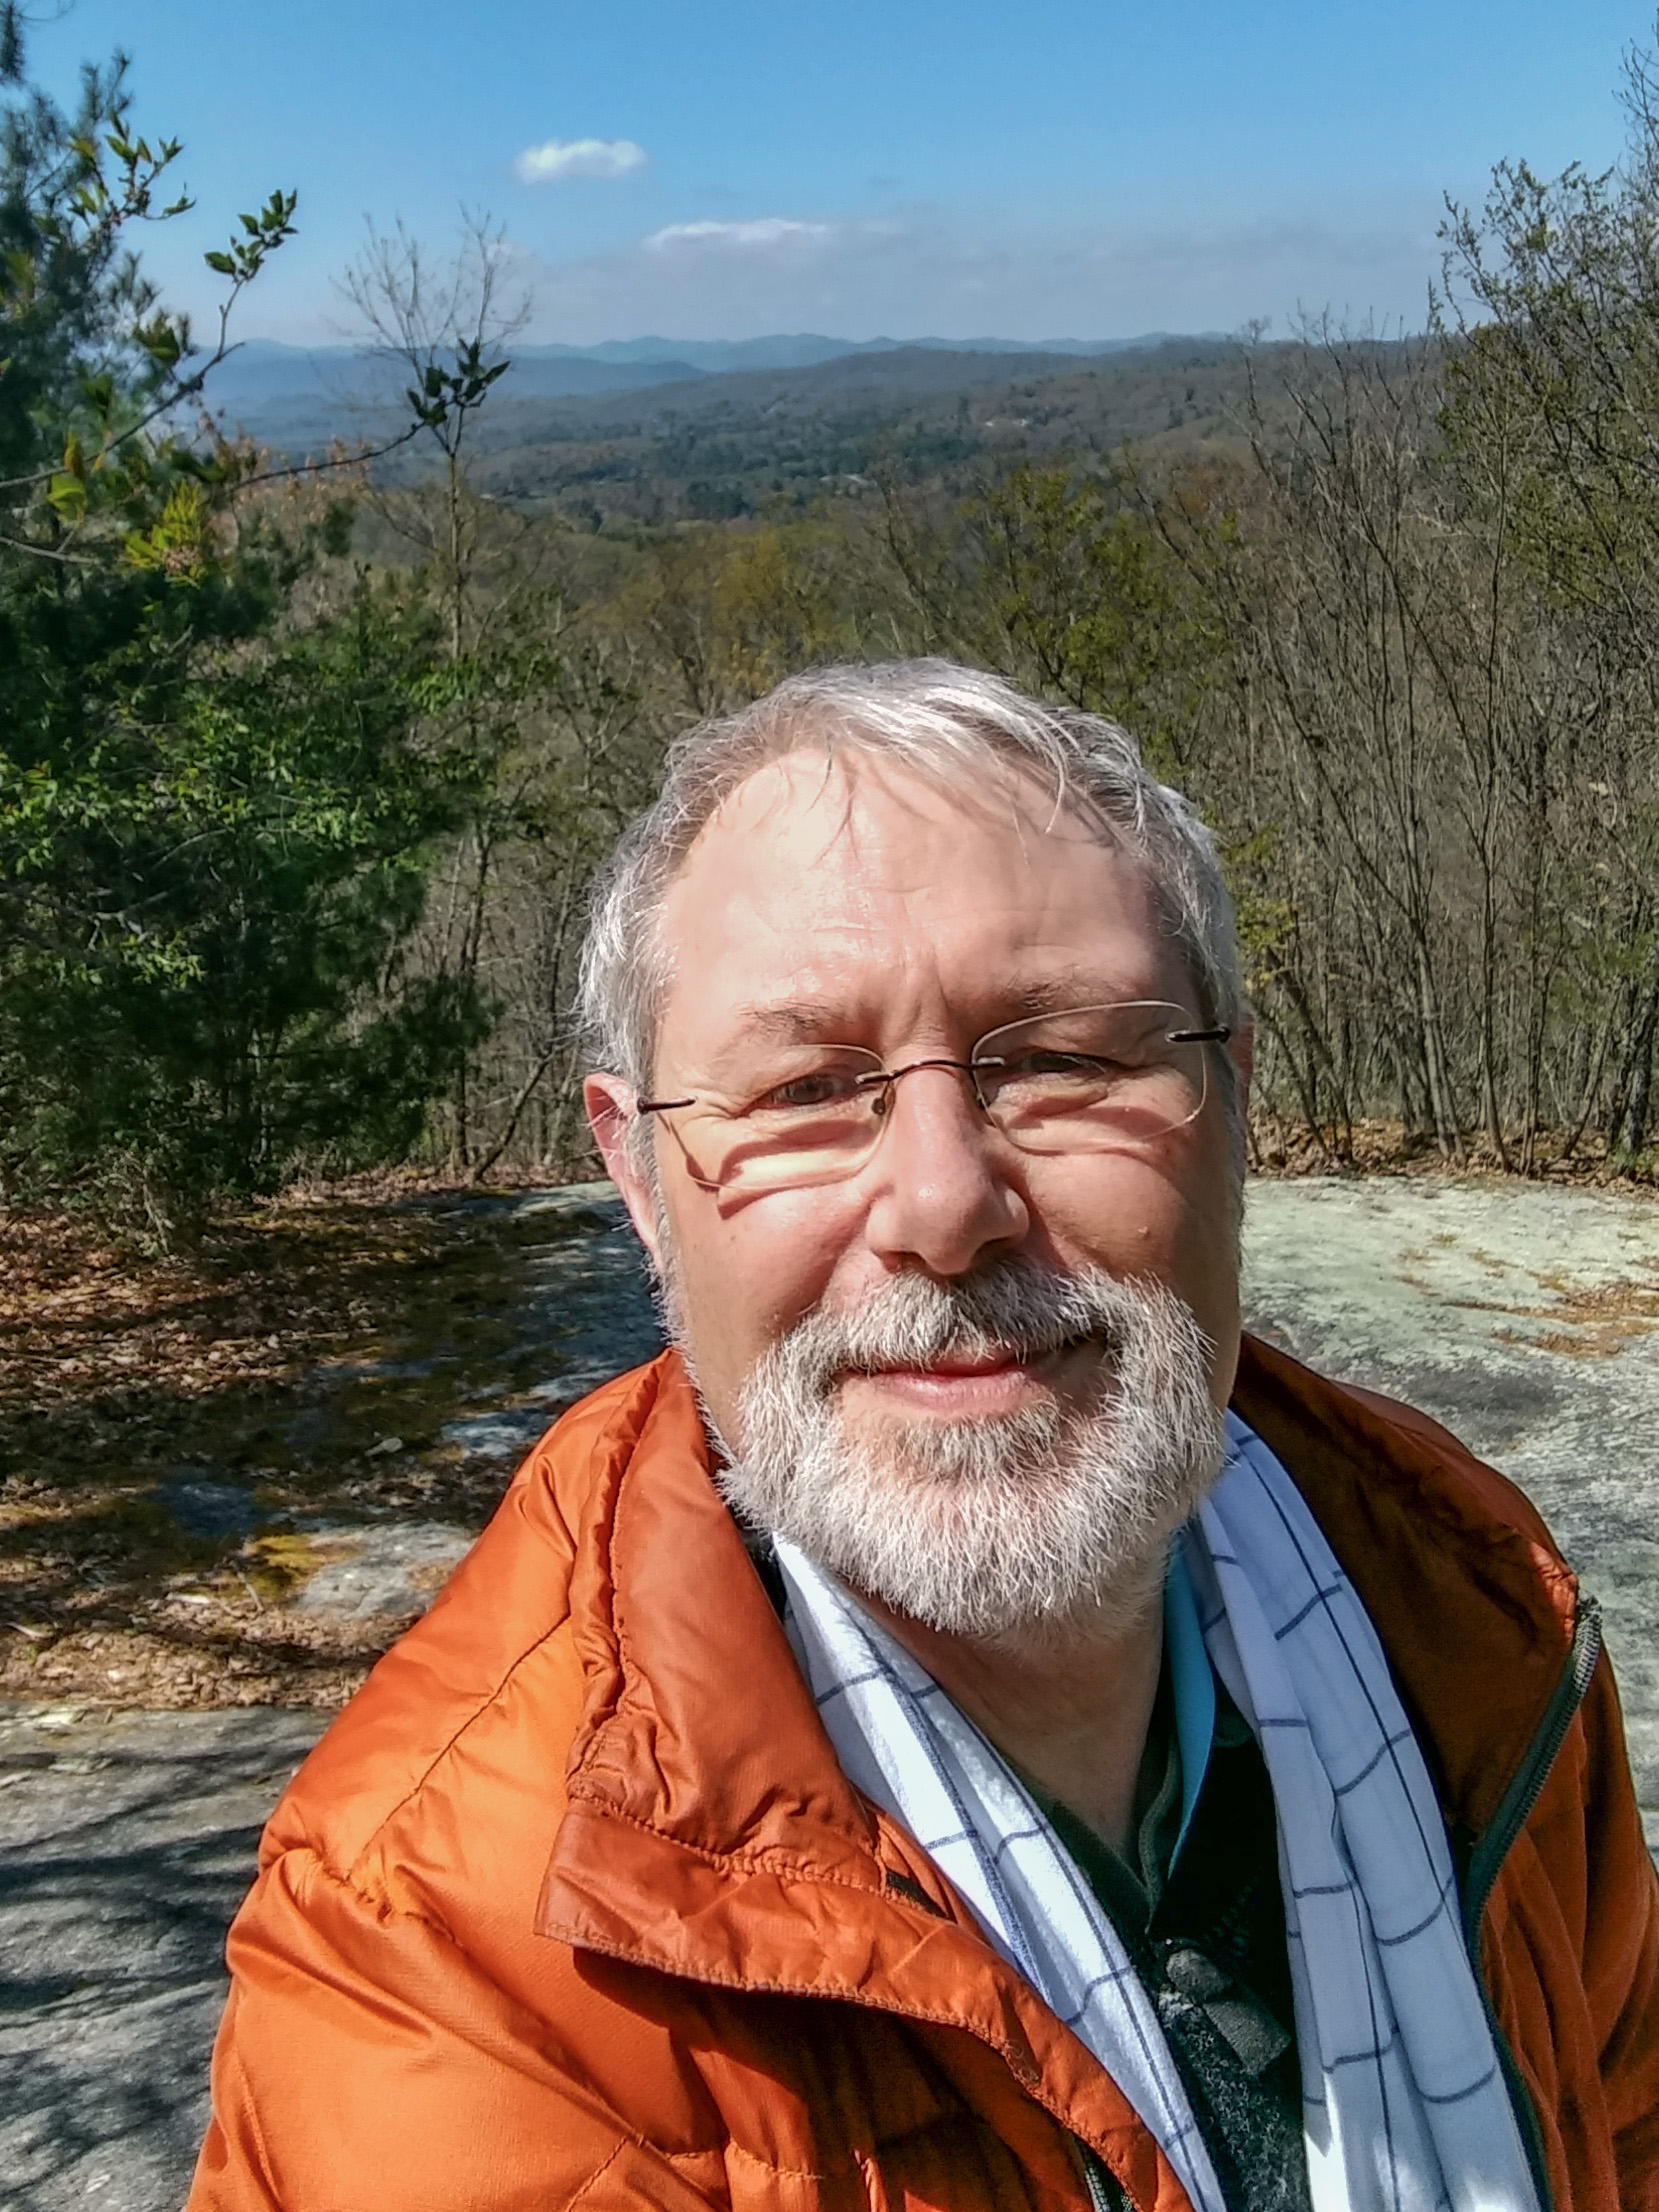
Selfie with the Blue Ridge Mountains near Hendersonville, North Carolina -
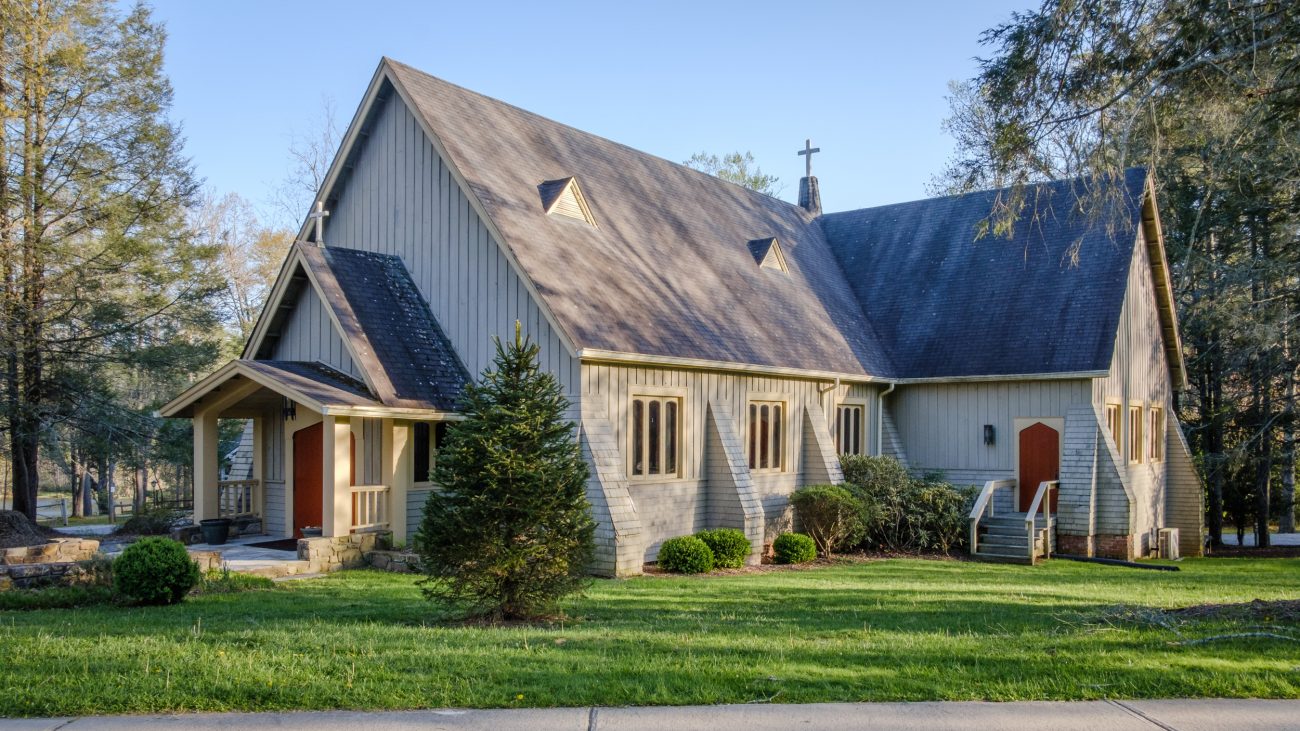
Evening Prayer at Kanuga

Evening Prayer at the Chapel of the Transfiguration – Kanuga Anyone who knows me, or has read my ramblings for the diocese, will know that I have a mixed relationship with prayer. Holding down a couple of jobs (and this is ironic, as one of those jobs is working for the Church), means that I tend to spend the time when churches are holding their regular services getting other things done.
I recently wrote:
Nowadays, I’m often not as rooted in the worship as I feel I should be. I’m sitting in the back of the church posting something about the service on social media, reviewing pictures to make sure I have what we need, or checking ahead in the order of service, so I can work out what I ought to be doing next. The plus side though, as I’ve mentioned before, is that I get to take part in a great number of life-changing events.
Spirit, June 2018Having a chance to join in morning and evening prayers while at the conference, with no other obligations, was very welcome. In the process, I got to hear many things that I needed to hear. Of course, the other piece of irony was that I still had my camera with me.


-
Kanuga’s Trails

Kanuga’s Yellow Trail We had a free afternoon, so I did a little bit of hiking on Kanuga’s Yellow and Red trails.
 A glimpse of Lake Kanuga. Copyright © 2018 Gary Allman, all rights reserved.
 Typical trail conditions. Copyright © 2018 Gary Allman, all rights reserved.
 A bit of a climb ahead… Copyright © 2018 Gary Allman, all rights reserved.
 Blue Ridge Mountains near Hendersonville, North Carolina. Copyright © 2018 Gary Allman, all rights reserved.
 Gary taking a break. Copyright © 2018 Gary Allman, all rights reserved.
 -
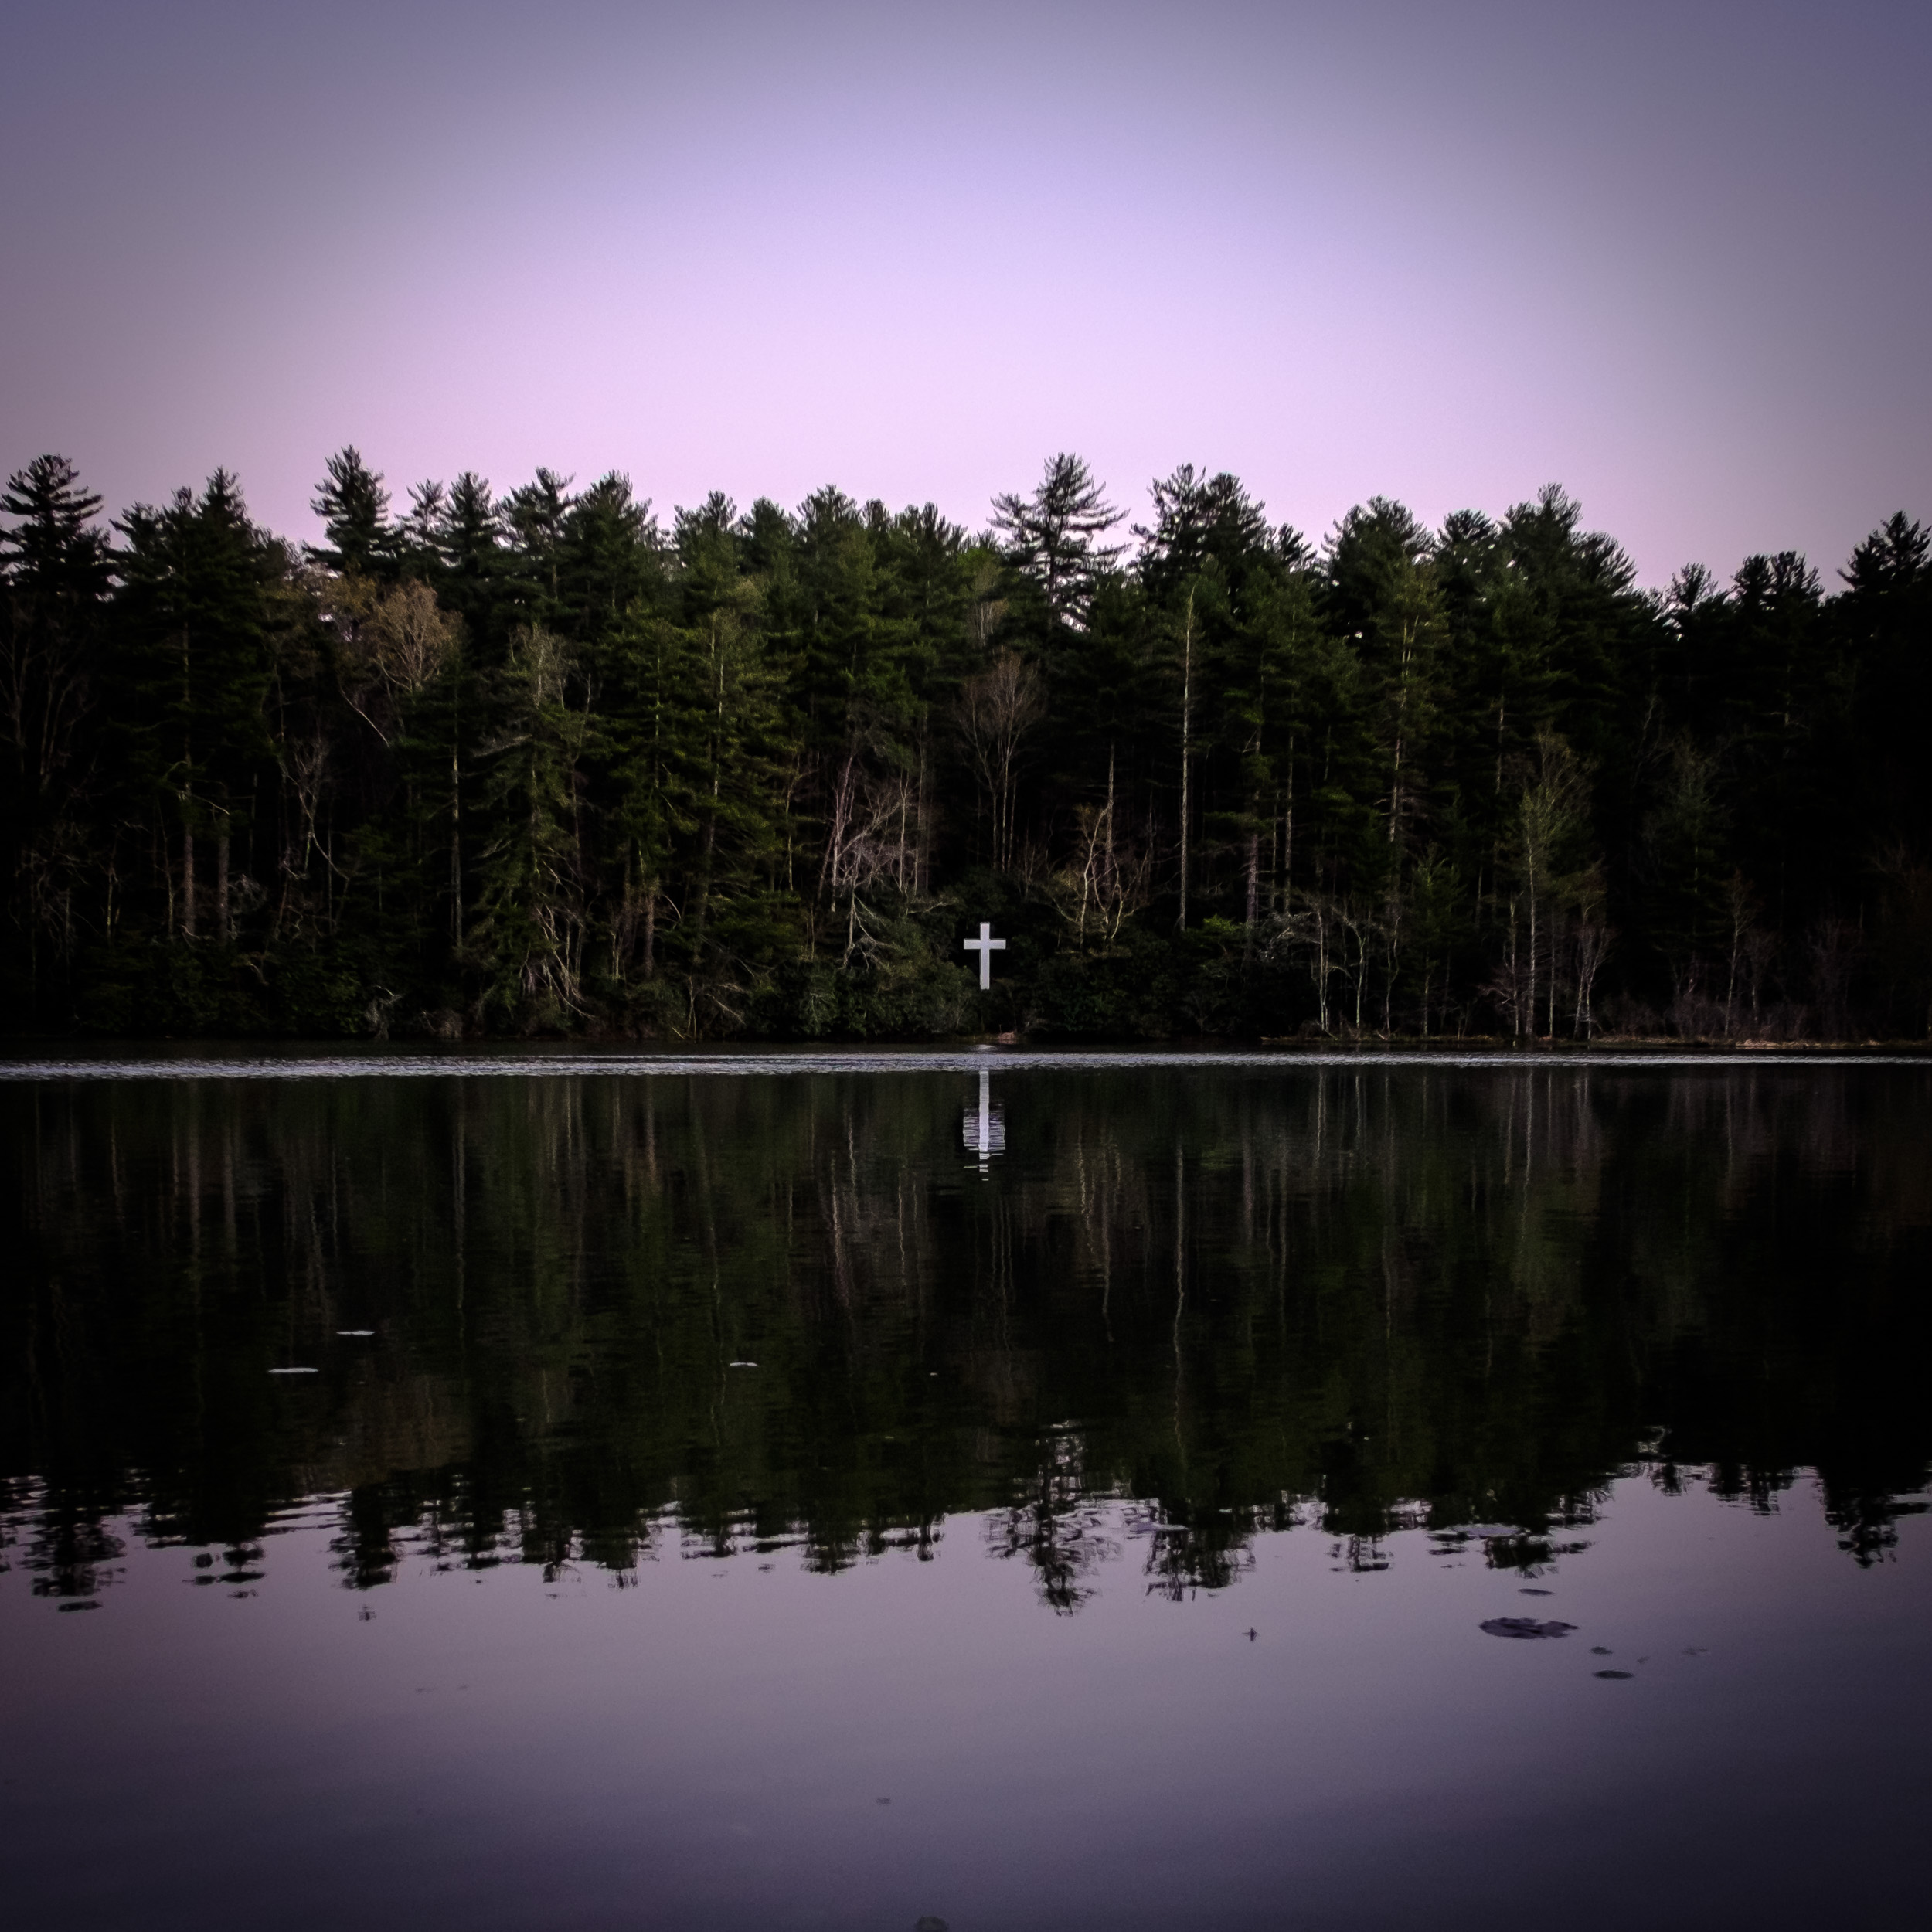
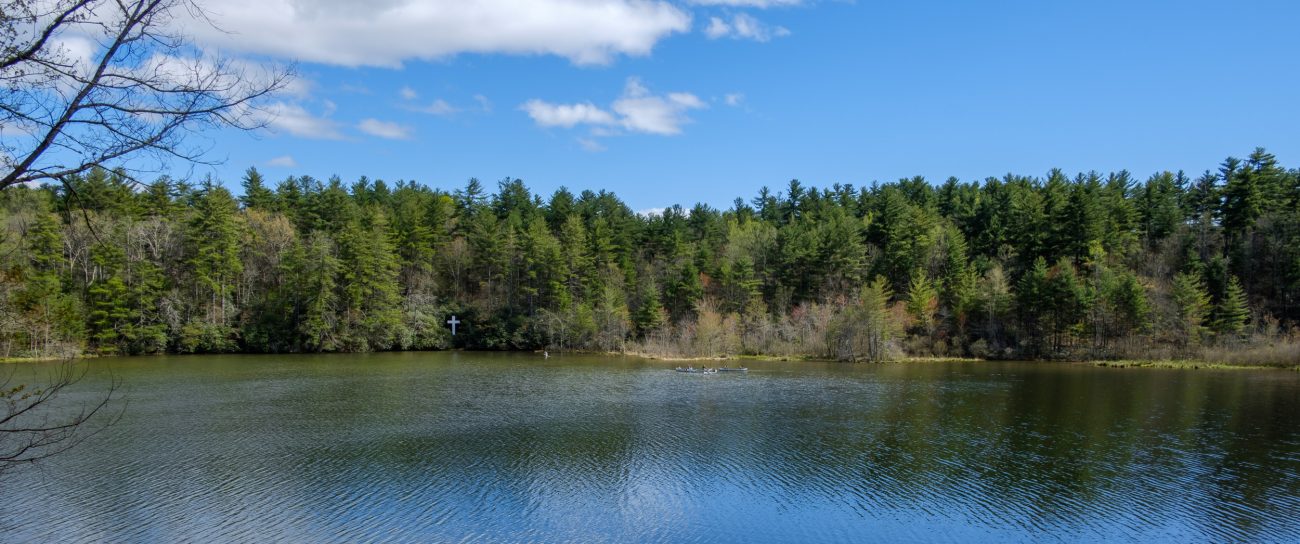
Cross by the Lake

The Cross at Lake Kanuga 
Update: 2019. I was asked if I’d donate this picture to be printed on a T-shirt promoting suicide awareness. A revised copy (made more suitable for printing) was dispatched the same day.
-
Walkway

Walkway -
Come to me, all who labor and are heavy-laden

Come to me, all who labor and are heavy-laden, and I will give you rest. Come to me, all who labor and are heavy-laden, and I will give you rest. Take my yoke upon you, and learn from me; for I am gentle and lowly in heart, and you will find rest for your souls. For my yoke is easy, and my burden is light.
Matthew 11:28-30
-
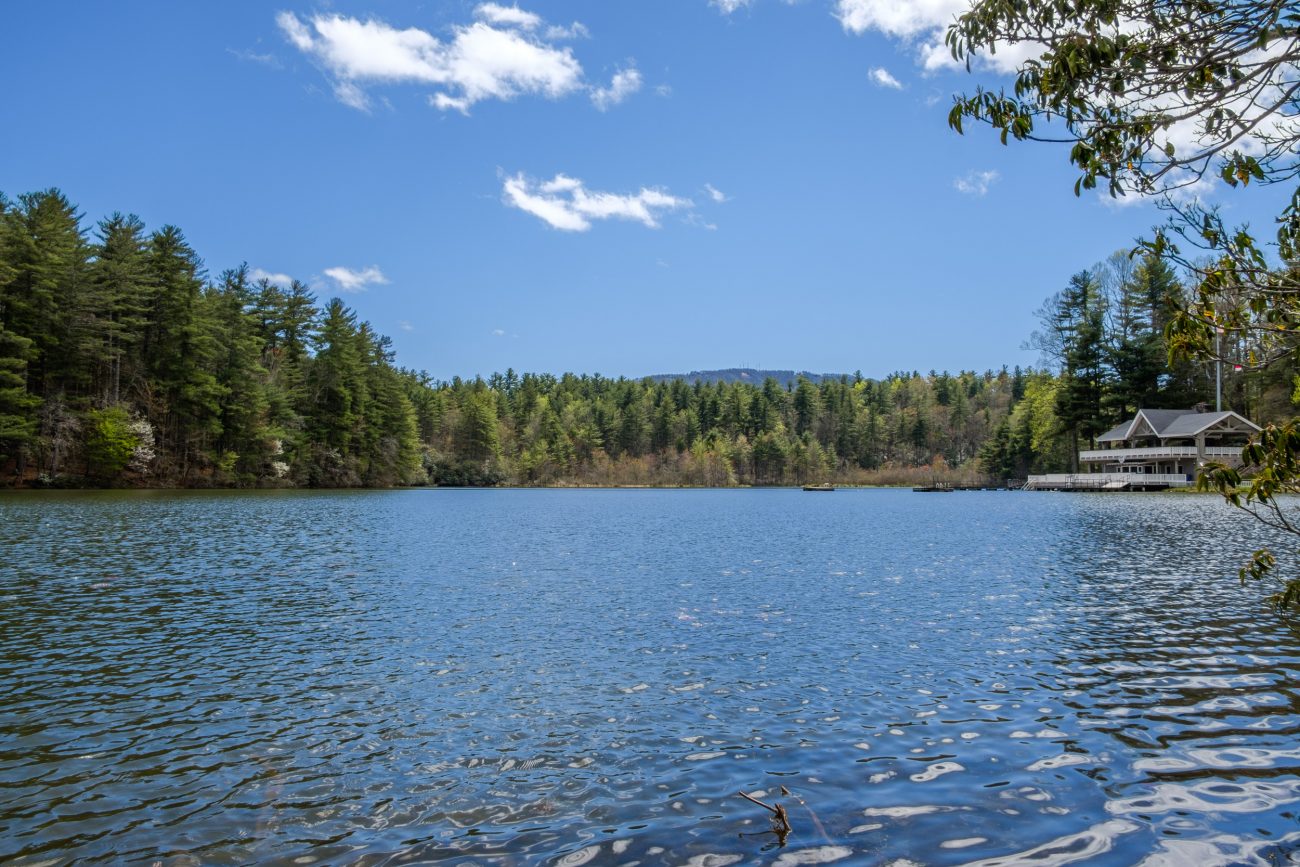
Lake Kanuga

Lake Kanuga I took a short walk around the lake this afternoon.

Lake Kanuga 
The Cross at Lake Kanuga -
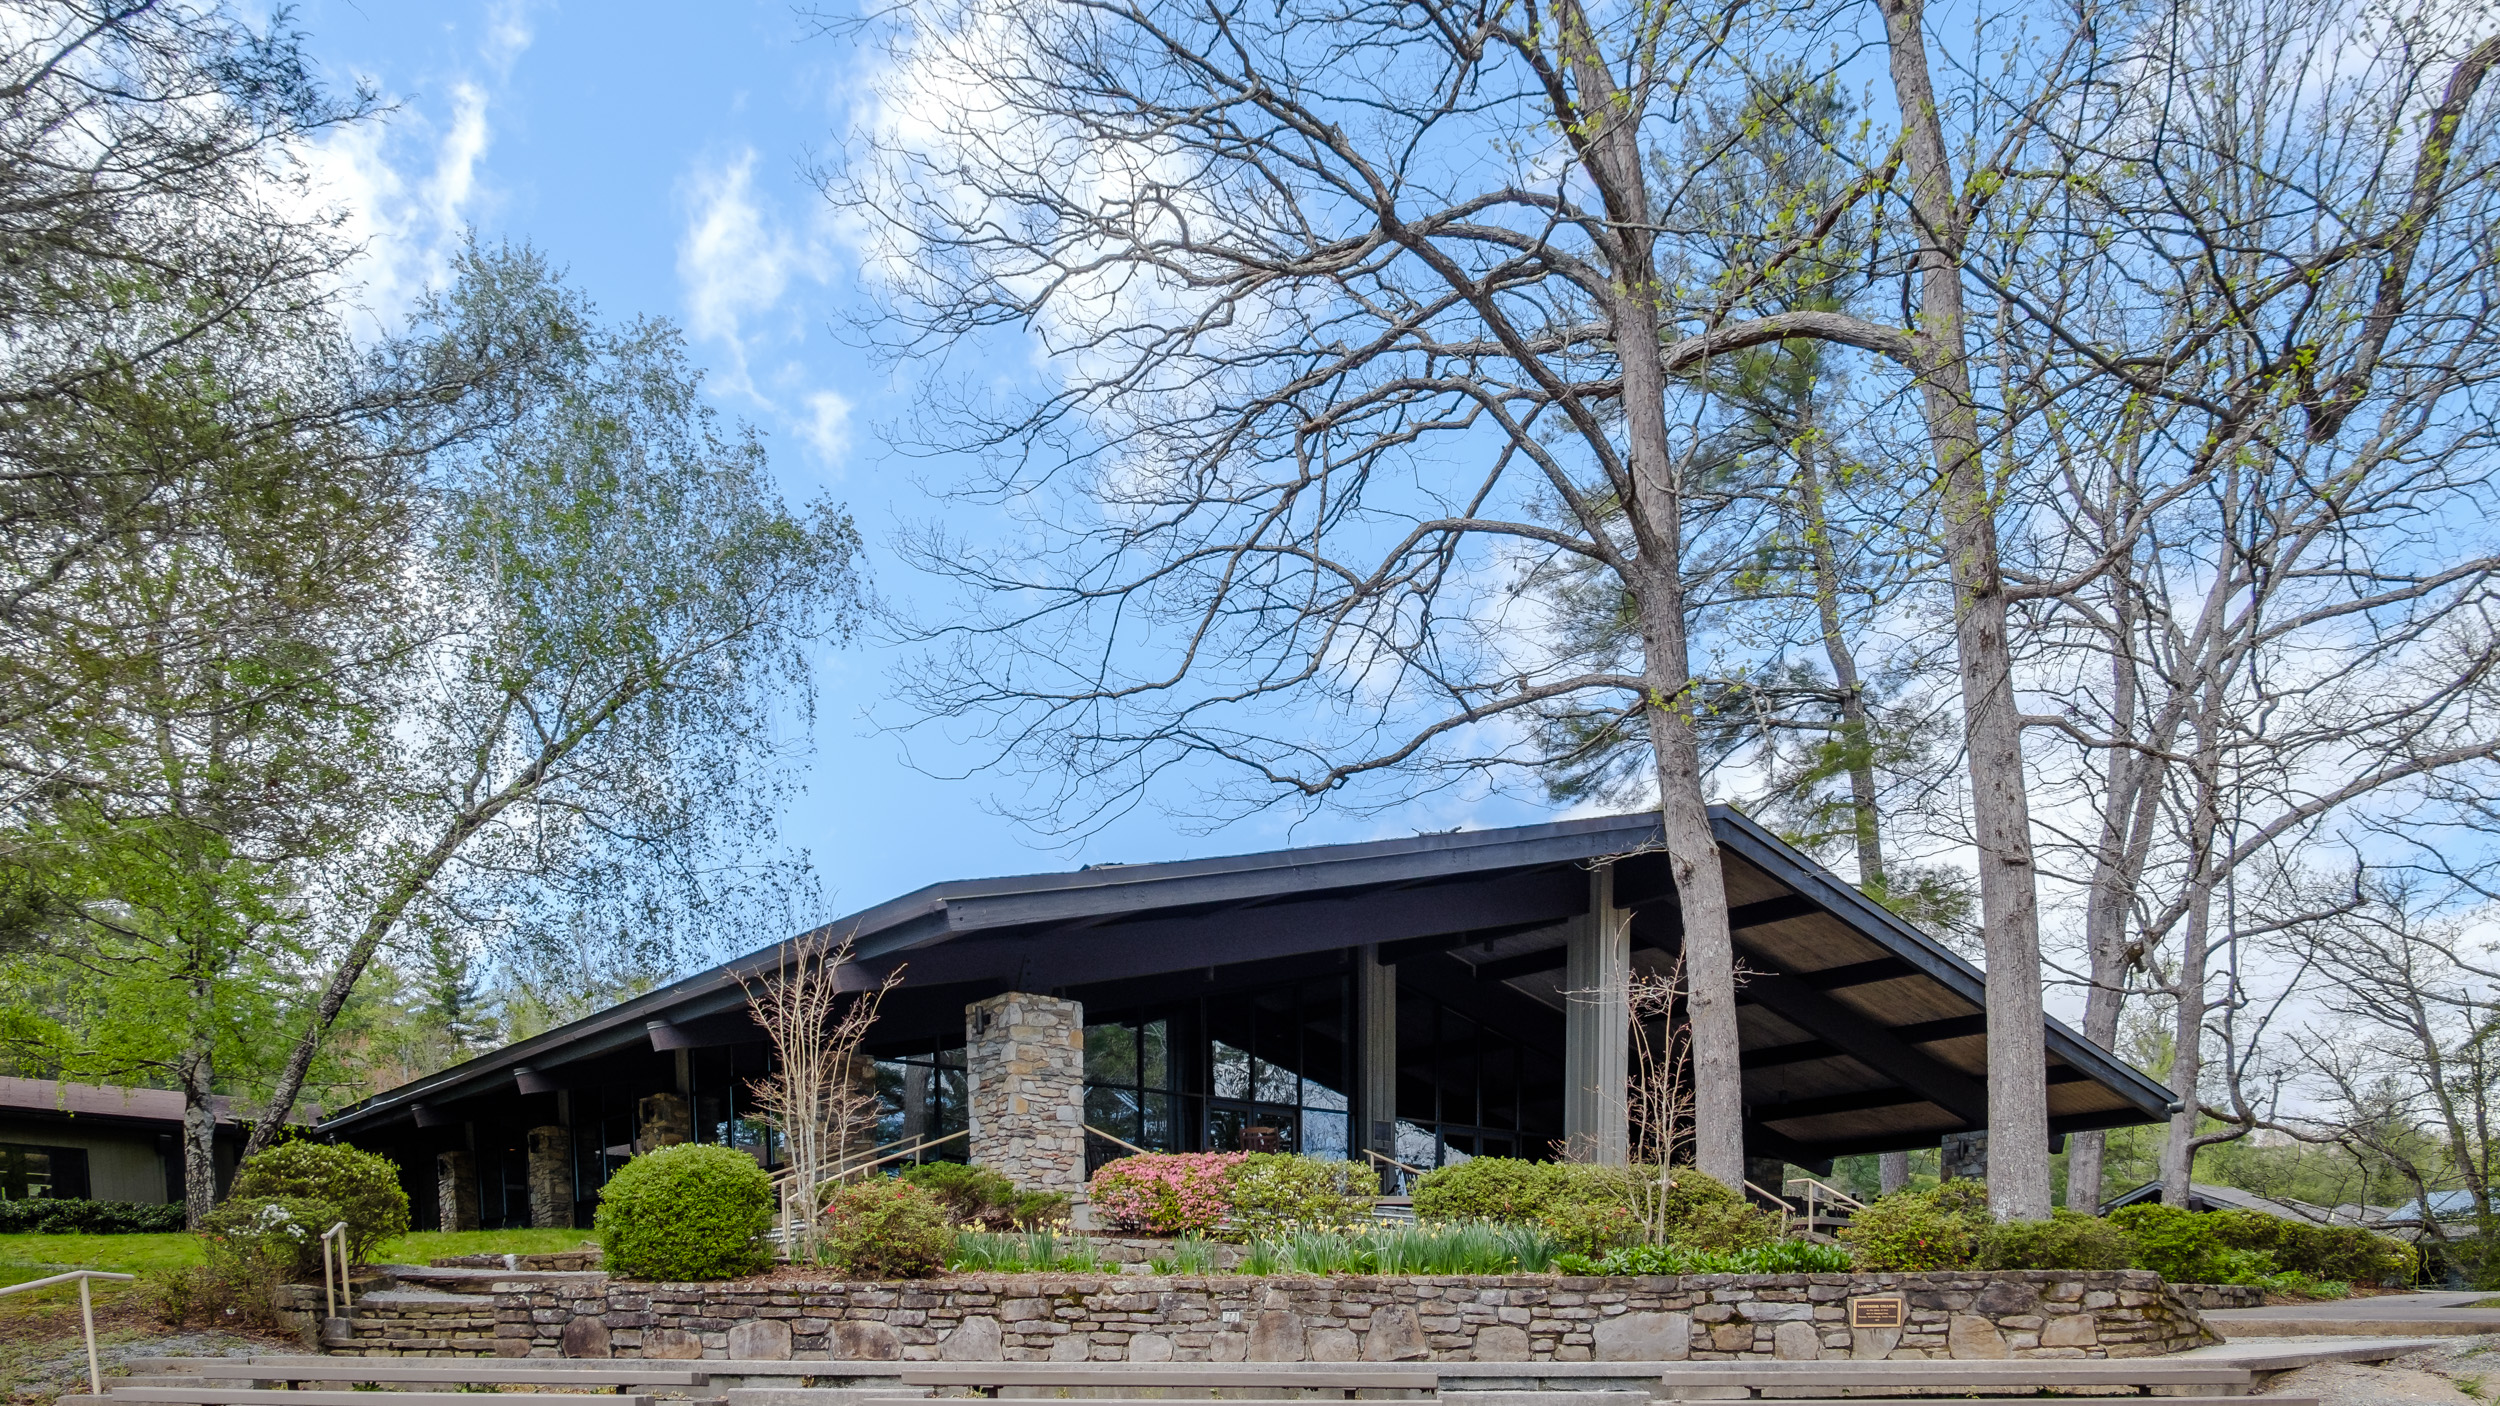
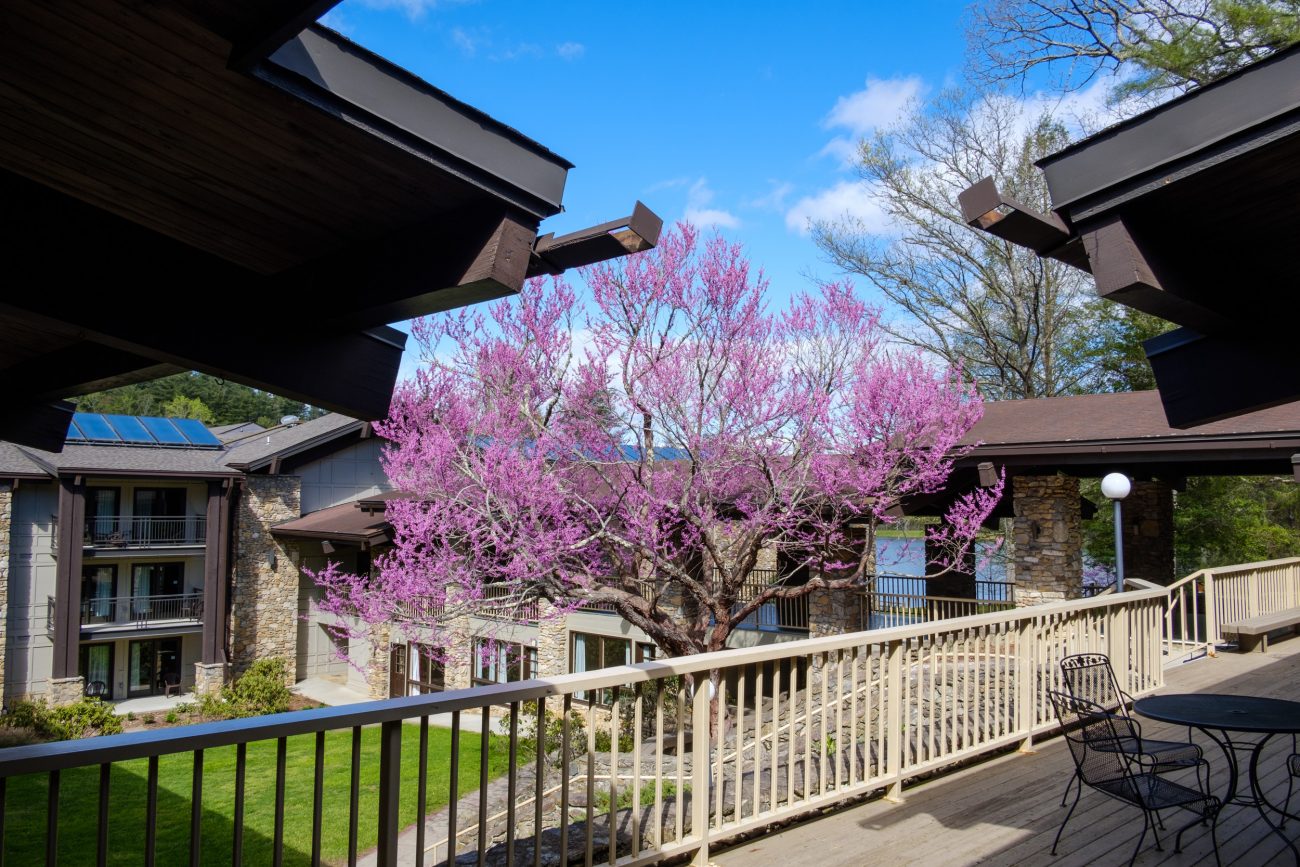
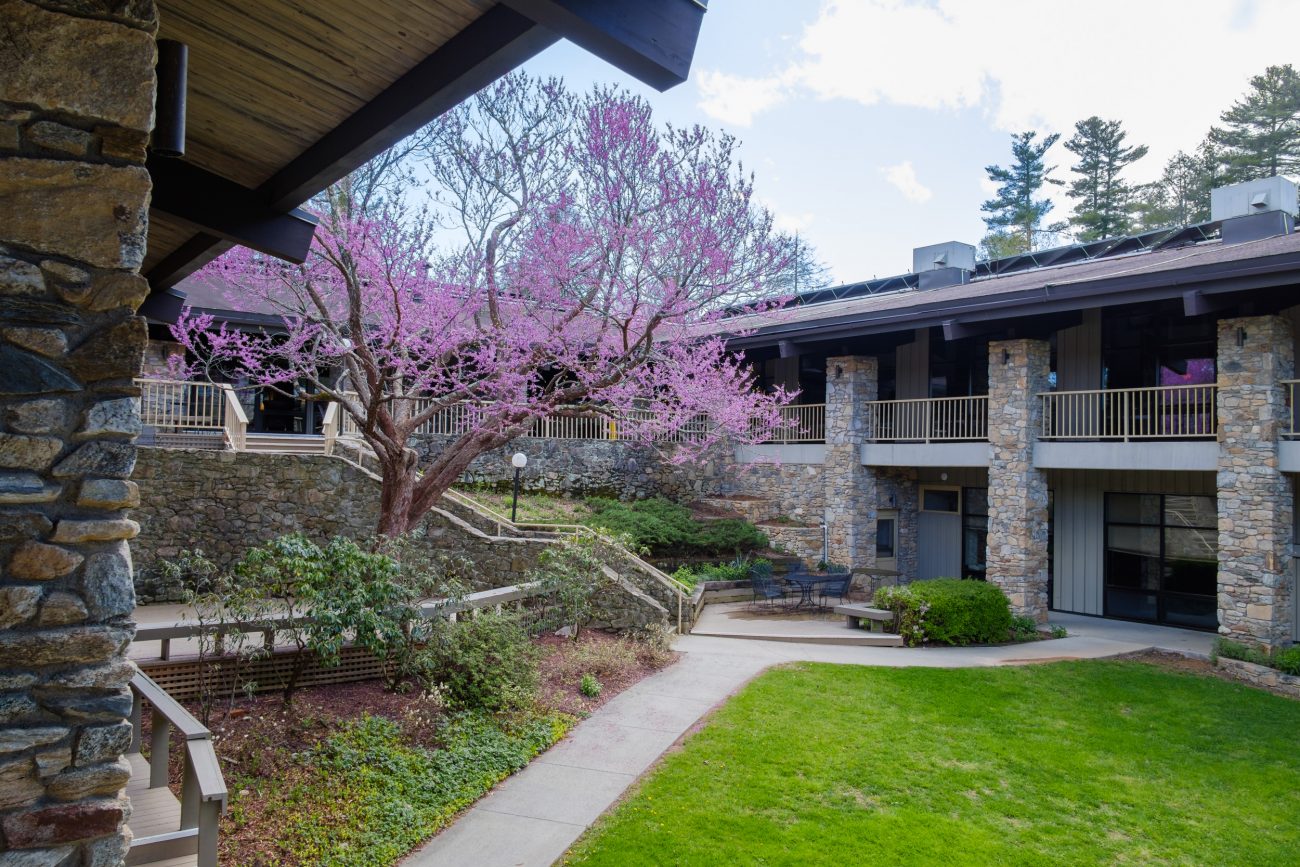
Kanuga Campus Pictures

Kanuga Conference Center, or more precisely, the Johnson Fireplace Lounge, and the Rocking Chair Porch. 


-
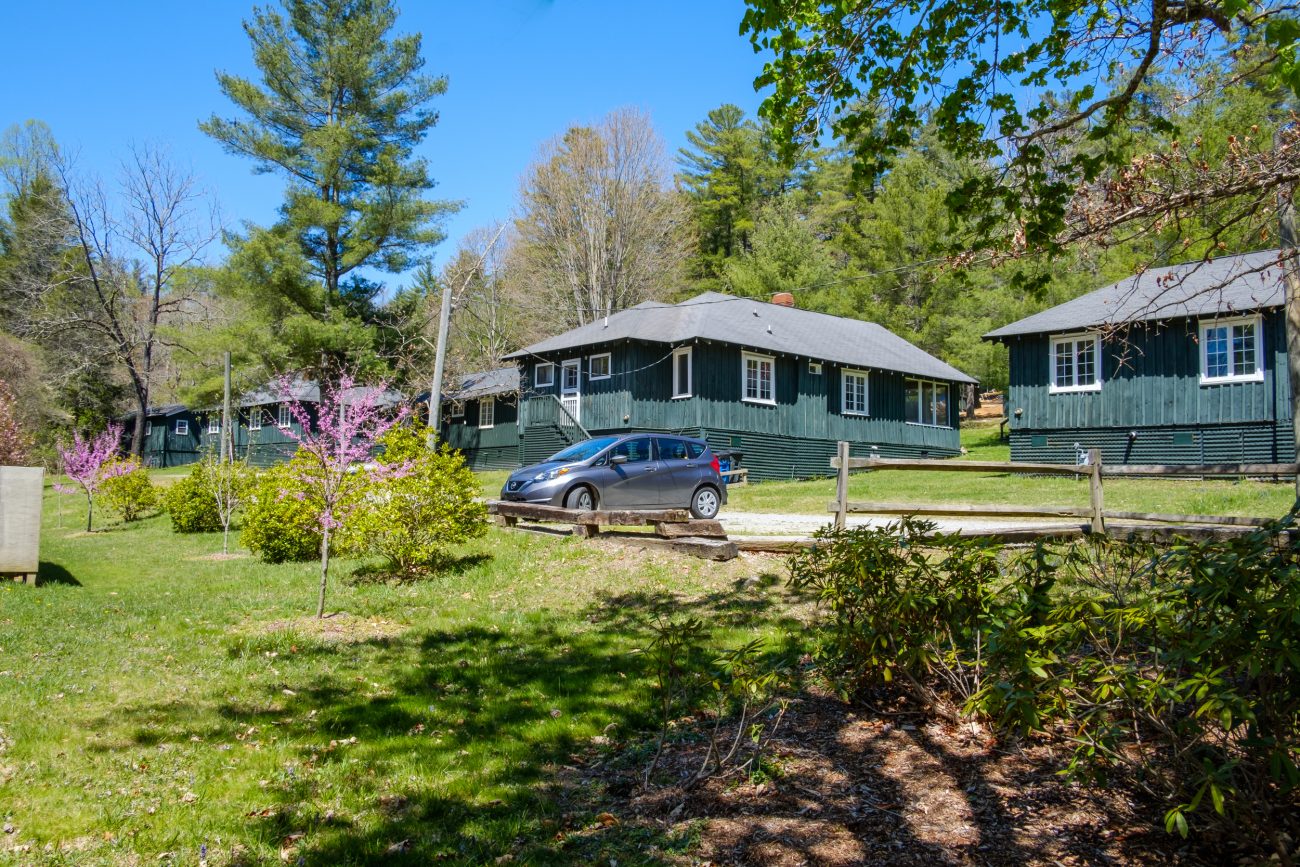
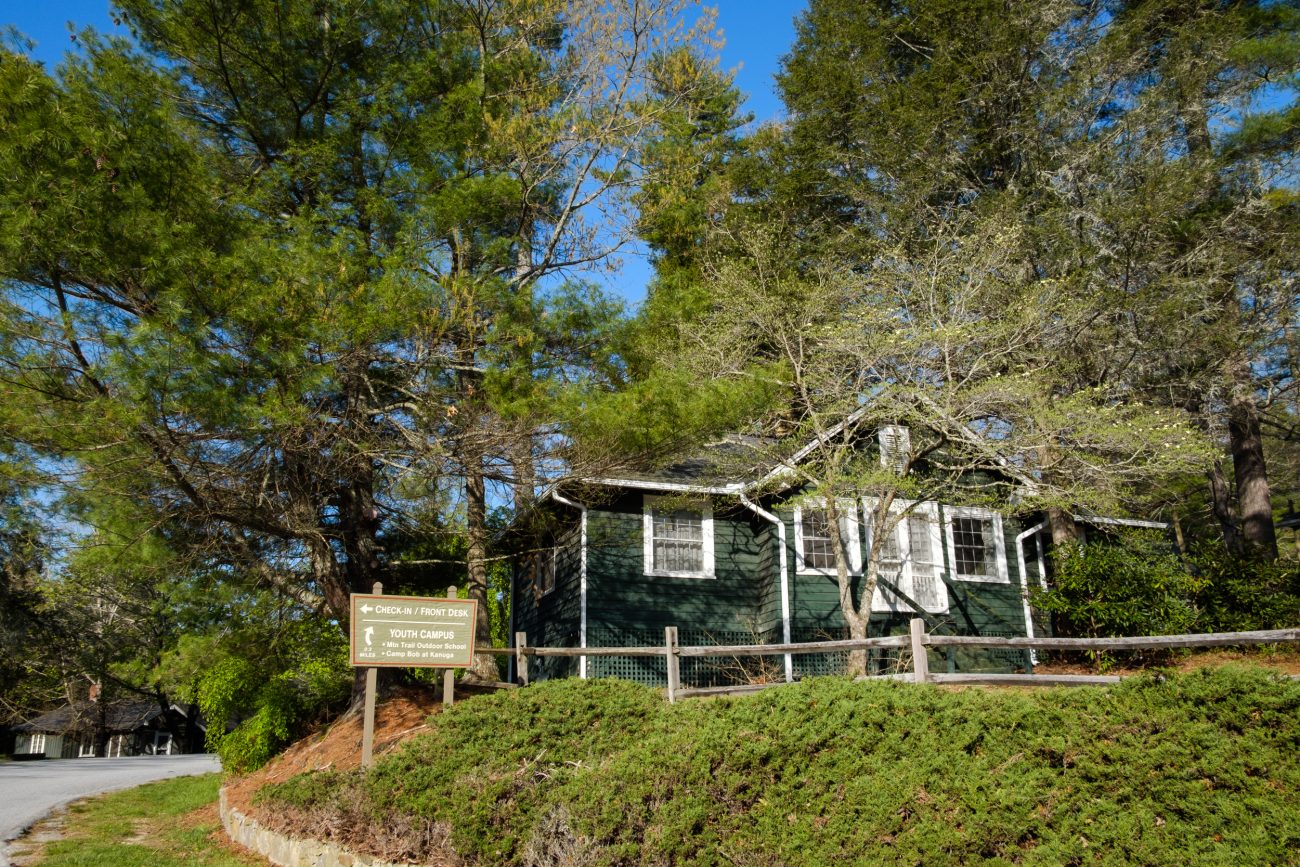
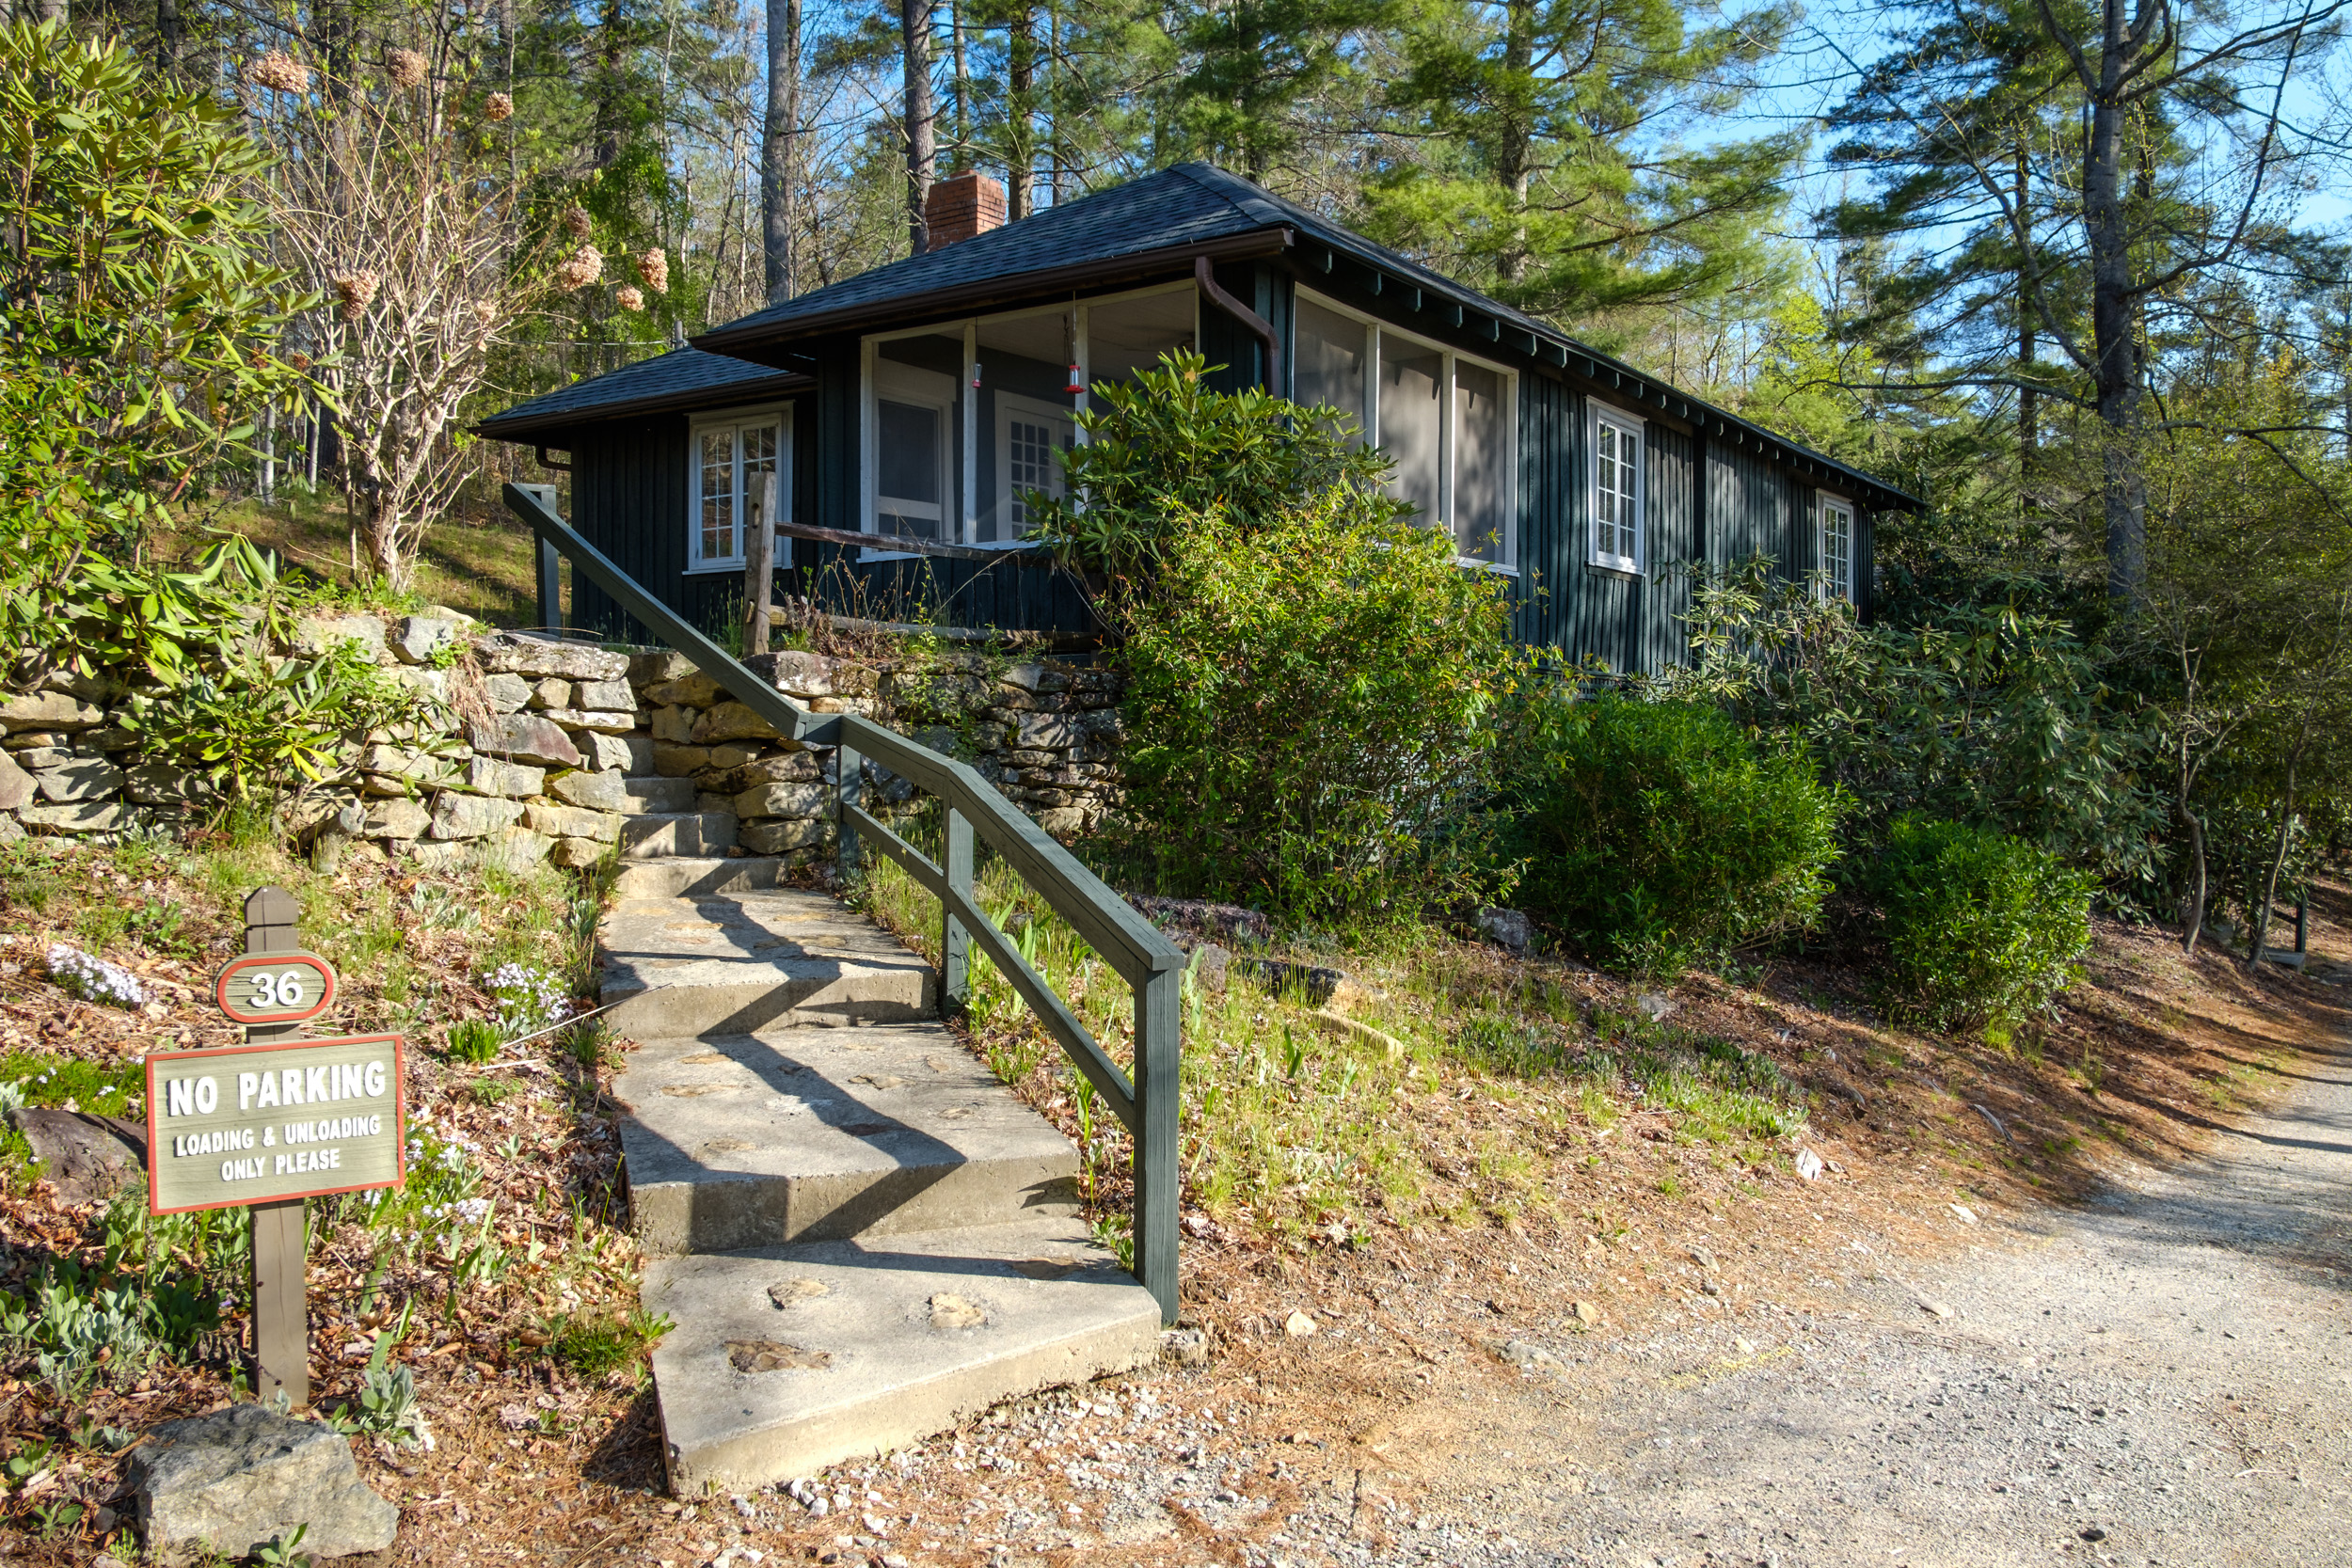
My Home For The Next Four Days

Cabin at Kanuga Conference Center Every three years the Episcopal Communicators’ Conference is held at a retreat center. This time is at the Kanuga Conference Center in the Blue Ridge Mountains in North Carolina. I missed last year’s conference as it clashed with my son’s wedding, so I was doubly glad to be able to make this one.
There are a lot of trails here, and I should be able to get away one evening, and we have one free afternoon when I plan to do some hiking.
Some of the other cabins


-
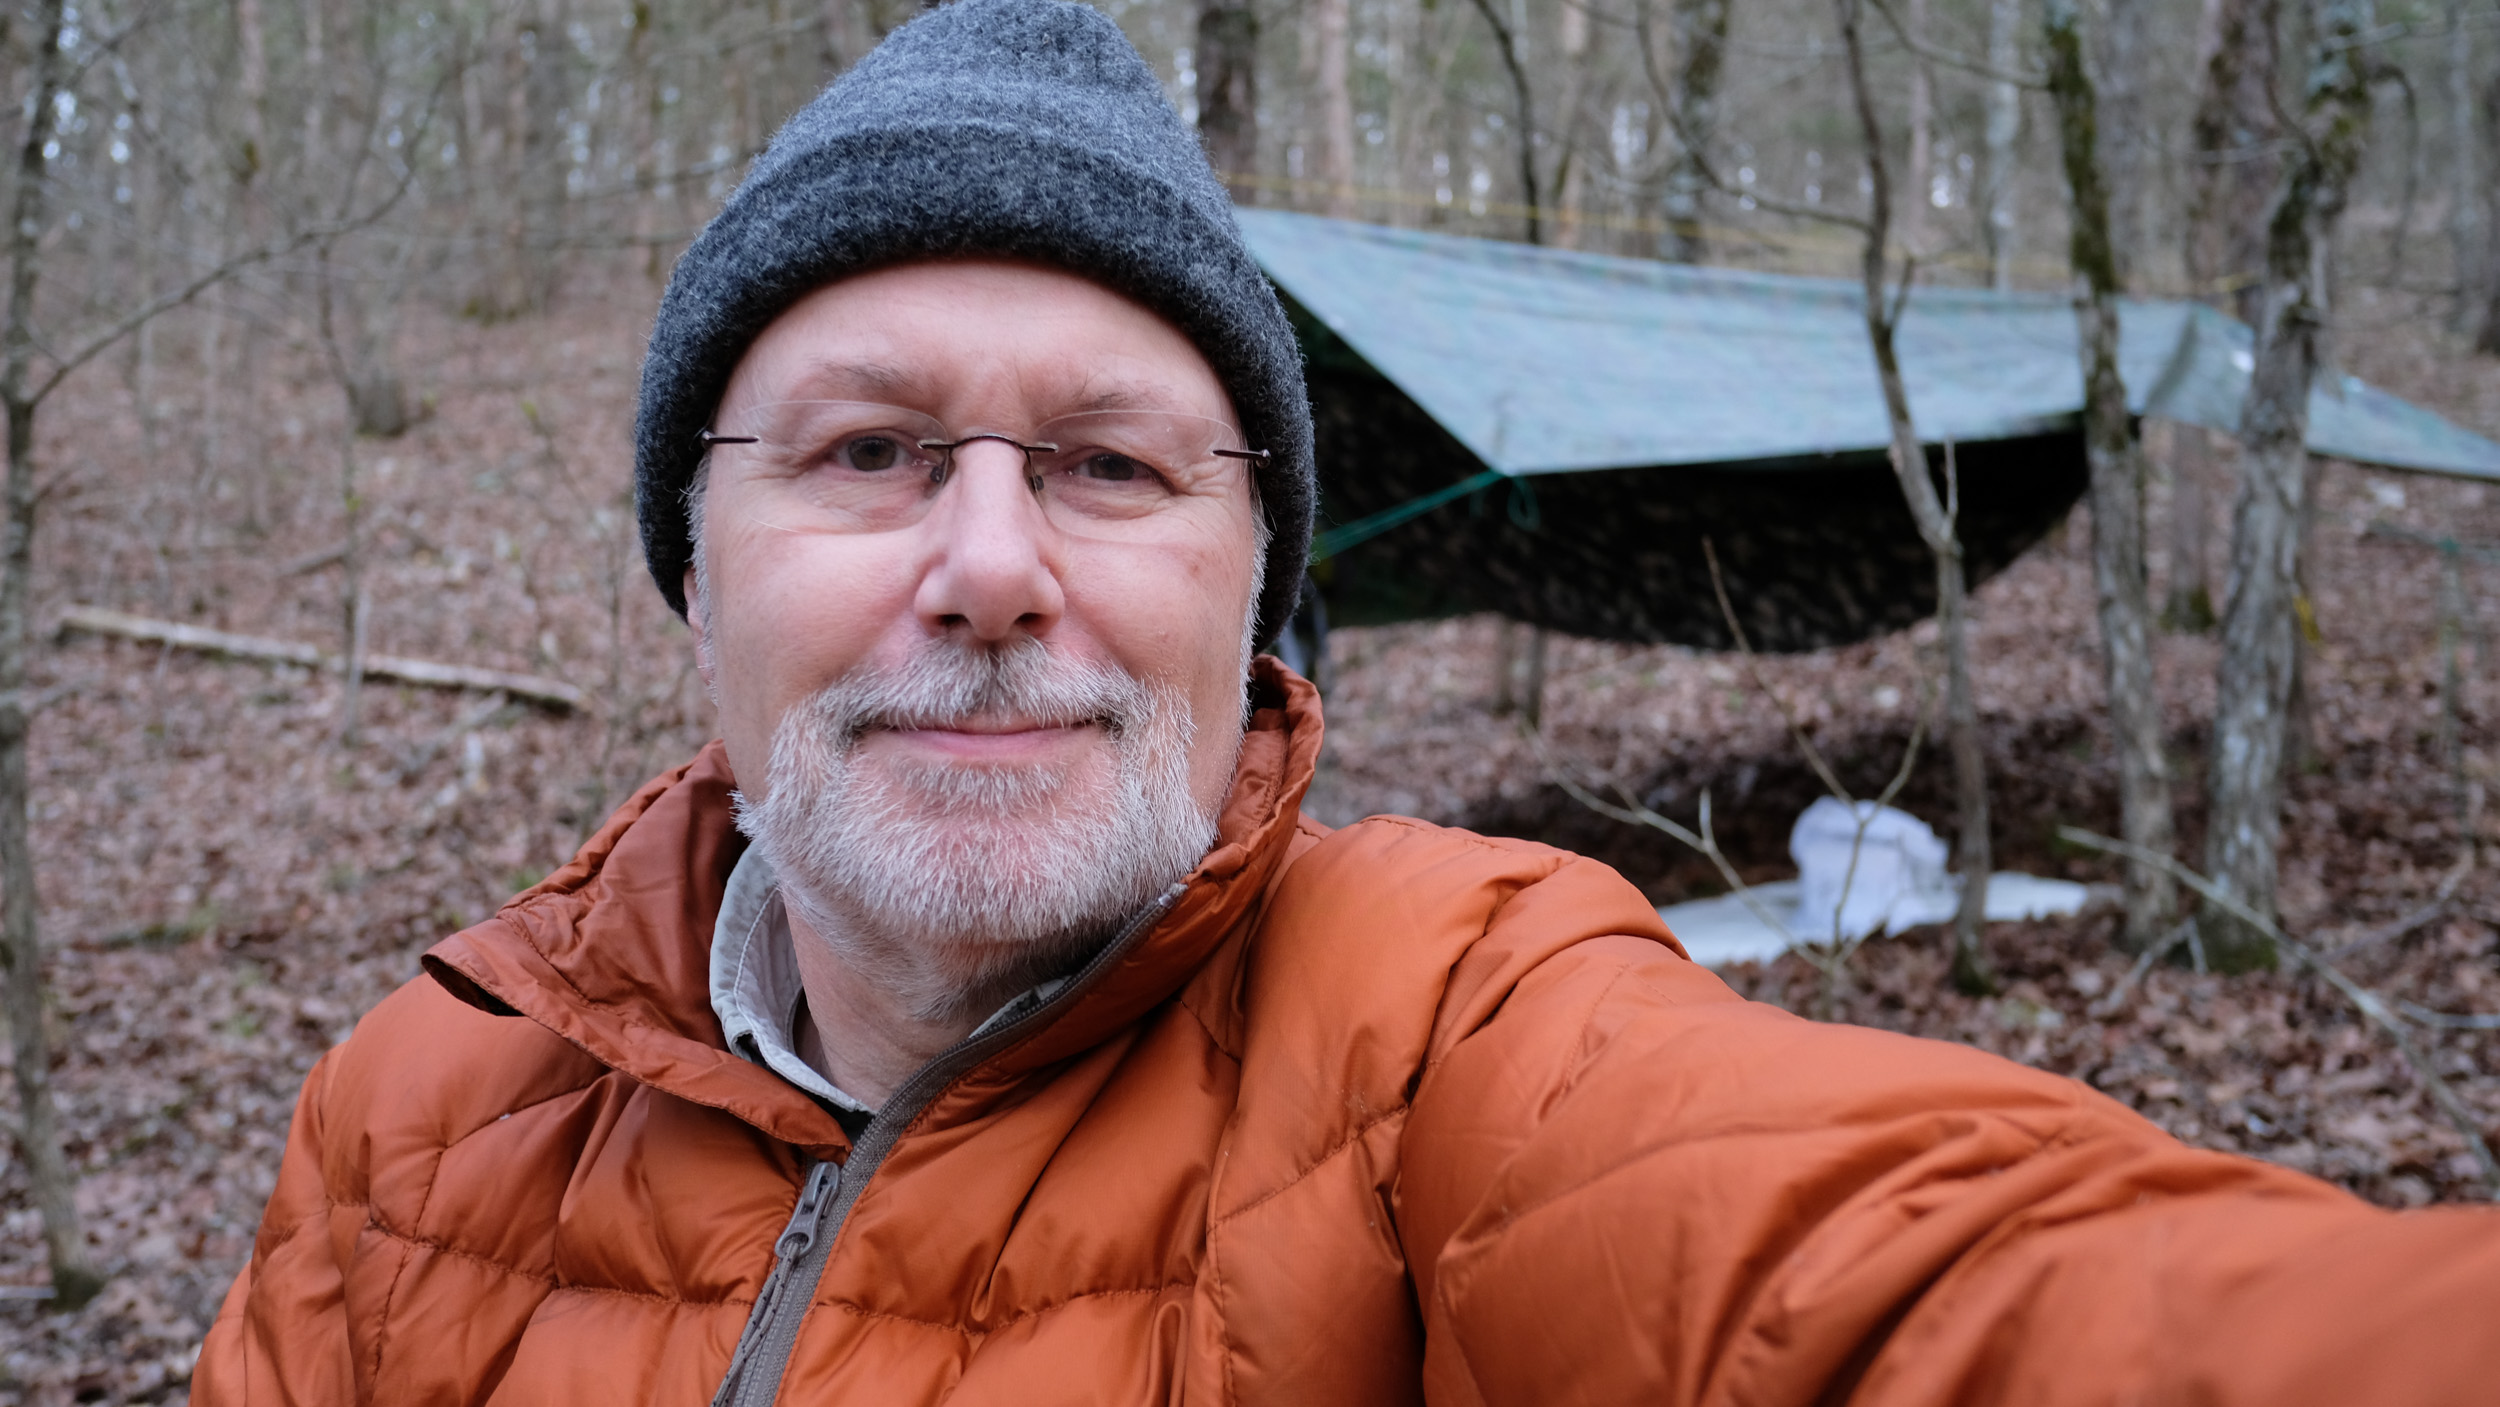
Pees Hollow Backpacking Trip

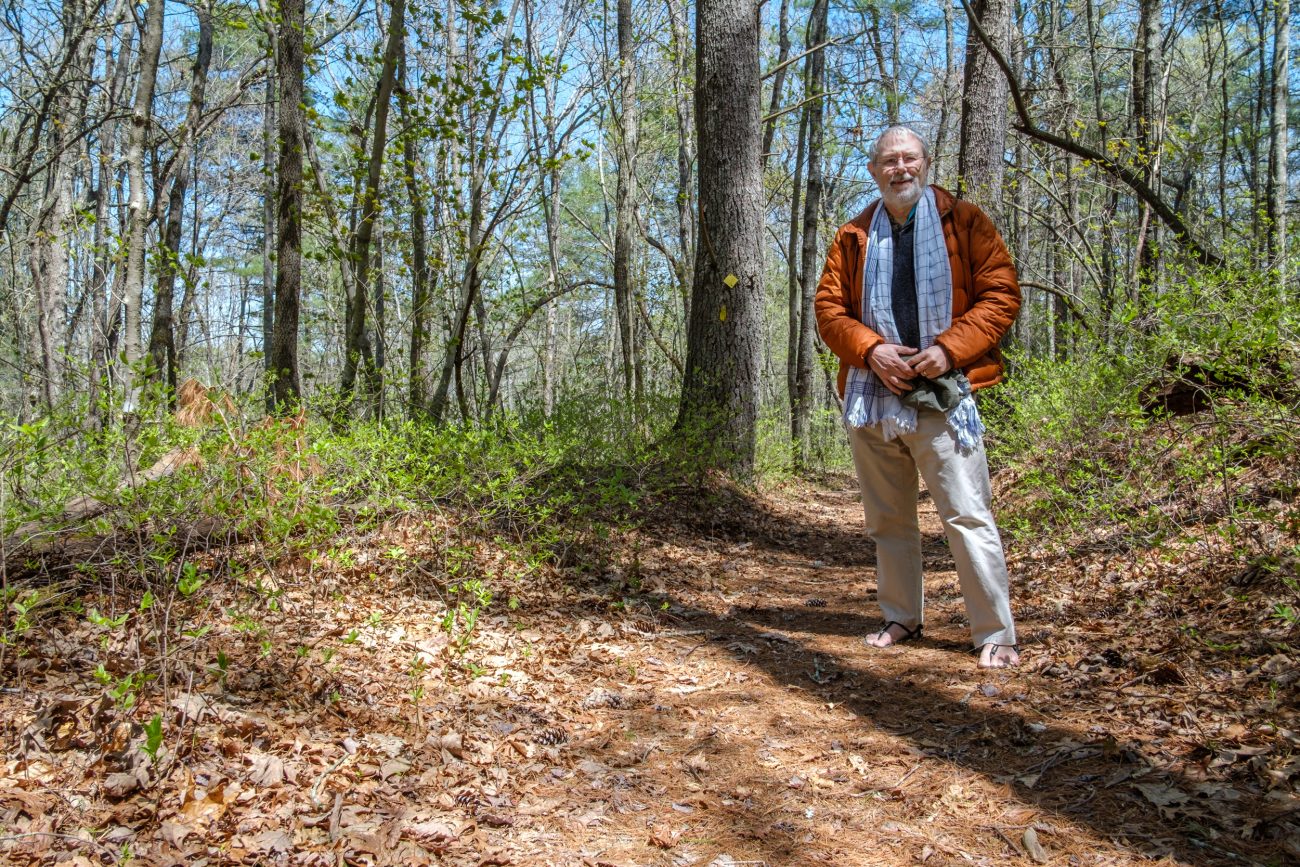
The temperature dropped very quickly so I put on my down jacket to keep warm. My new Hammock arrived last week and I couldn’t wait any longer to try it out. My week was looking pretty full, as I’m at a conference next week and Friday was booked with a customer, plus I had a meeting first thing Monday. I wasn’t sure I could justify squeezing something in, but the alternative was to let my nice new hammock sit in a gear-bin untested for at least a couple of weeks. I checked the weather and decided I could fit in a quick hike with one night in the wilderness if I left straight after the meeting on Monday.

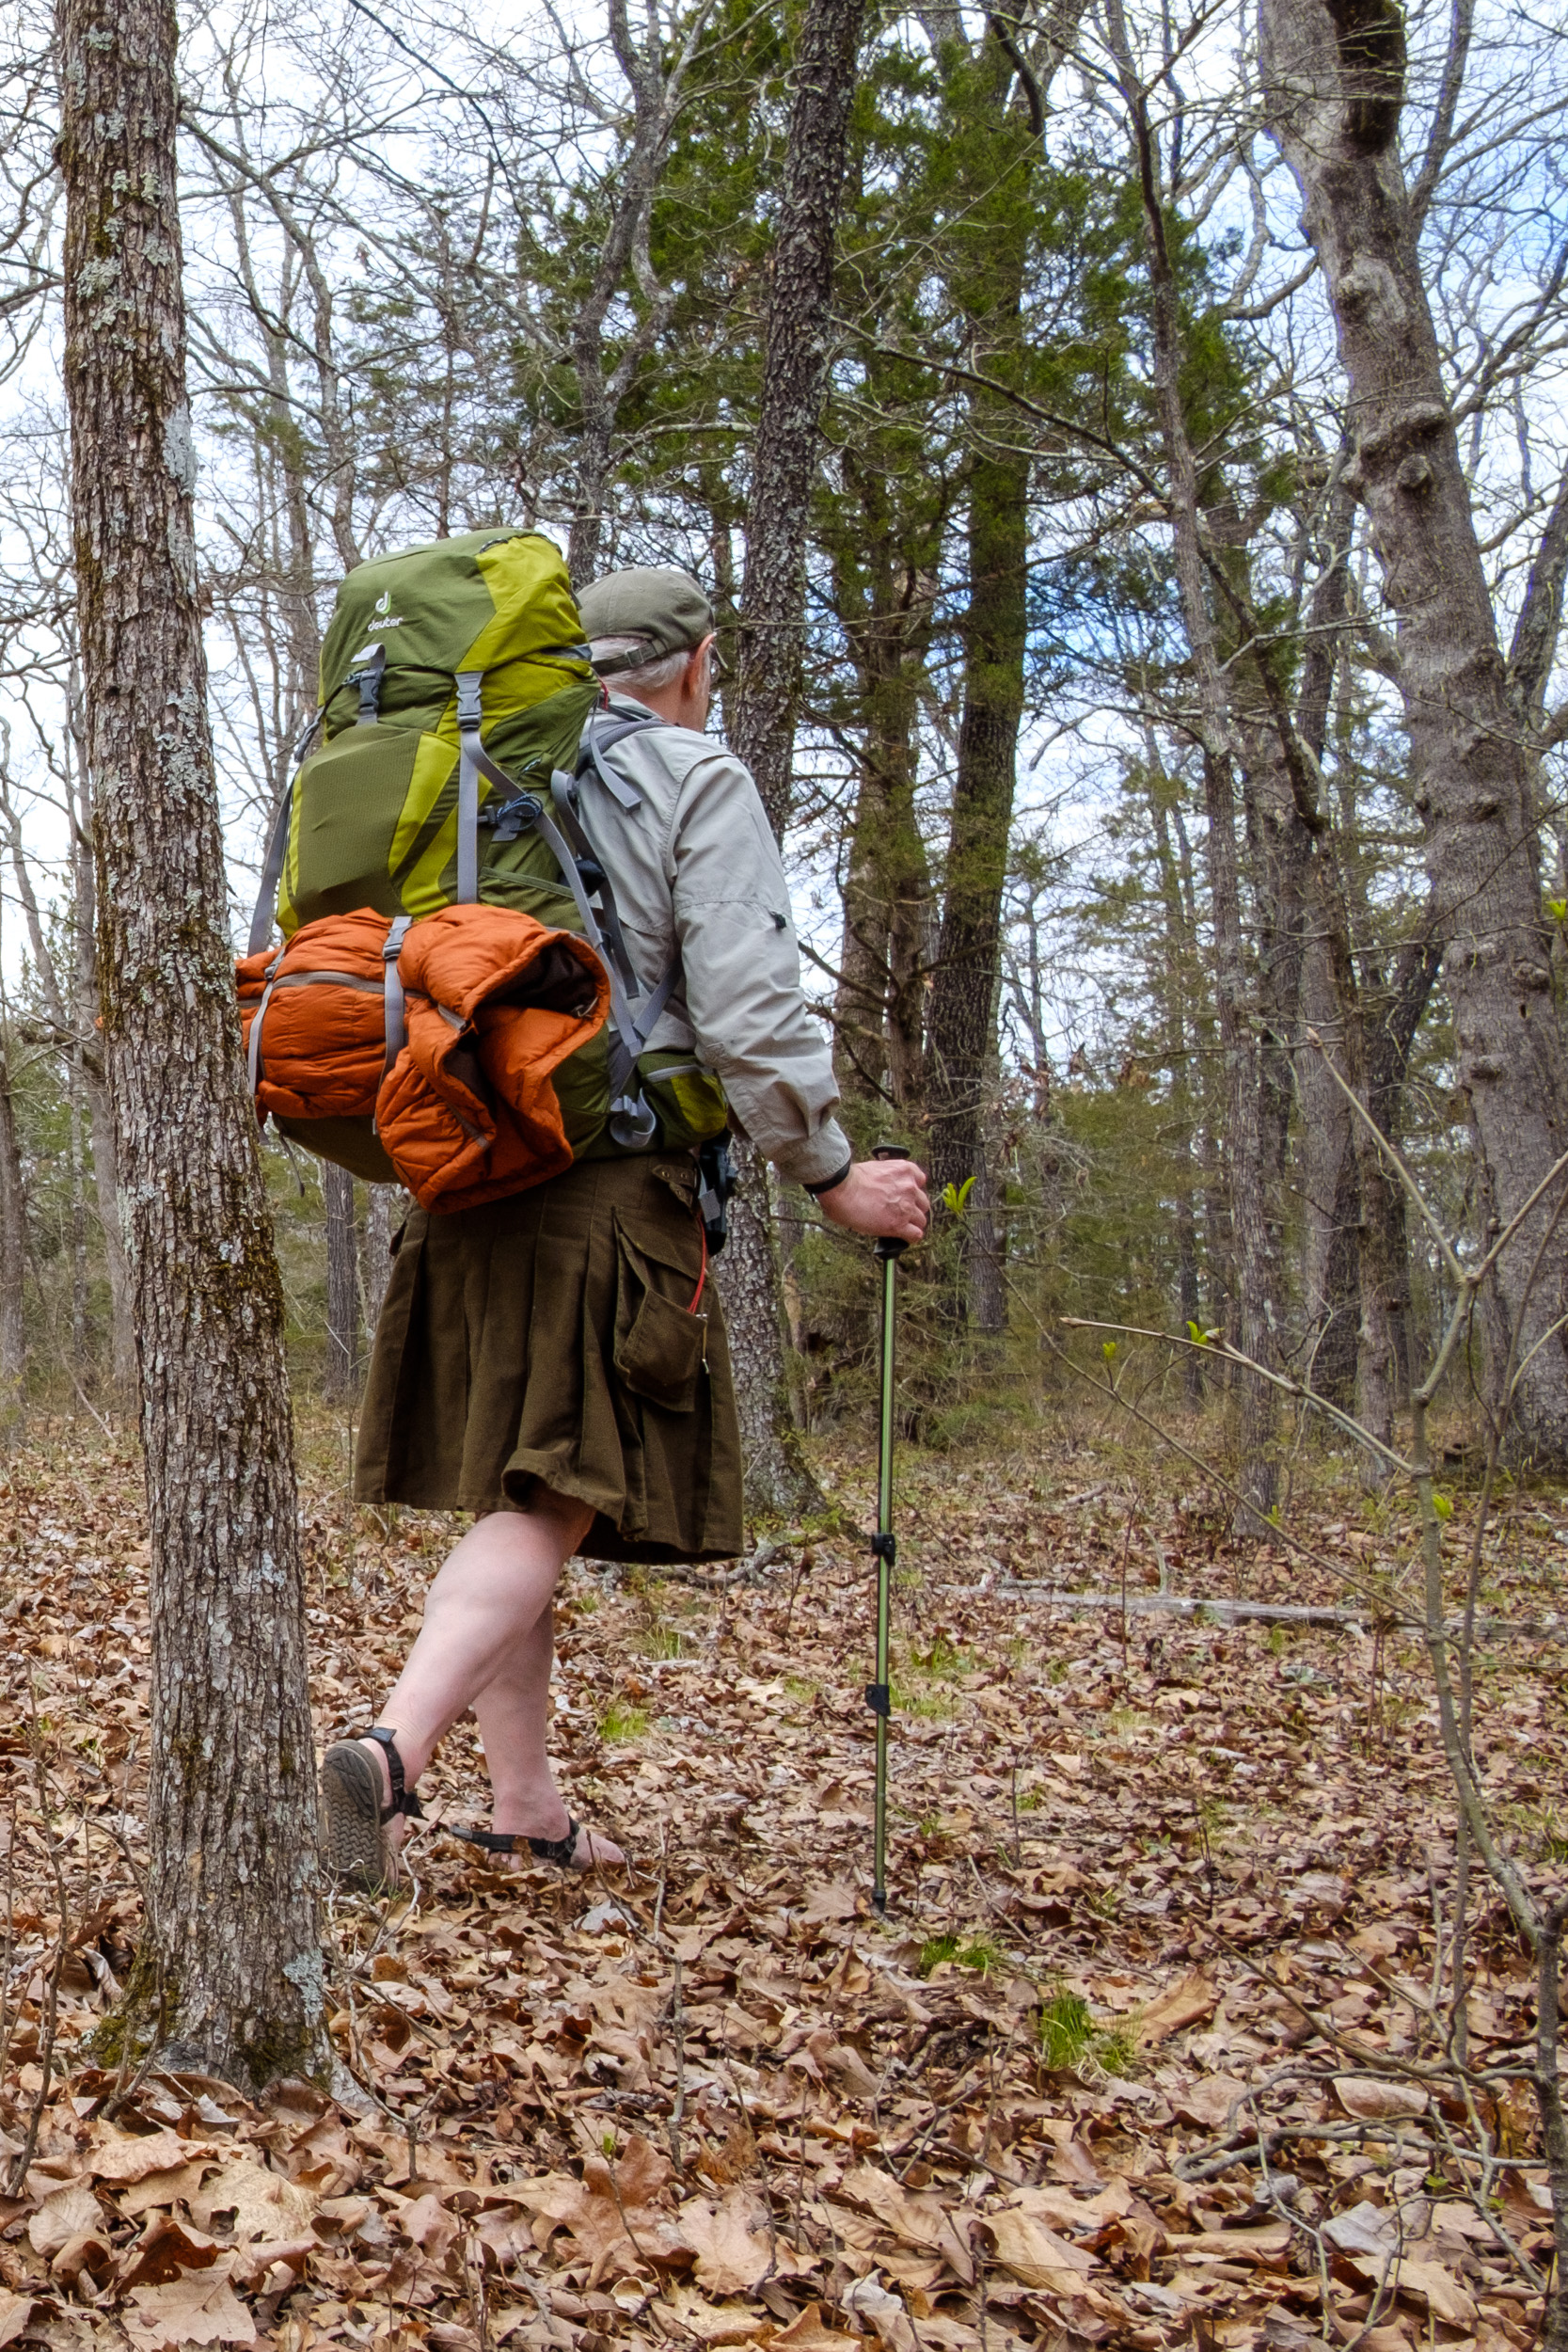
Gary, on his way along the Pees Hollow Trail. Besides spending a night in my new hammock, I thought it would be a chance to change the gear I’d been using. The forecast was for a colder night (35°F) than my last trip, and I wanted to try and lighten my pack.
I took my 0° sleeping bag and the huge (77″x24″) but warm and comfy Neoair pad (Contrary to what I said when writing up my last trip, while bigger when in use, the Neoair packs smaller and is lighter than my Thermarest pad). Instead of my huaraches, I wanted to try out my hiking sandals (also from Xero Shoes), and with no rain in the forecast, I decided to give another, heavier, Utility Kilt, and my down jacket a try-out. I had two new Mountain House meals to try out; Beef Stroganoff and Breakfast Skillet. I fixed the ripped out grommet in the tarp (damaged on my last trip) by gluing in its place a plastic washer made out of an old page divider. I wanted to try out a larger groundsheet, but I couldn’t find the spare Tyvek. Oh well.
My Plan
I decided to hike the Pees Hollow trail at Hercules Glades. It’s a six miles loop, which you can do in a day — if you don’t get lost. As I was starting later in the day, I thought I’d hike the trail clockwise, starting at the western (furthest ) end, and hike the mile and a half down to ‘The Cab’ — an old truck cab abandoned in the wilderness. There’s a fire ring by the cab, and I could spend the night there, or do some exploring and find a spot to camp along what we call ‘Cab Creek’. The next day, it would be a fairly easy, but, uphill hike for the remaining four or so miles of the trail to complete the loop.
Day One

Trail Marker at the western end of the Pees Hollow Trail. It was around eleven-thirty by the time I got back from my meeting, and while I’d gathered everything up ready, it all needed to be packed away. I didn’t weigh my fully packed rucksack, but it was 21lbs without water and my 4lb sleeping bag, so probably somewhere around 30lbs. I managed to get out the house and on the road by one p.m. (with one false start where I set off and then realized I’d forgotten to pack coffee).
By two O’clock I was on my way heading towards the Western end of the Pees Hollow Trail. The hike down the ridge to the glades was nice and easy.
I stopped and took lots of pictures all along the way, so, it took me a nice leisurely hour and a half to get to the cab.
 At the top of the ridge at the begining of the Pees Hollow Trail. Copyright © 2018 Gary Allman, all rights reserved.
 Looking south(ish) along the trail after crossing the small creek. Copyright © 2018 Gary Allman, all rights reserved.
 Brushy Creek is on the other side of that ridge. Copyright © 2018 Gary Allman, all rights reserved.
 The trail was very clear here. Copyright © 2018 Gary Allman, all rights reserved.
 Stock pond set a short way back from the trail. Copyright © 2018 Gary Allman, all rights reserved.
 A tree down across the trail makes a good tripod for a selfie. Copyright © 2018 Gary Allman, all rights reserved.
Someone had left a good supply of firewood at the fire ring there, but I don’t like to camp right on the trail, so I decided to take a look along Cab Creek. After a short walk on what is a little-used side-trail, I found a nice little fire ring next to the creek, which was running and making watery noises as it dropped down a series of low stepped falls. I could have hung my hammock across the trail near the fire ring, but I decided to go a bit further on and then set up camp well back from the trail.

The truck cab, and the near-by fire ring.  Fire ring by ‘Cab Creek’ all set up ready for lighting. Copyright © 2018 Gary Allman, all rights reserved.
 ‘Cab Creek’.Copyright © 2018 Gary Allman, all rights reserved.
I took my time setting up the hammock — though it was very simple. The new (‘Beetle’) buckles are quick and easy to set up and the hammock set really well. The Neoair pad fitted the hammock okay — I thought it might be a bit of a tight fit.
Just like last time out, later in the afternoon the temperature dropped rapidly, and the last forecast I had seen was for 29°F overnight, a lot cooler than I was expecting. With that in mind, I decided I’d light a fire to pass the evening hours, and keep warm. With plenty of daylight in hand, I collected wood and prepared the fire, and left a nice big pile of prepared wood by the fire ring, enough for the next visitor to start a fire too.
 My new Chameleon hammock all ready for the night. Nice camo! Copyright © 2018 Gary Allman, all rights reserved.
 My new Chameleon hammock all ready for the night. Nice camo! Copyright © 2018 Gary Allman, all rights reserved.
 My new Chameleon hammock all ready for the night. Nice camo! Copyright © 2018 Gary Allman, all rights reserved.
 My new Chameleon hammock all ready for the night. Nice camo! Copyright © 2018 Gary Allman, all rights reserved.
 Relaxing while making dinner (if you can call heating some water ‘making dinner’). Copyright © 2018 Gary Allman, all rights reserved.
 Getting breakfast ready. Copyright © 2018 Gary Allman, all rights reserved.
 Relaxing while making dinner (if you can call heating some water ‘making dinner’). Copyright © 2018 Gary Allman, all rights reserved.
I had dinner sitting under the tarp. The Mountain House Beef Stroganoff was tasty enough. When I’d cleared up I set off to go and sit by the fire. The fire was fun, and the down jacket did an excellent job of keeping my back warm, I was nice and cozy. I also discovered a great advantage of a kilt over shorts. Sitting down, you can drape the kilt over your legs to keep them warm.

It didn’t take long to get a decent fire going. 
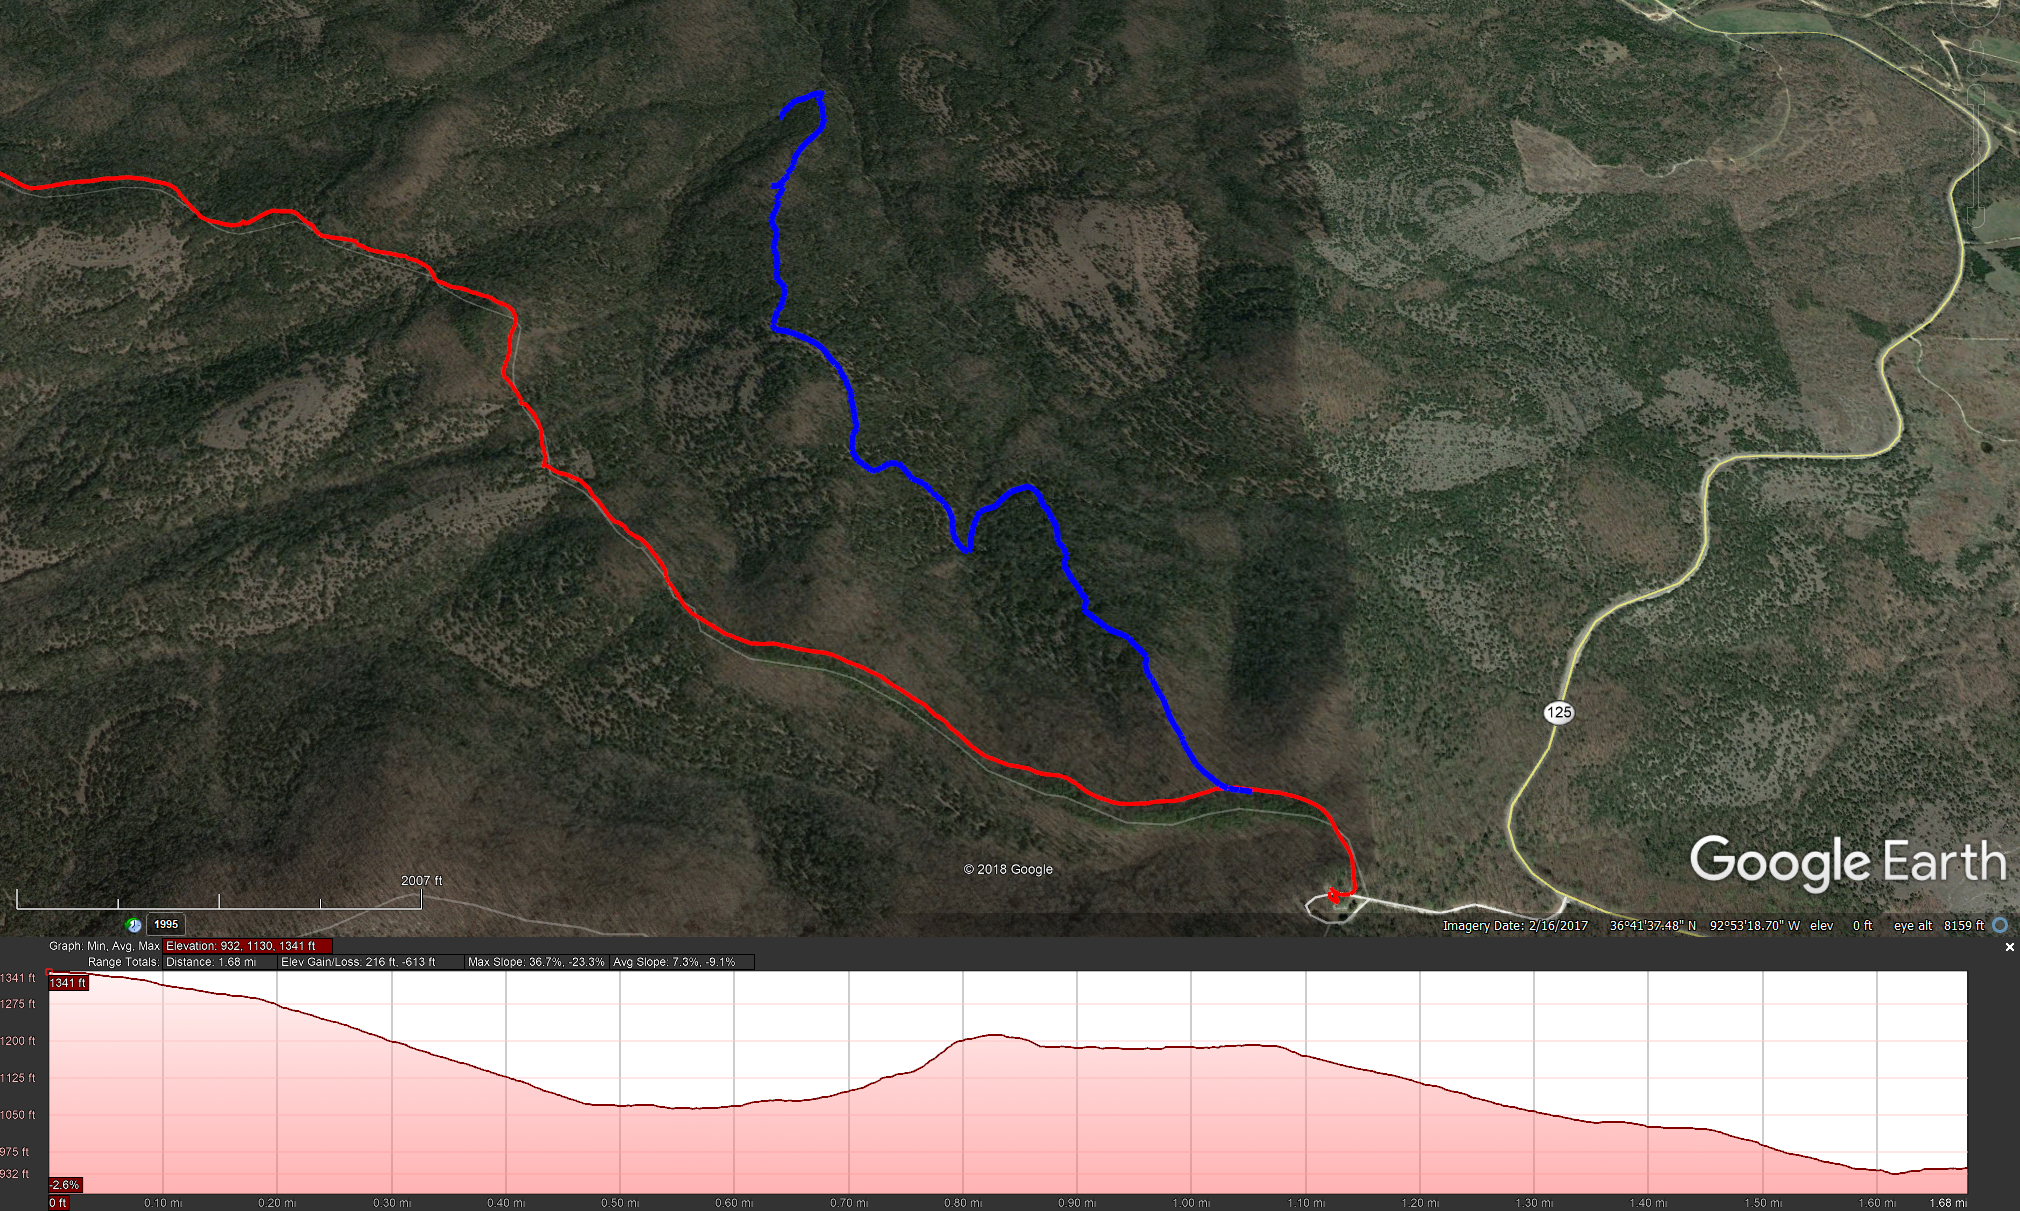
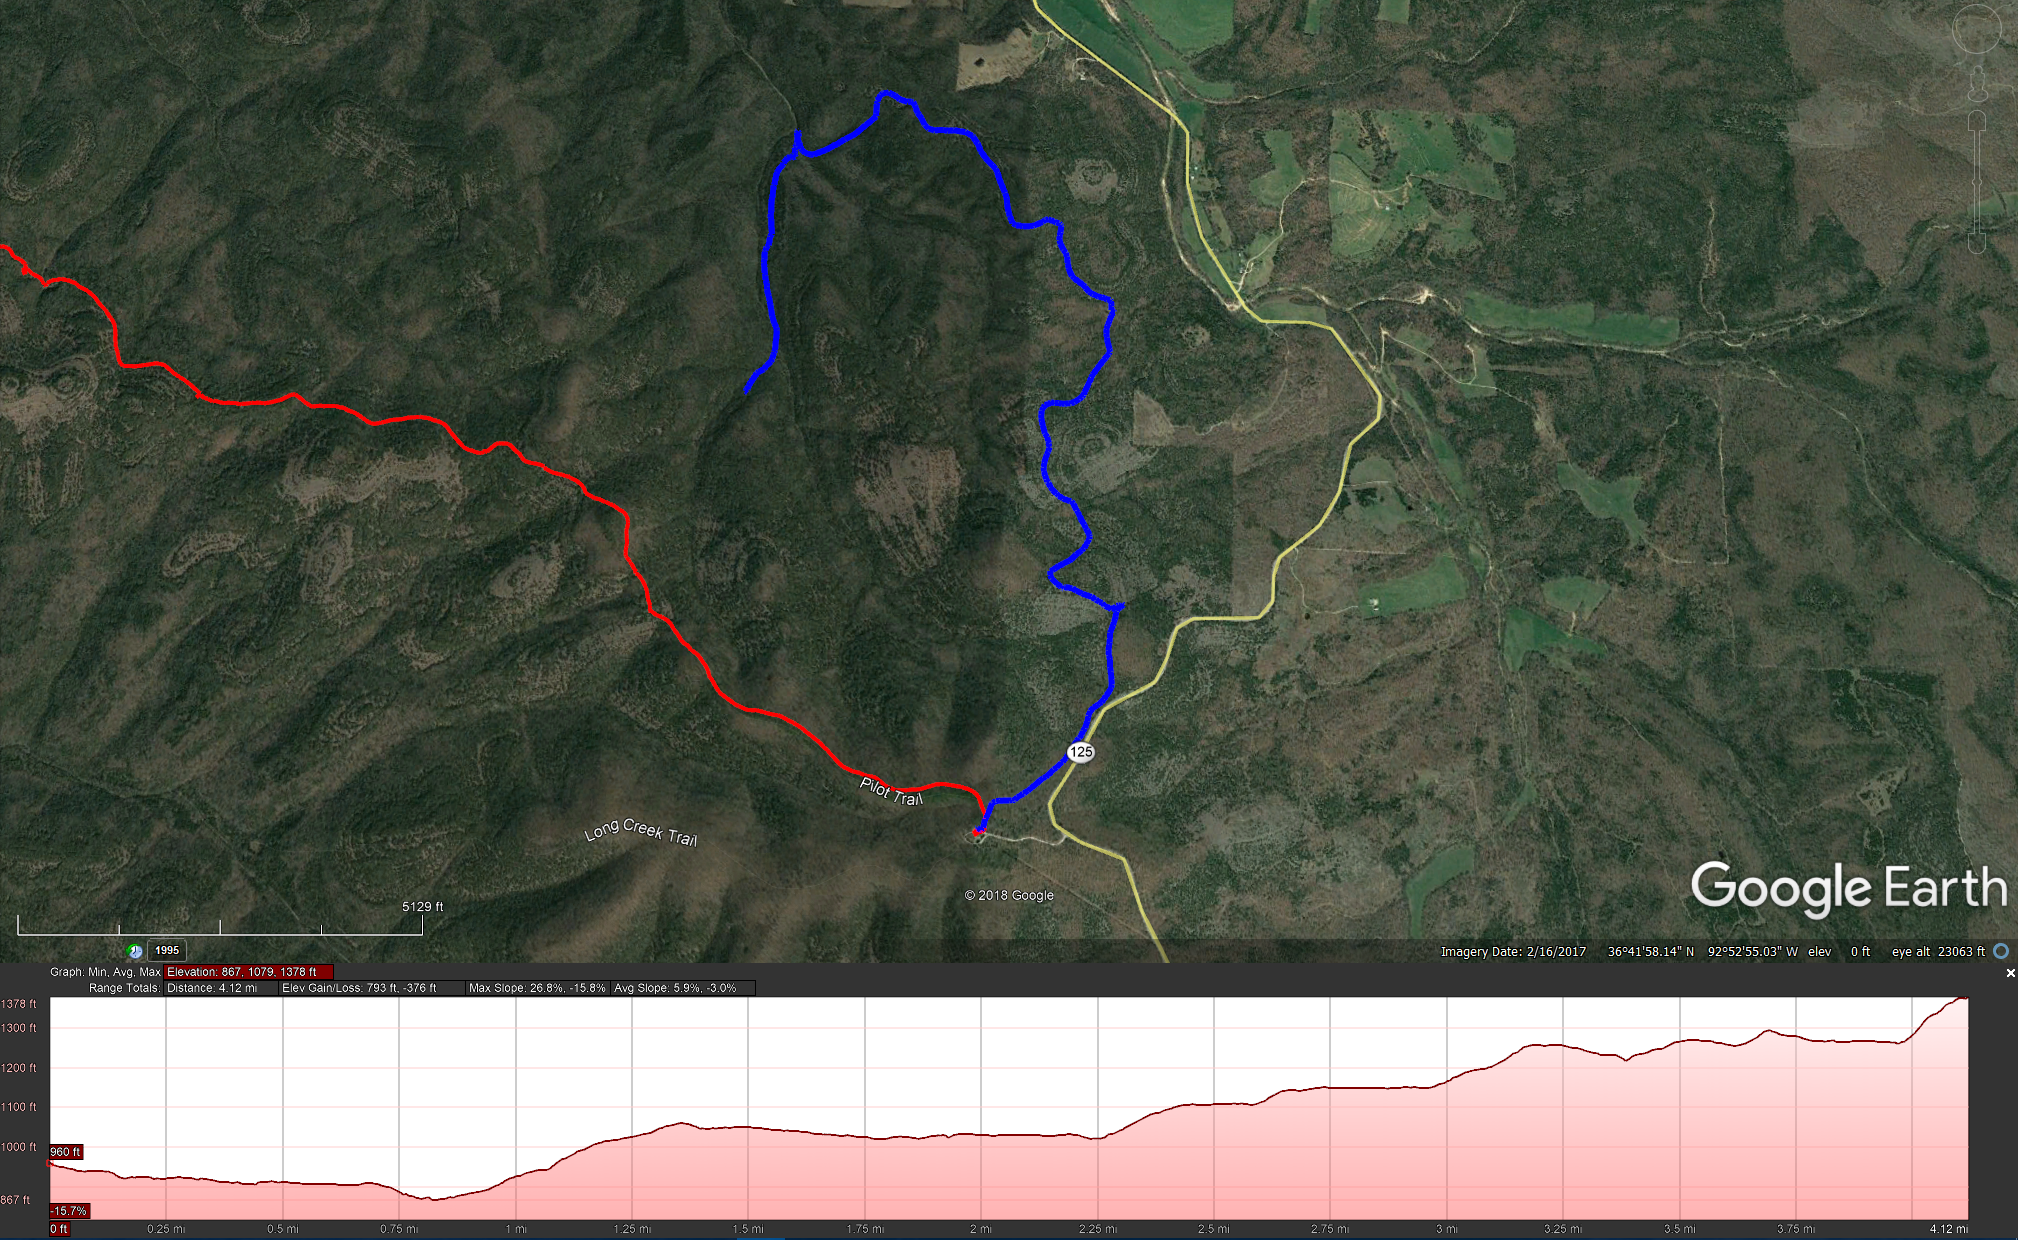
Day One (You’ll note I forgot to turn on the GPS until I’d already gone about 1/4 mile). Day Two
 Morning view from my hammock. Copyright © 2018 Gary Allman, all rights reserved.
 Morning view from my hammock. Copyright © 2018 Gary Allman, all rights reserved.
My new hammock is great. I fitted the bug net, which helped keep a bit of warmth in. I’d wrapped my pad in my sleeping bag liner so it was more comfortable to sleep on and used the sleeping bag as a quilt. My nose got chilly, but that was about it. I was very comfortable and warm. Too warm, as at one point and I got rid of my base layer. I’m looking forward to trying out the hammock with an underquilt. While sitting around I had an idea, that, if I can get it to work, might extend the temperature range of the underquilt. I want to try lining it with my 40° quilt.
There was one problem though, I woke up feeling a bit cool underneath. I later realized I’d made a rookie mistake. I inflated the pad when it was warm, and forgot to top it up when it got cold, so the pad was a bit deflated and a lot less effective than it should have been by morning.
Making coffee got delayed when I couldn’t find the coffee. I knew I had it, and I thought I’d put it on one side for the morning. After turning everything out, I went and retrieved the bear bag, and sure enough, I’d packed it away up a tree. Oh well, I needed my breakfast from the bag anyway.
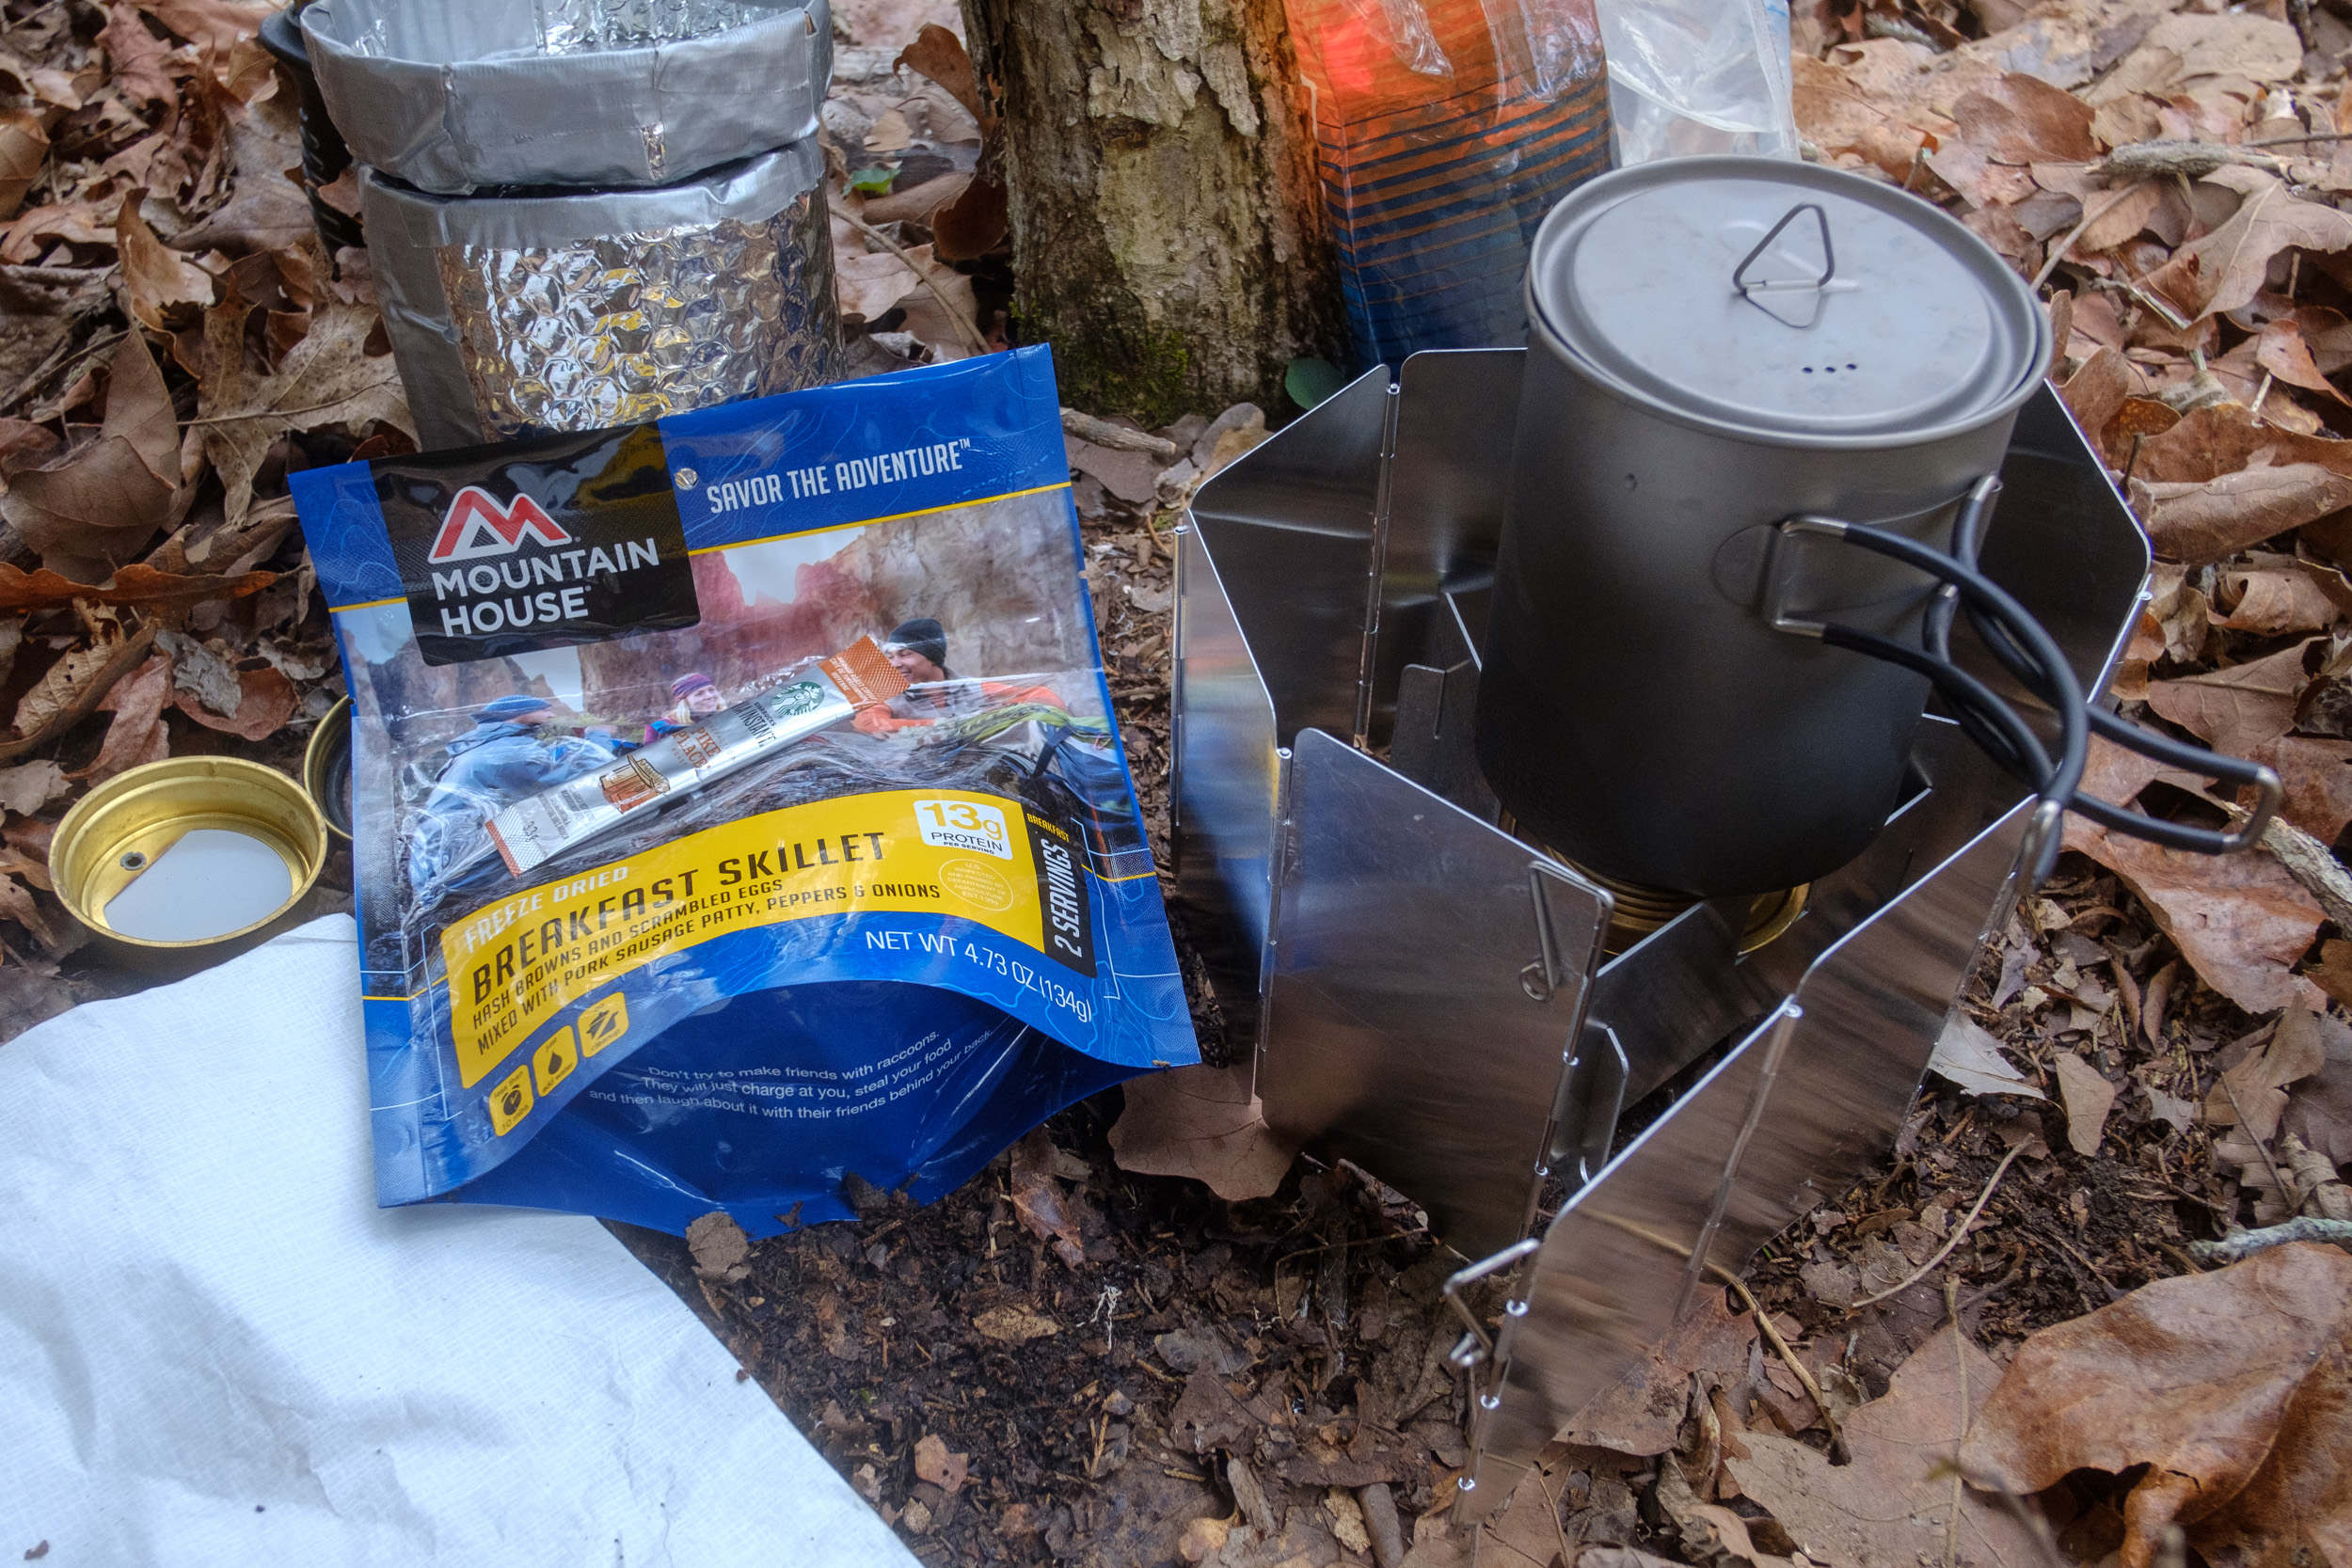
Breakfast, the Mountain House Breakfast Skillet was very good, It is an instant favorite of the dehydrated Mountain House meals I’ve had so far.

Getting breakfast ready. I spent a leisurely morning taking pictures and packing away. I loved how easily the hammock can be pushed into its stuff sack. It took seconds. Disconnecting the hammock from the suspension I discovered another careless/rookie mistake. At the foot end, I’d got the beetle buckle upside down, which meant the buckle wasn’t being held closed. I was lucky I didn’t get dumped on the floor in the middle of the night!
 Moss on a tree. Copyright © 2018 Gary Allman, all rights reserved.
 Morning Sunlight. Copyright © 2018 Gary Allman, all rights reserved.
 DutchWare Gear Chameleon hammock. When I first saw this picture I thought I’d set the hammock up wrong. Then I realized it’s just the weight of the backpack pulling the near end down. Copyright © 2018 Gary Allman, all rights reserved.
 Beetle Buckles the correct way up … Copyright © 2018 Gary Allman, all rights reserved.
 Cab and fire ring. Copyright © 2018 Gary Allman, all rights reserved.
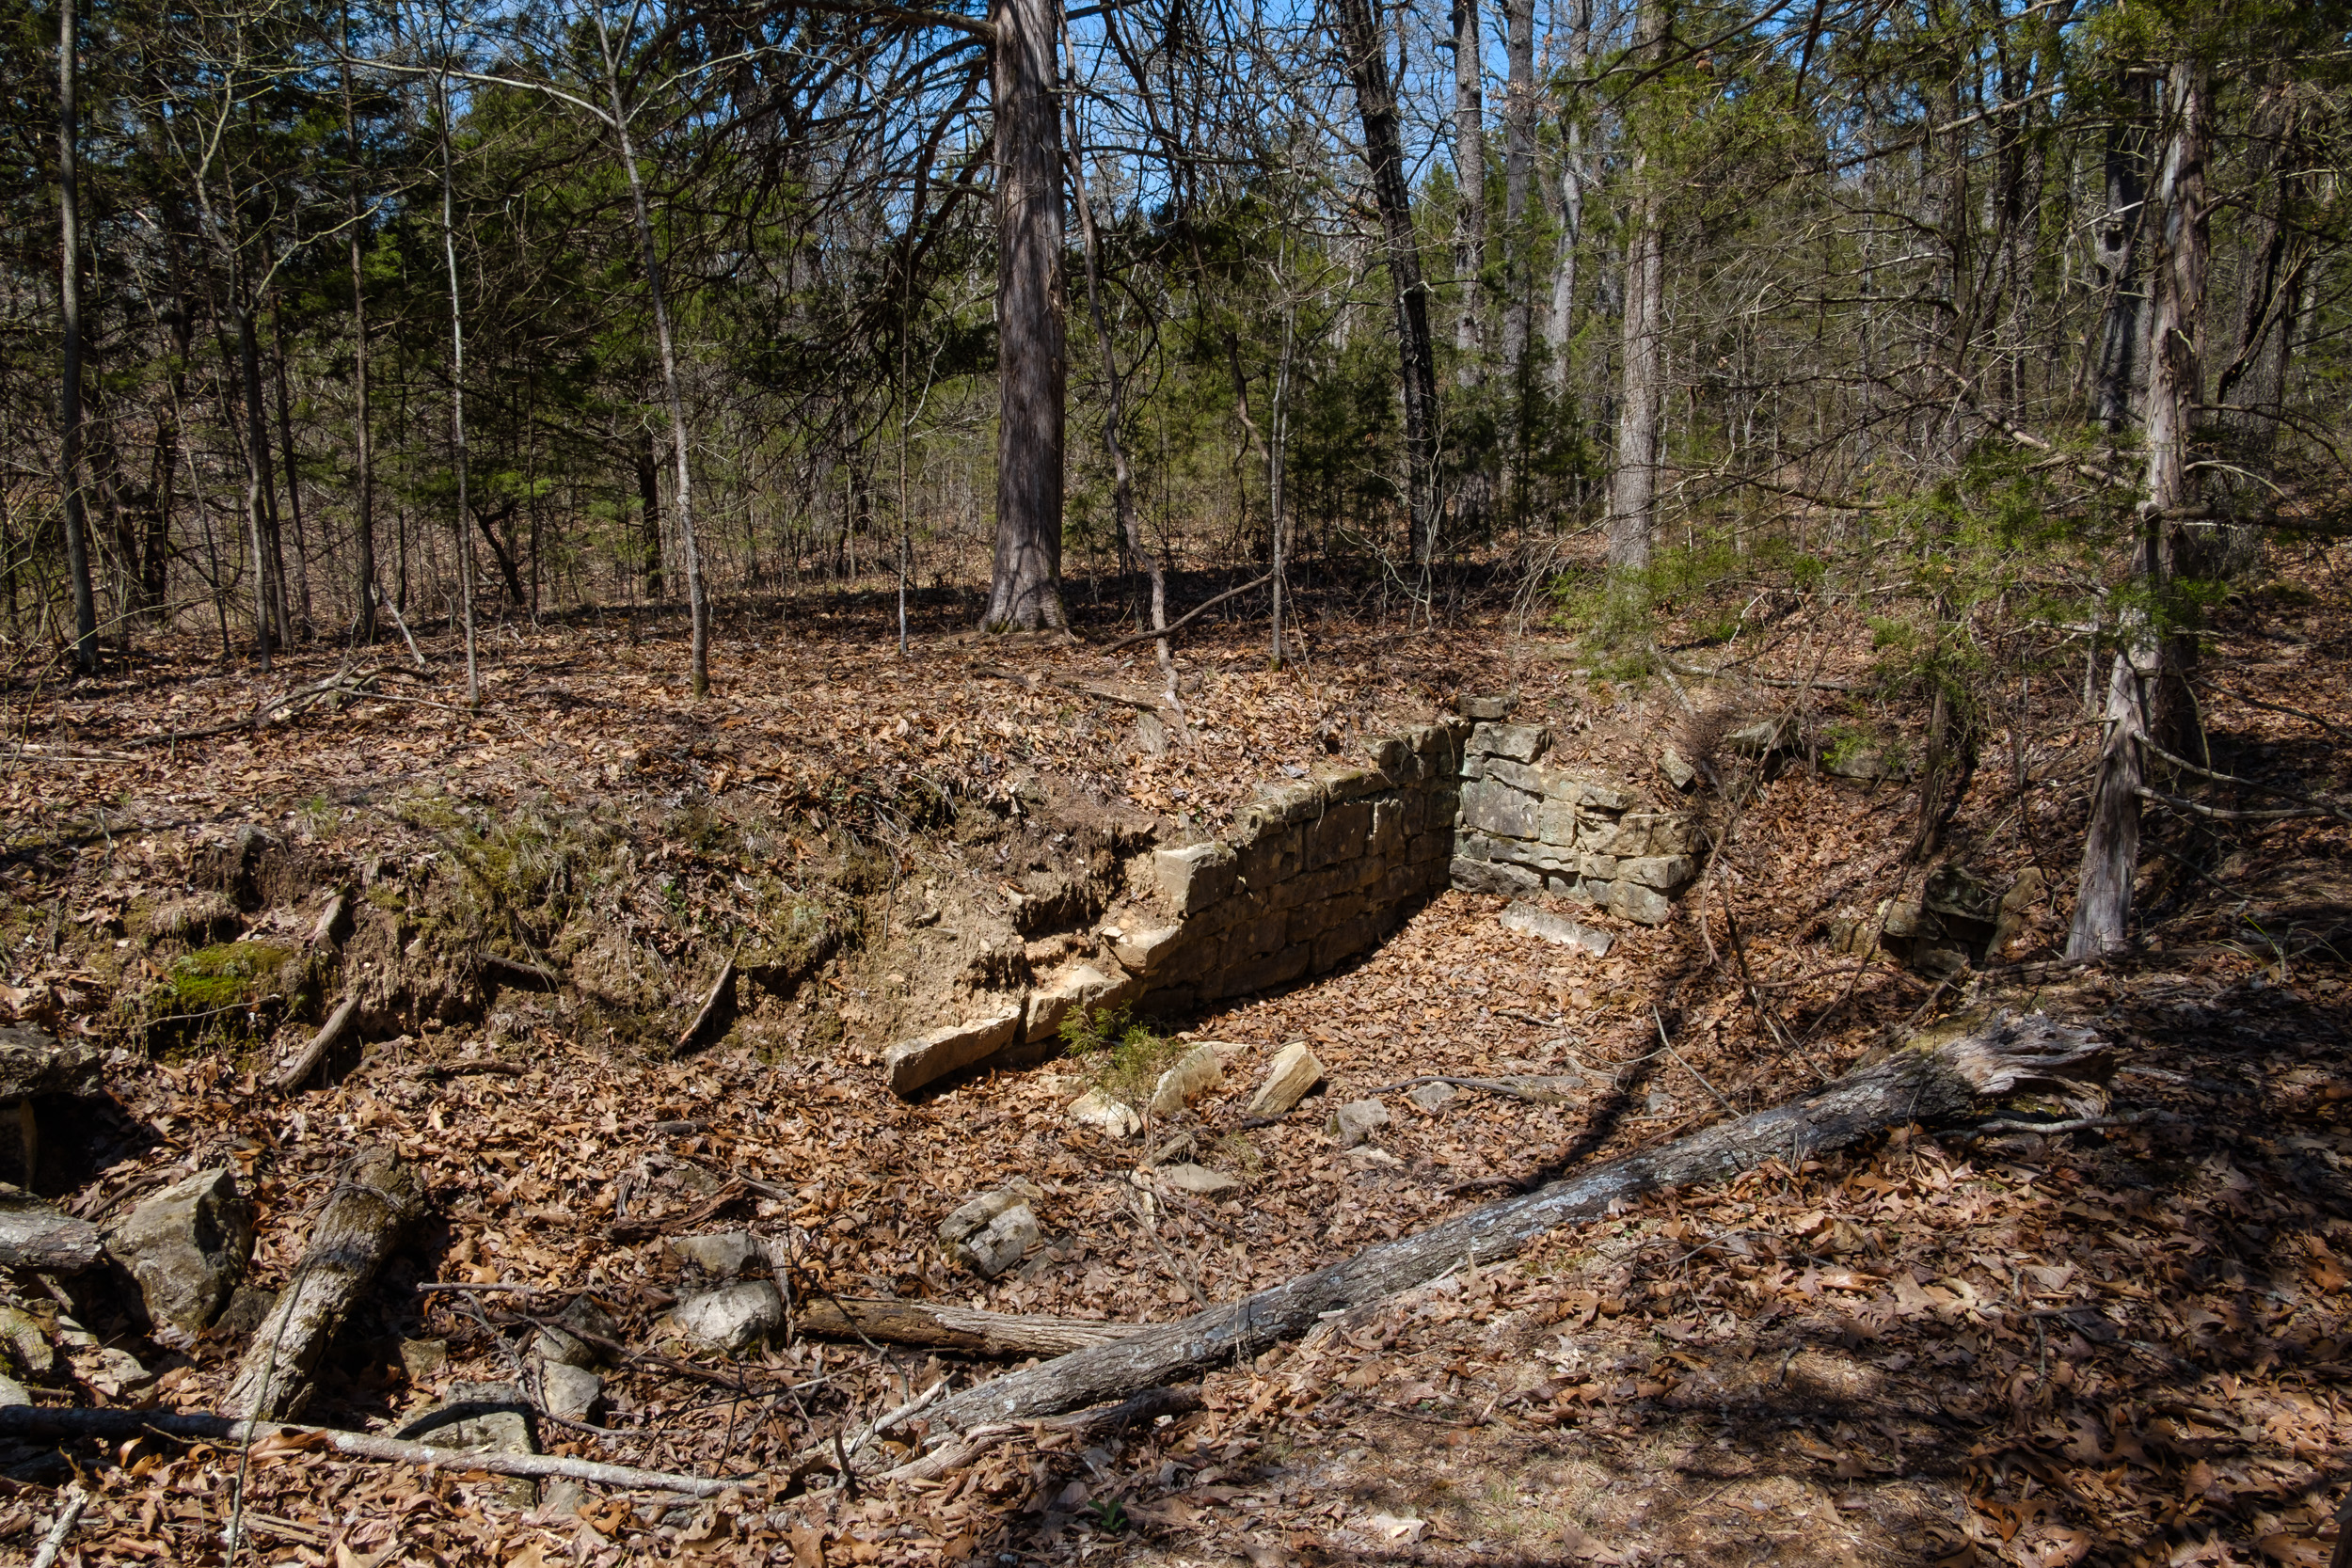
On the way back I planned to try and find the remains of an old Ozarks log cabin we’d discovered on a previous trip. I wanted to take some better pictures and geotag it. It was somewhere just before Brushy Creek (a very apt name by the way, it is very brushy!) Half an hour after setting out in the morning, I was wandering off trail looking for the cabin. I was lucky and found it almost immediately. The cabin must have had a great view of Brushy Creek when all the intervening brush was cleared.
 Remains of an old log cabin. Copyright © 2018 Gary Allman, all rights reserved.
 Remains of an old log cabin.
 Remains of an old log cabin. Copyright © 2018 Gary Allman, all rights reserved.
 Remains of an old log cabin. Copyright © 2018 Gary Allman, all rights reserved.
Pictures taken, I hiked the short distance to Brushy Creek.

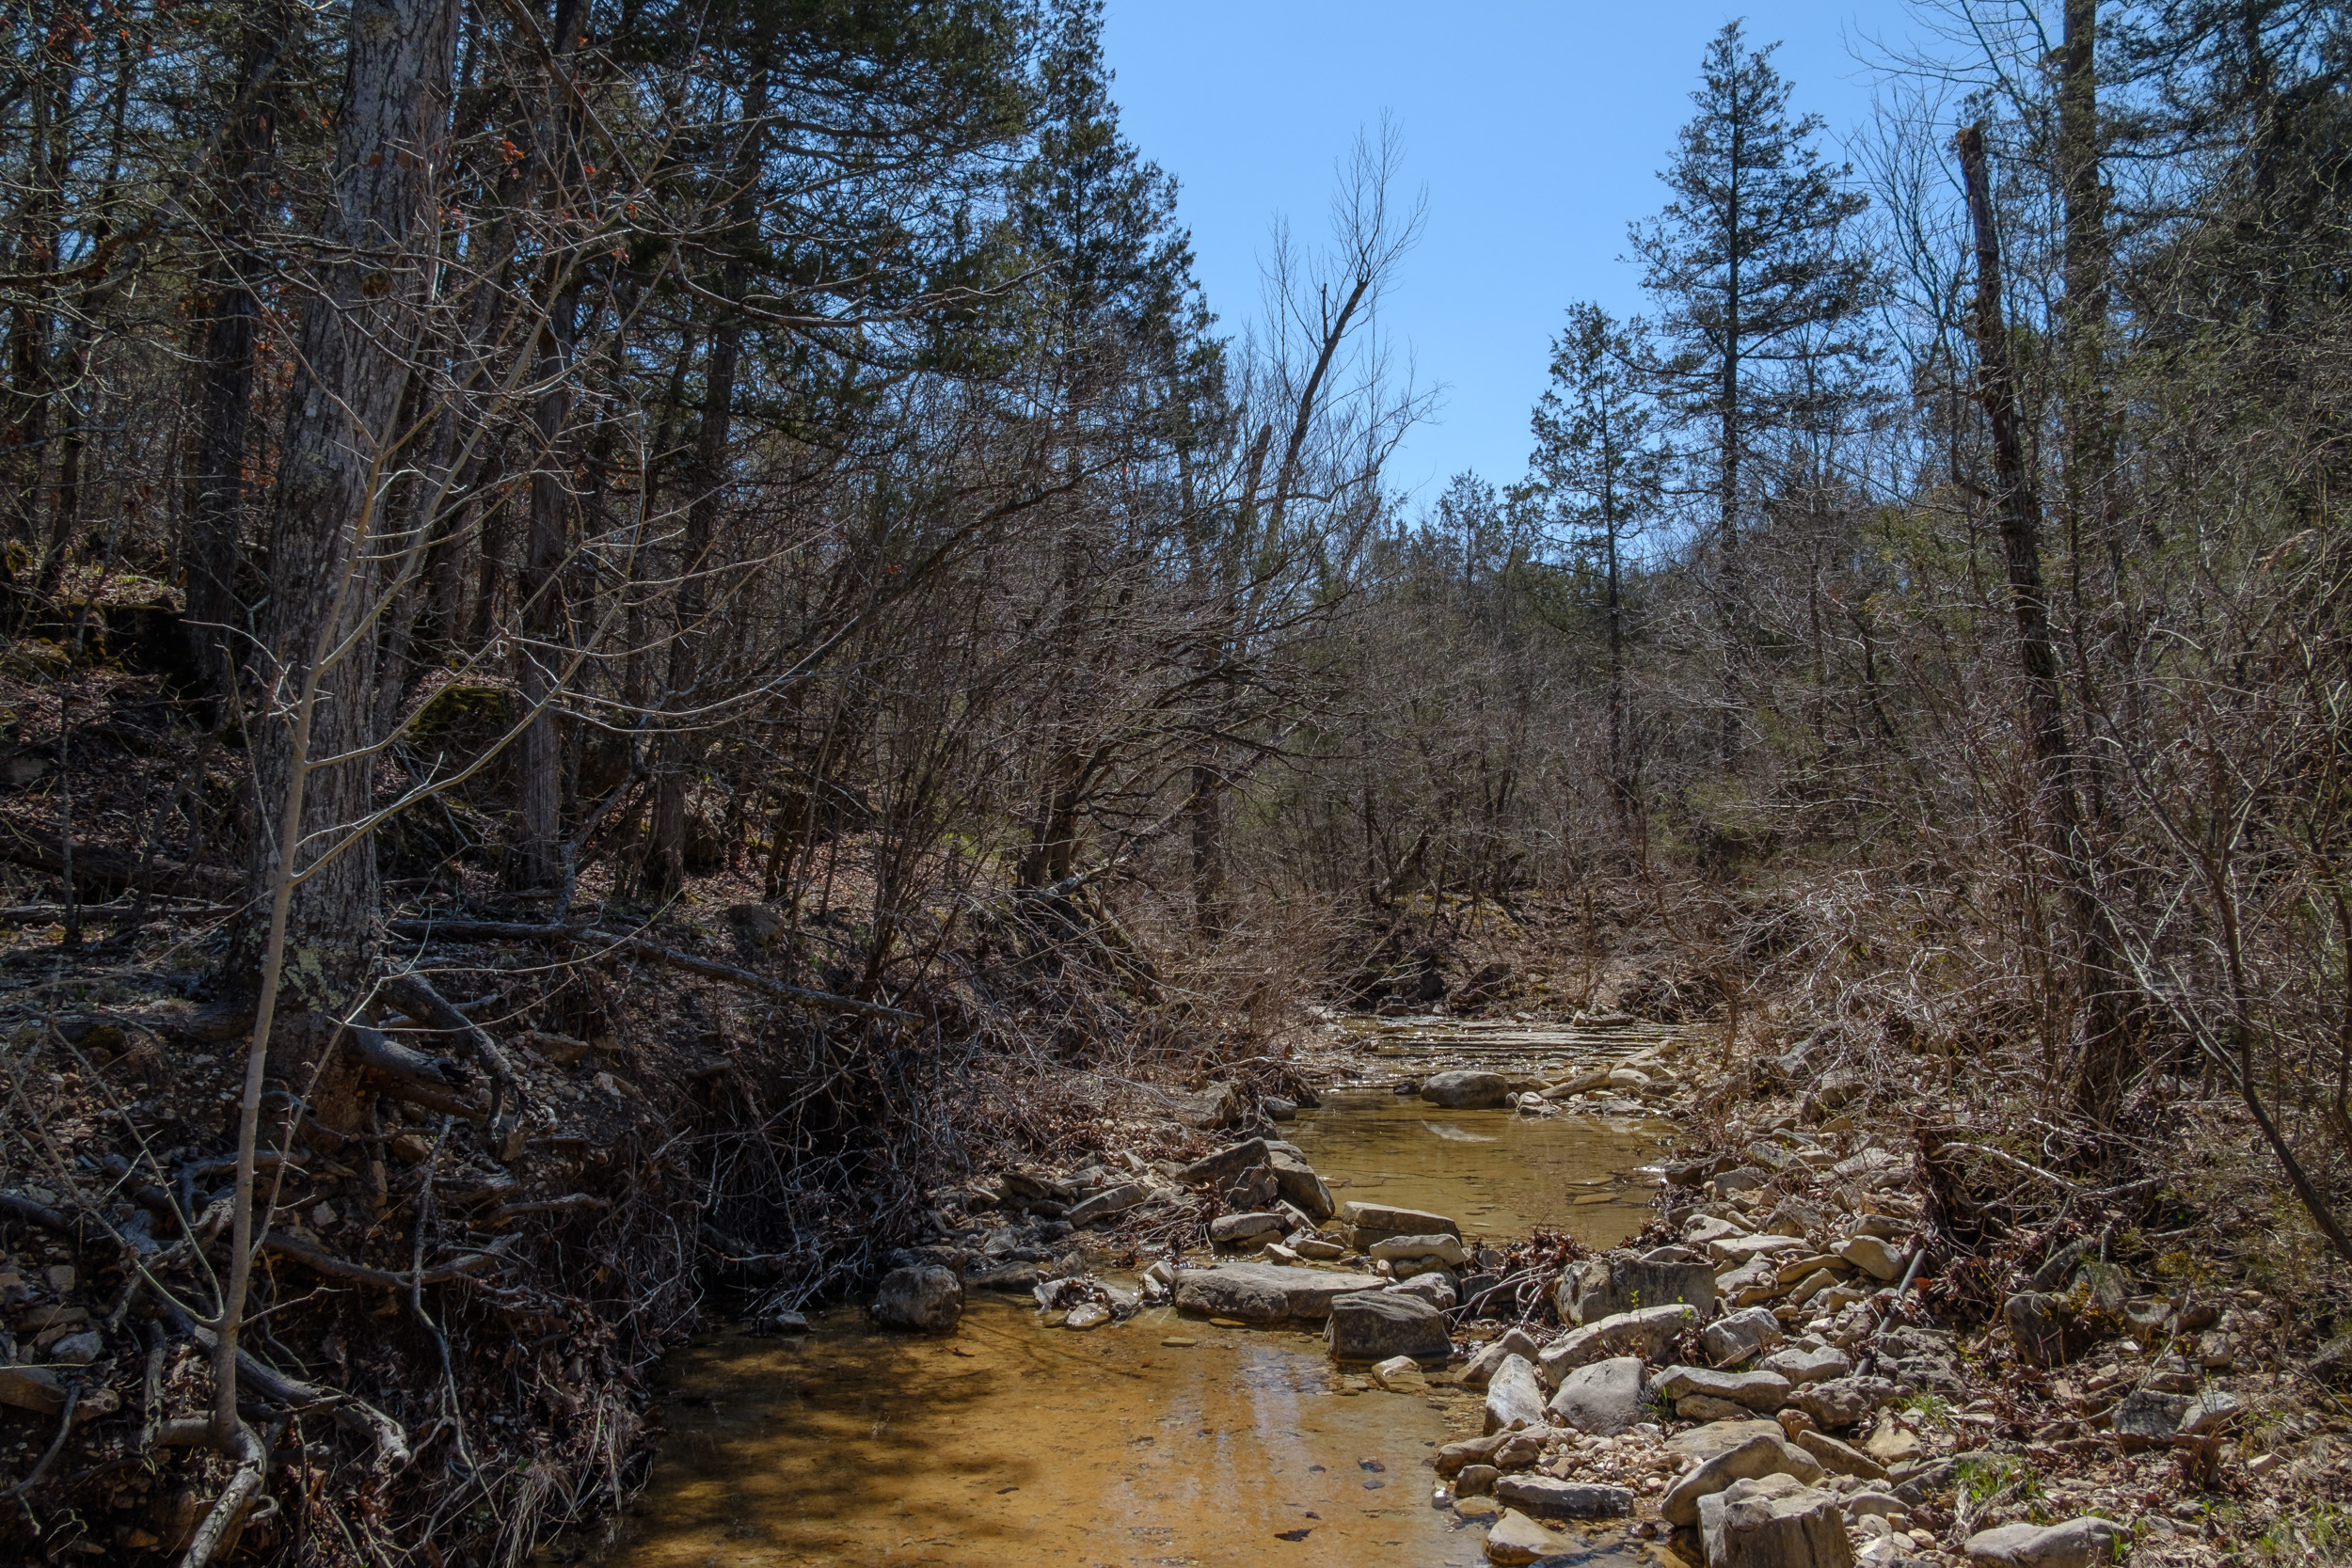
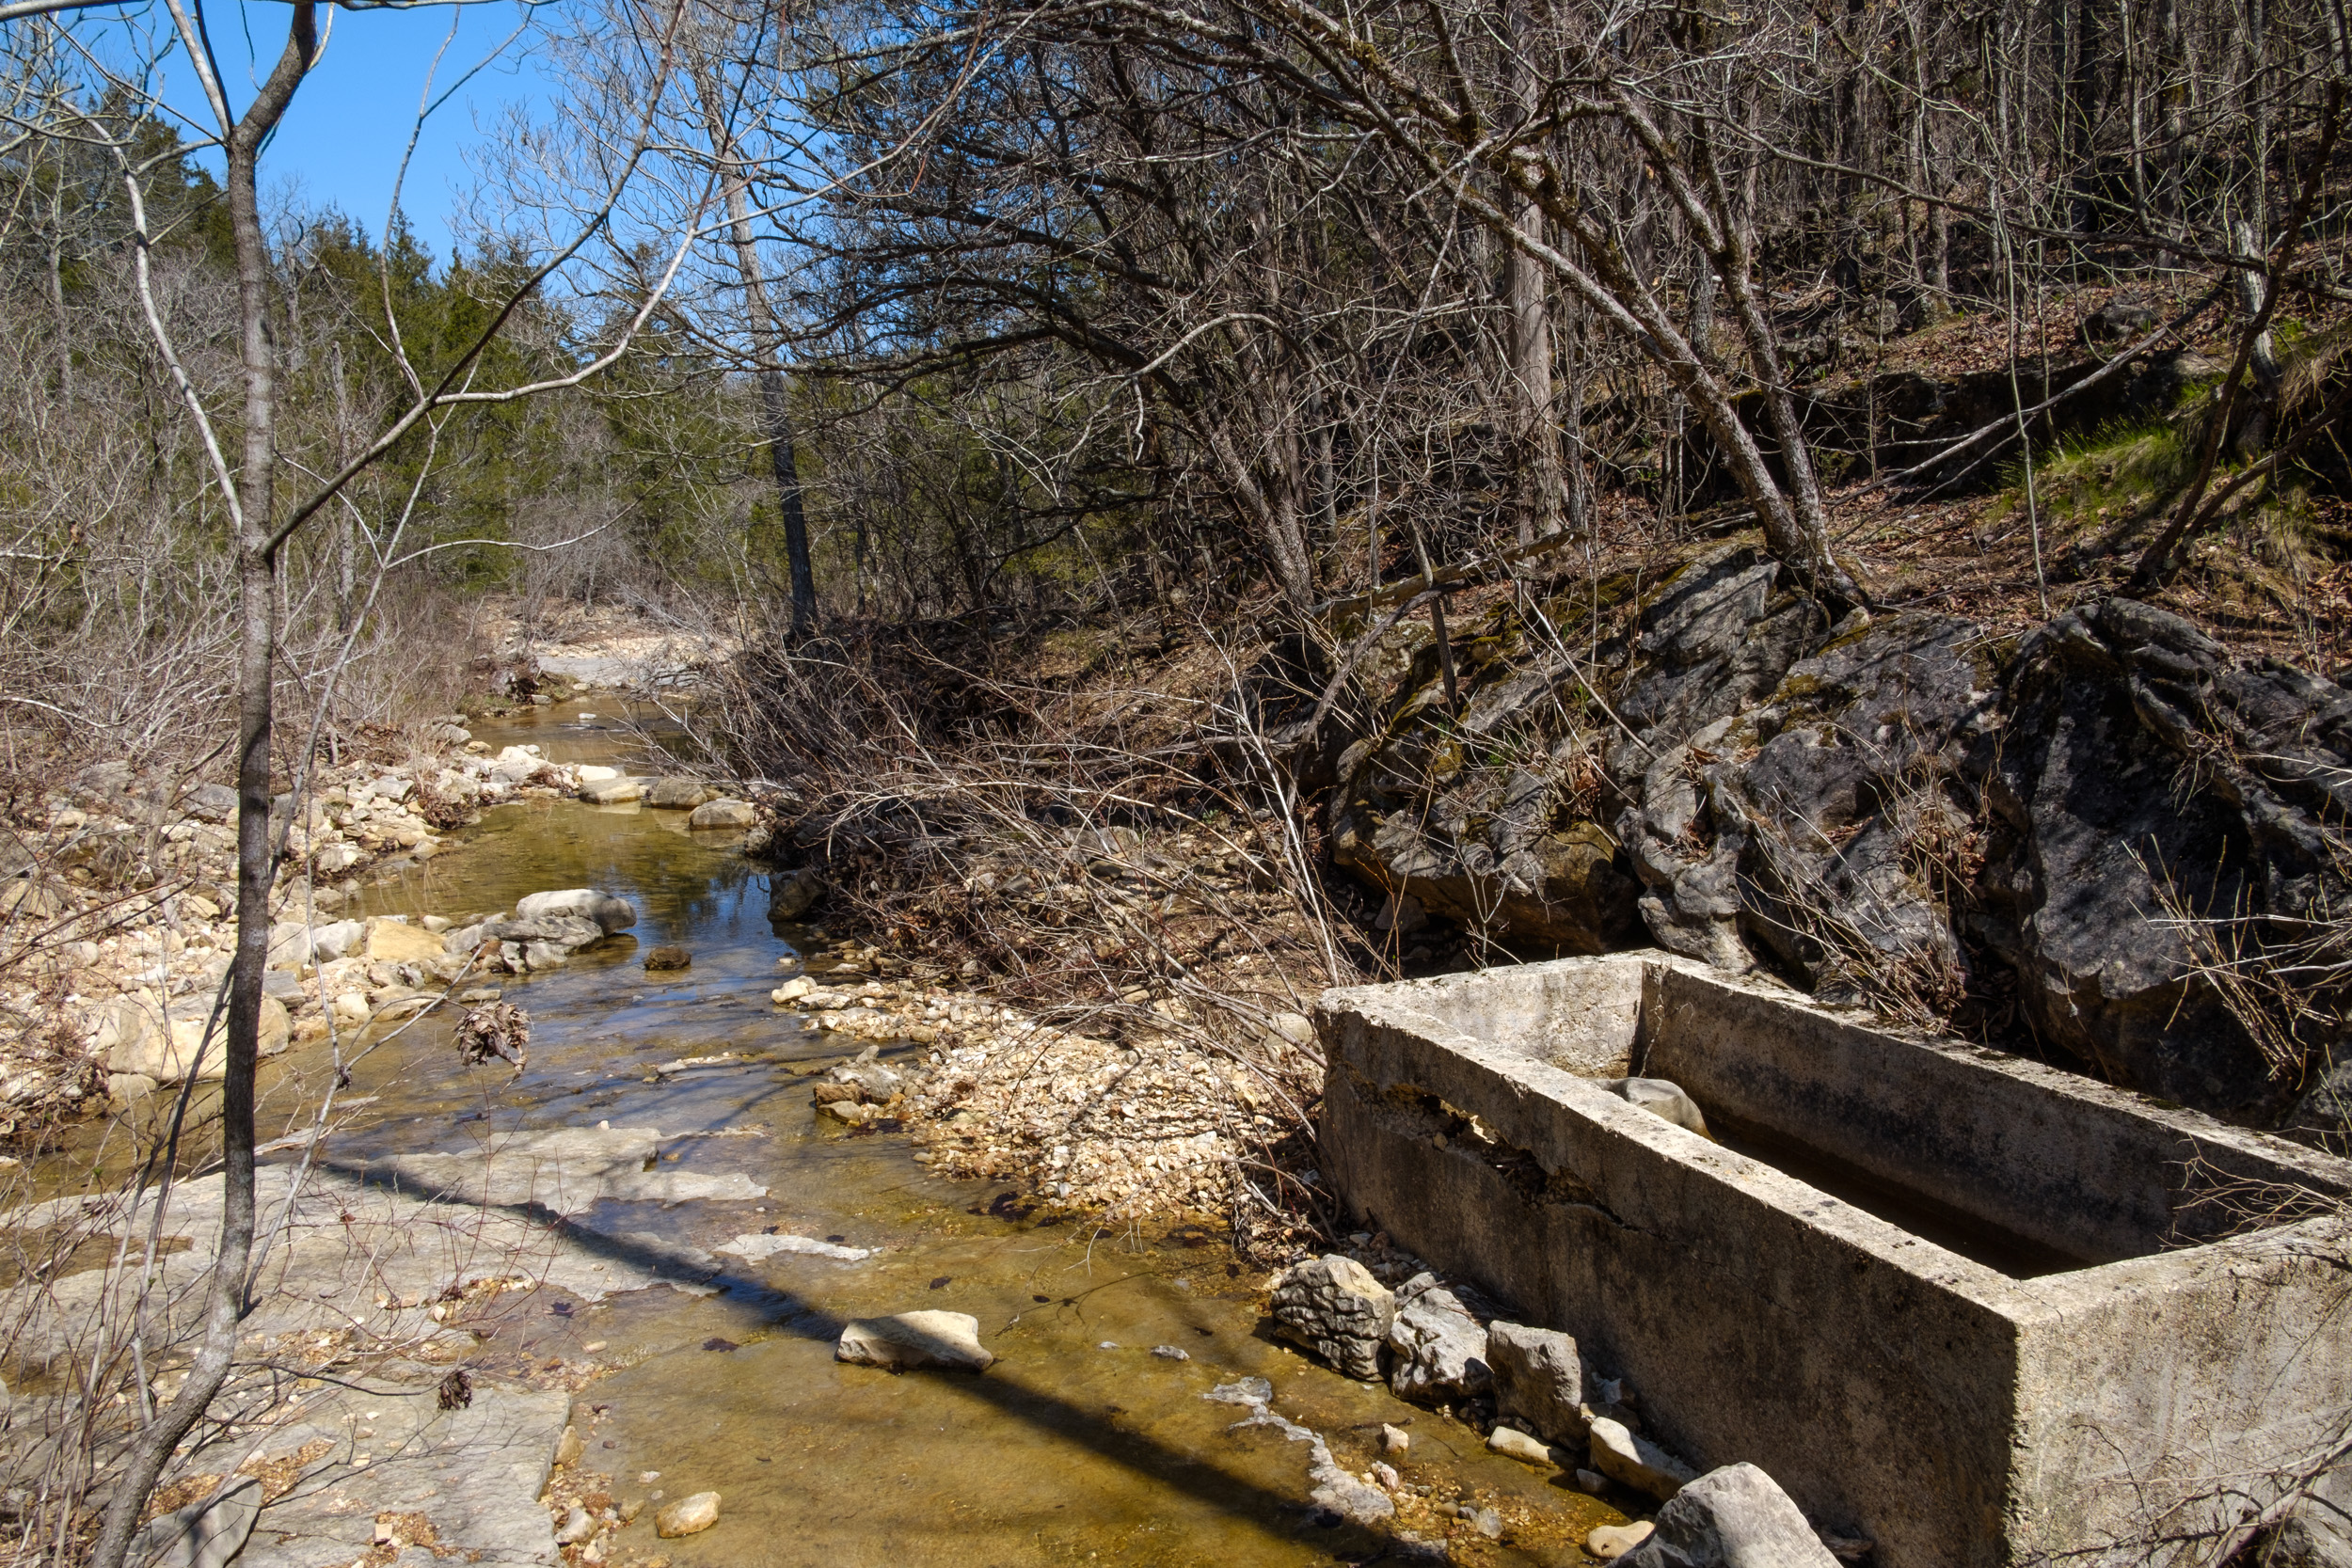
Looking up Brushy Creek. Looking down the creek I spotted a spring box, and went off to explore. Once there, I noticed a second spring box. It looked set up to catch drips from a seep in the creek’s bank. I explored further down the creek and there were some excellent-looking rock steps where Brushy Creek and ‘Cab Creek’ meet. I spent a while taking pictures and looking around. This would be another nice spot for wild camping.

Spring box in Brushy Creek. 
The confluence of Brushy Creek (left) and ‘Cab Creek’ (right).  Spring box in Brushy Creek. Copyright © 2018 Gary Allman, all rights reserved.
 Brushy Creek (Looking south). Copyright © 2018 Gary Allman, all rights reserved.
 Looking East down Brushy Creek. Copyright © 2018 Gary Allman, all rights reserved.
 Rocky steps at the confluence of Bushy Creek (left) and ‘Cab Creek’ (right). Copyright © 2018 Gary Allman, all rights reserved.
 Looking upstream towards Brushy Creek and ‘Cab Creek’. Copyright © 2018 Gary Allman, all rights reserved.
 Gary modestly posing at the confluence of Brushy Creek and ‘Cab Creek’. Copyright © 2018 Gary Allman, all rights reserved.
 Gary modestly posing at the confluence of Brushy Creek and ‘Cab Creek’. Copyright © 2018 Gary Allman, all rights reserved.
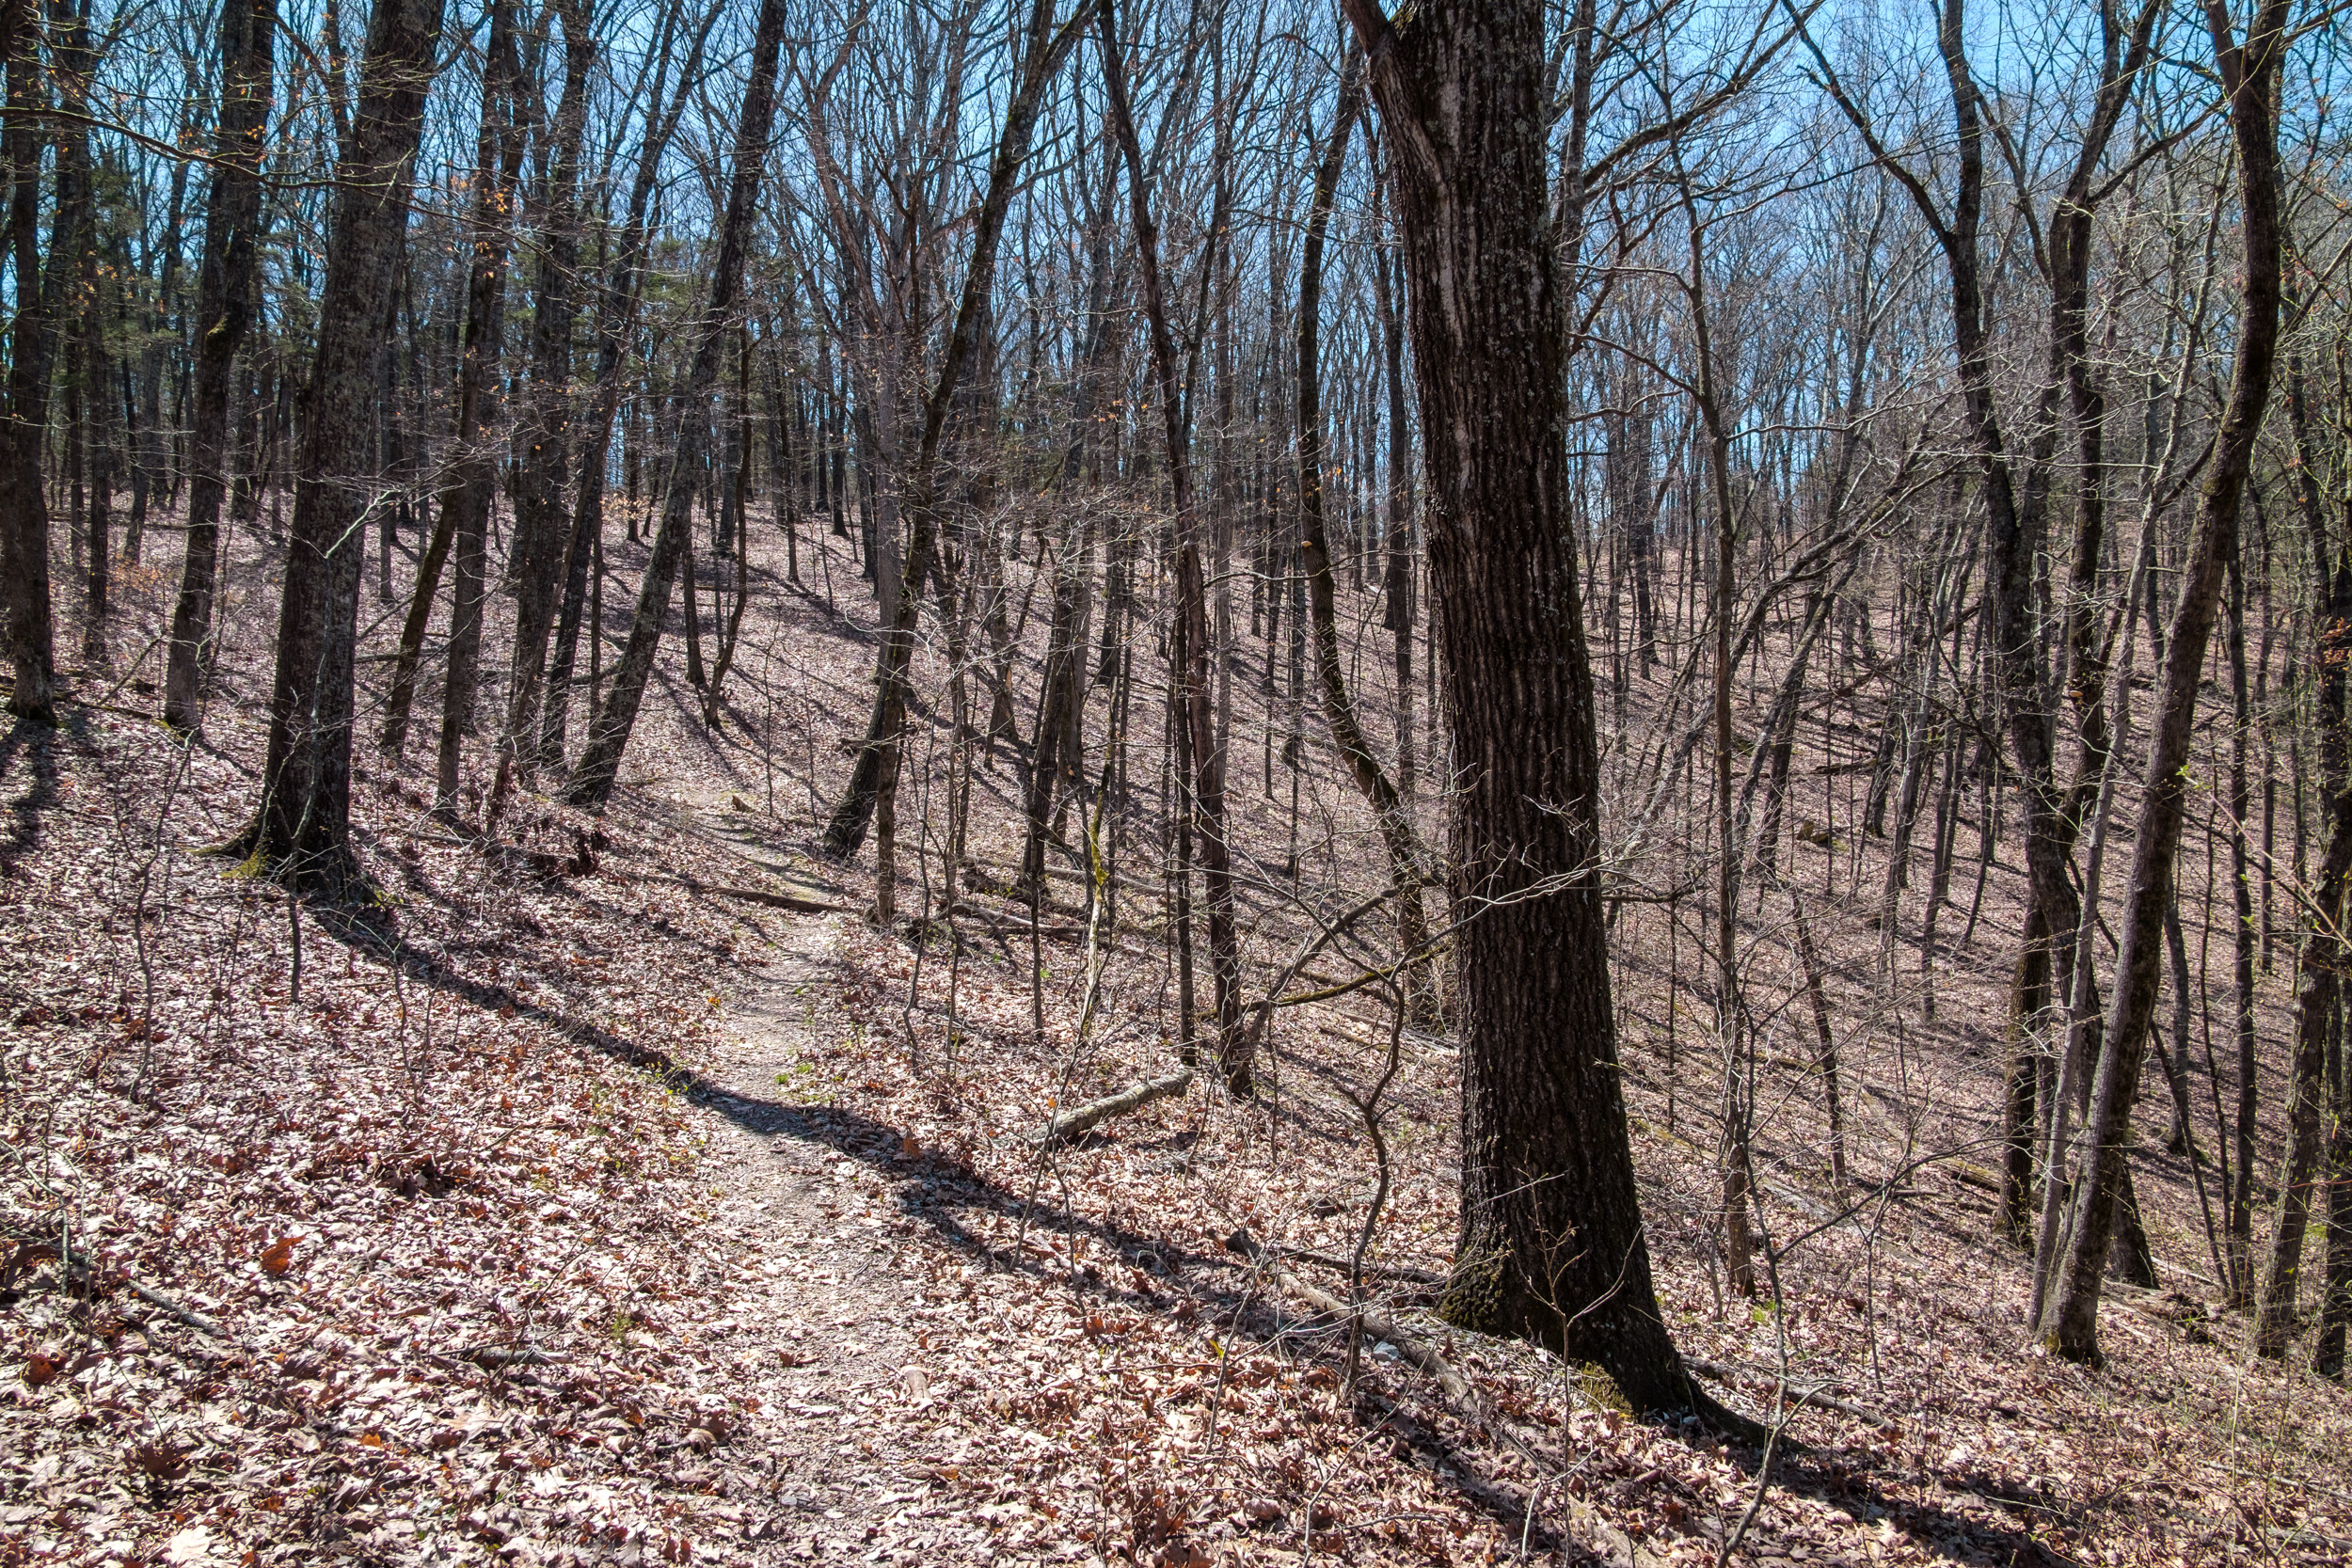
Pictures taken and exploring complete, I hiked straight up the creek bed back to the trail (an advantage of wearing sandals or huaraches). Where the trail crosses the creek is well marked, they were the first trail markers I’d seen on my hike so far. Now all I had to do was complete the long climb from the Brushy Creek crossing back to the trailhead at the fire tower. En route I hoped to check on a few old landmarks we have previously geotagged.
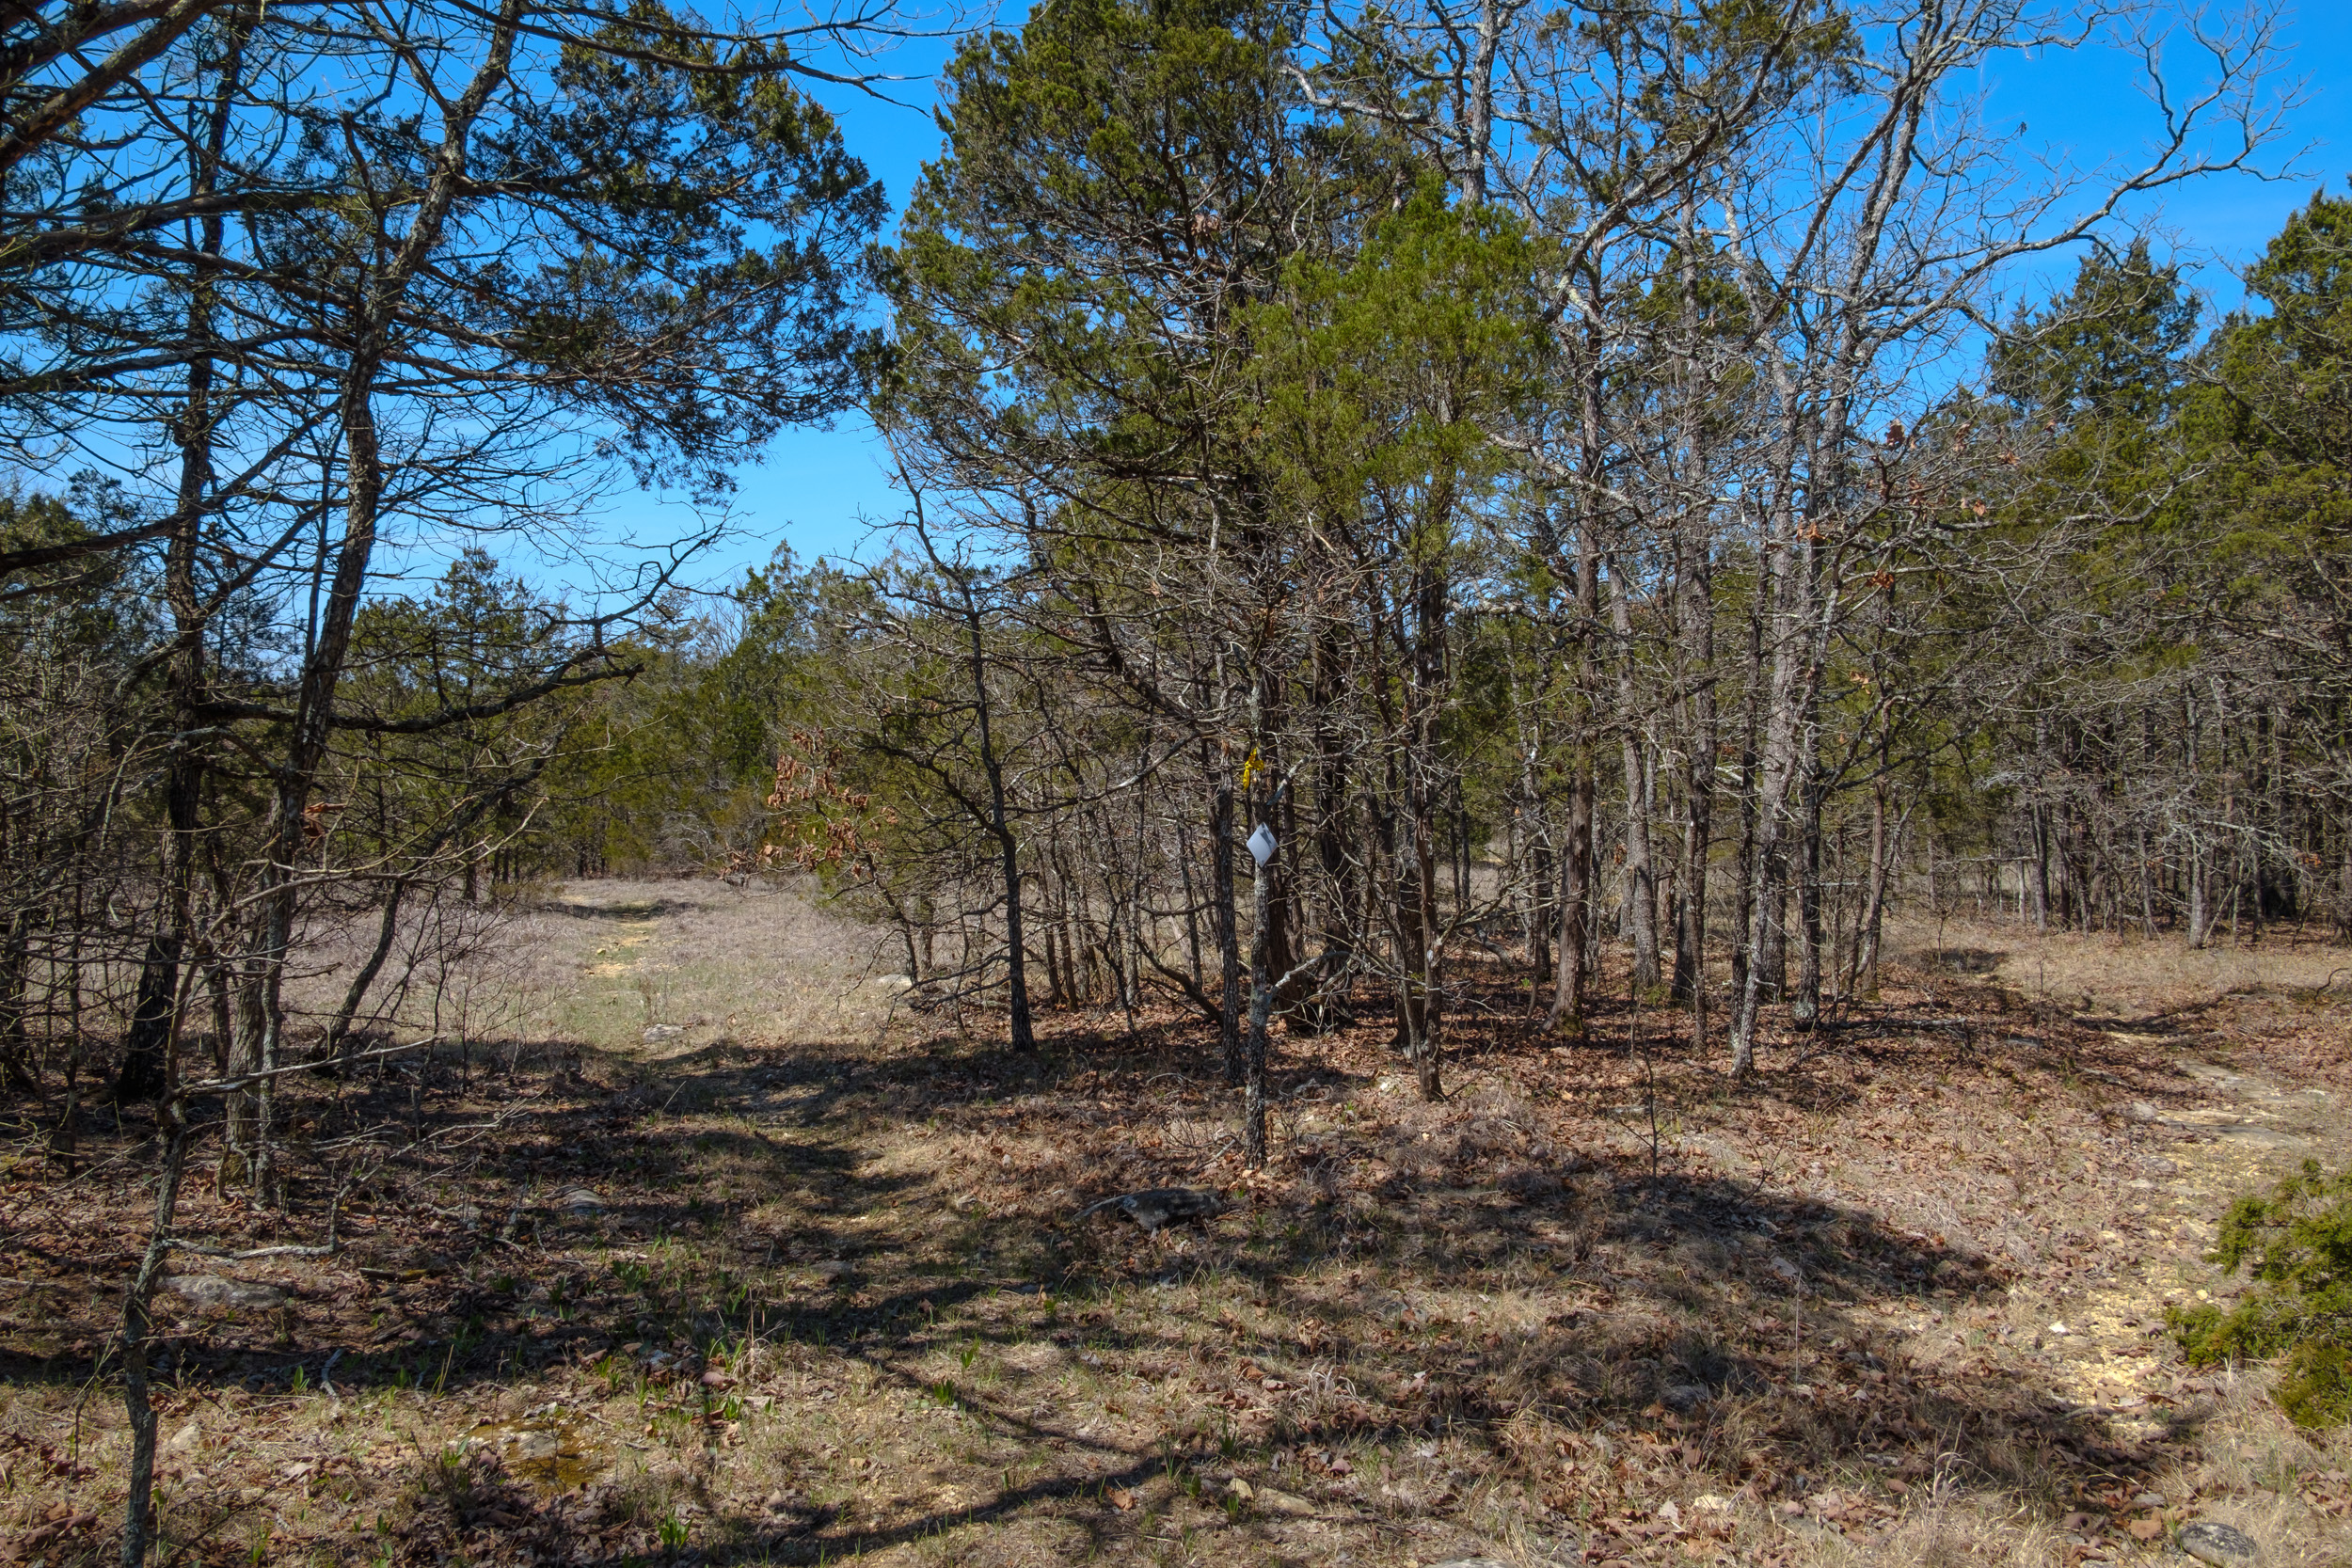
The climb up from Brushy Creek along the old farm track got my heart and sweat going! Once out of the trees, I came to a spot where another ‘unofficial’ side trail joined from the north. I realized this was most likely where Ginger got lured off the trail when she tried to hike the Pees Hollow Trail counterclockwise a while back. I stopped to take a picture to show Ginger and I saw one of the most badly placed trail markers I’ve seen so far. Instead of being to the left of the Pees Hollow Trail, it was slap-bang in the middle of the two trails. Nothing indicates that you should follow the trail to the left. I wish I’d had a sharpie with me to draw an arrow on the trail marker.

Very ambiguous trail marker — Take the left trail. As I hoped, I found the landmarks I was looking for; the farm track gate posts, the Dodge truck hood, and the remains of an old building.

Old gateposts, on the old farm trail. 
Old cellar, store, or what? 
Dodge truck hood.  Looking west across the hollow where Brushy Creek runs. Copyright © 2018 Gary Allman, all rights reserved.
 Trail junction. Make sure you follow the trails that have a marker, or you’ll end up on the glades that run between ‘Cab Creek’ and Brushy Creek. Copyright © 2018 Gary Allman, all rights reserved.
 Trail junction. Make sure you follow the trails that have a marker, or you’ll end up on the glades that run between ‘Cab Creek’ and Brushy Creek.
 Glades and Knobs. Copyright © 2018 Gary Allman, all rights reserved.
 Looking north east out of Hercules Glades.Copyright © 2018 Gary Allman, all rights reserved.
 The end of the hike (the fire tower) is in sight.Copyright © 2018 Gary Allman, all rights reserved.
Very near the end of the trail. Hwy 125 is at the top of the slope to the left. I made one new discovery very near the end of the hike. I saw a spring and spring box, at what has to be one of the sources of the creek that Joins ‘Cab Creek’. It must produce quite a lot of water, as It was a couple of hundred yards off of the trail, and the sound of running water was very clear. I didn’t bushwhack over for a closer look, because I didn’t want to give away any of my hard earned elevation gains. I’ll have to explore it another day.
I’d started hiking at around 10:15 a.m. and I arrived back at the van at 1:30 p.m.

Day Two Final Thoughts
What worked:
- My new DutchWare Gear Chameleon Hammock. It is very well made and the bug net kept in a surprising amount of warmth. Having the ridgeline inside the bug net is very convenient for hanging gear on, making things much more organized.
- The Deuter backpack was again comfortable and took everything easily with plenty of room to spare. And that included the huge 0° sleeping bag.
- Utility Kilt. I don’t know if it was the thicker material that made wearing a kilt comfortable in the lower temperatures or not, but it was fine. I was comfortable in it from 34°F to 60°F. I think this might well become my regular hiking attire. I’ll just have to get used to meeting people on the trail while wearing one.
- Buff. I’ve carried one of these for ages, but not used it. I was surprised by how good it was. I turned it into a beanie and wore it instead of my thick Thinsulate hat while I sat around the fire. It was warm and comfortable. I shall be experimenting with it some more. It has the advantage of being very light and compressing very small.
- Hiking Sandals. These were great and I appreciated the extra depth of sole making some of the more stony and sharp parts of the trail easier to hike.
- Once again the Trangia stove and the rest of my cooking system worked great. Right now I see no reason to change anything.
It all went very well for a quick first test of a new hammock. I’m pleased with the hammock and looking forward to getting the underquilt so that I don’t have to carry and deal with an inflatable pad. Lugging around the 12′ x 10′ polypropylene tarp is a bit of a chore, so I cannot wait for the delivery of my lightweight tarp.
This time I remembered to take powdered milk (not whey powder), and I mixed it into a nice hot cup of cocoa which I drank while sitting by the campfire.
I hiked a tad short of six miles with a total elevation gain (and loss) of 1,000′. Now to plan another trip for after next week’s conference.