-
Gary and Ginger Allman sitting on a bench at Milton Lock

Gary and Ginger Allman sitting on a bench at Milton Lock, Langstone Harbour. Copyright © 2017 Gary Allman, all rights reserved. For more information on the history behind this picture, read this post.
-
Sitting on a bench at Milton Lock

Sitting on a bench at Milton Lock. Copyright © 2017 Gary Allman, all rights reserved. For more information on the history behind this picture, read this post.
-
Langstone Mill

Langstone Mill. Copyright © 2017 Gary Allman, all rights reserved. Besides being picturesque, Langstone Mill is interesting because it is the site of two mills. As well as the obvious windmill, there was also a tidal mill on the site. Built around 1730, the mill was derelict in 1934. By the start of the Second World War, it had been converted to a private residence. I’d love to give a link to the English Heritage site to confirm this information, but the website’s not working at the moment.
In the distance is Hayling Island. Once upon a time a frequent haunt of mine because my first boat was kept there, and in the seventies, I visited often to go horse riding along the beach. Hold on, one of the rare pictures I have from before 2007 was taken here in the seventies…

After Riding – 1977, 1978 I don’t know. Bob, Kim, Gary, and Jayne. We’d often stop at the pub after riding. Note ‘poser’ Bob’s riding boots. 🙂 Copyright © Gary Allman, all rights reserved. Yes, that’s me with the long hair. It was the seventies, so you’ll have to excuse me. You’ll notice that the beard was already in place. And on the far left is Bob, who also appears elsewhere, Kim, his girlfriend at the time, and my fiancée (judging by the ring on her finger) Jayne Brown nee Pitt.
Back to 2017 …

Langstone Mill. Copyright © 2017 Gary Allman, all rights reserved. -
The Royal Oak & Langstone Mill

The Royal Oak and Langstone Mill. Copyright © 2017 Gary Allman, all rights reserved. Vacation Day: 9
We weren’t quite sure what time we were supposed to be arriving for dinner with my brother and his family, so we decided to have a short walk followed by a quick preprandial drink in the Royal Oak. It was just as well it was only a quick drink, as while we were there we received a text asking what time we were arriving for dinner …
-
Watermill

Watermill – Weald & Downland Living Museum. Copyright © 2017 Gary Allman, all rights reserved. Vacation Day 7: An afternoon at the Weald and Downland Museum
Who couldn’t resist taking a picture of this watermill with its reflection in the lower pool?
The millpond was in a bit of a mess, with construction and preparations for the main tourist season underway. While the millpond might not have been ready for tourists, there were lots of moorhen chicks and tiny ducklings around in the lower pool, and I’ll confess, I couldn’t resist taking a picture of them.
 Moorhen and three chicks – there were some chicks in the lower millpond. Weald & Downland Living Museum. Copyright © 2017 Gary Allman, all rights reserved.
 Millstone – Weald & Downland Living Museum. Copyright © 2017 Gary Allman, all rights reserved.
 -
Basket Weaving

Basket Weaving – Weald & Downland Living Museum. Copyright © 2017 Gary Allman, all rights reserved. Weald & Downland Living Museum, West Sussex.

Basket Weaving at Weald & Downland Living Museum. Copyright © 2017 Gary Allman, all rights reserved. Contrary to popular belief in the US, there are firearms in the UK. Clay Pigeon (skeet) shooting is very popular, and here are a load of spent shotgun cartridges to prove it.
-
Vacation Days 3-5 – Working

Final Video on the Electronic Billboard at KC Live! Kansas City, Missouri What no vacation pictures?
Before leaving on vacation I ran out of time to complete a couple of tasks that needed to be done while I was away. The creation of the artwork for ‘Feather banners’, some 3′ x 8′ Banners, and a postcard handout. This is all for a big event I’m working on May 5-7, which had got booked after I’d found out about the wedding. We decided to cut short our vacation so that I could get back and deal with the additional workload.
Knowing I had a few bits of artwork to produce I got the MacBook all patched up-to-date, and made sure all the apps and files I’d need were up-to-date before we left. All I had to do was download the banner and postcard templates from the printer, create the artwork and then upload it all to the printer’s website.
That was before we rented two weeks display time on an electronic billboard. I got to hear about this while I was getting ready to leave. Not just any old billboard, this one is twenty plus feet wide and on the top of the building where one of the events is being held. Oh, and the artwork has to be with them by Wednesday April 17.
Creating the slideshow and editing the video proved to be another issue.
My initial plan for the billboard was to take a poster flyer I’d already created and re-work it to the necessary aspect ratio. Then I checked some pictures of the billboard and re-read the specs. A still image wouldn’t do, this needed video. I’ve not produced an electronic billboard ad. before, and I know nothing of the psychology, best practices etc. behind them. So I designed a short slide show giving what I thought should be the key messages / calls to action.
Creating the slideshow and editing the video proved to be another issue. The MacBook refused to do anything except in Extra … Slow … Time … After spending part of Wednesday trying to work with it, I gave up, and borrowed Ginger’s laptop. Of course, then I had to waste an entire day installing all the software and downloading all the files I needed.
Looking for the templates for the banners that was supposed to be my only ‘vacation work’, I found out (via a telephone call to the printer) that they don’t provide any templates. I’ll not work with a printer who cannot provide templates. I’m supposed to guess the angles of the feather banners? So now I had the additional task of finding a new printer, plus source stands etc. Ginger searched for a new supplier for the banners while I created slides and edited the video. At least Ginger’s Windows laptop worked – unlike the MacBook. So that’s what I spent the next few days doing.
The feedback I got on the video I produced was that it had too many slides, so taking advantage of the UK – US time difference, I cut a new version on Tuesday morning (Vacation Day Seven).
At the earliest opportunity the MacBook is going in the trash.
So I lost a huge chunk of my vacation to work (around 40 hours). Neither Ginger nor I were particularly amused. We had planned on visiting friends in Dorset and finding a hotel on the Dorset coast. Those plans had to be scrapped. In the end, we decided to stay in the Portsmouth area and make the best of it – though we’d have to move out of Rob and Gail’s early Wednesday. So we booked into the hotel we were going to stay at for the wedding and stayed there a few extra days. Having a rental car sitting outside the door costing money while I was working was pretty darned annoying, to say the least.
At the earliest opportunity, the MacBook is going in the trash. It has let me down in meetings, where it was supposed to provide the video link. It froze solid when it was being used to project slides at the annual convention. It is a total liability.


-
Commercial Road, Portsmouth

Commercial Road, Portsmouth Vacation Day 2 – A quick visit to Commercial Road
-
Park and Ride Bus

Park and Ride Bus Vacation Day 2 – A quick visit to Commercial Road
-
St. John’s Catholic Cathedral, Portsmouth, UK
Vacation Day 2

St. John’s Catholic Cathedral 
St. John’s Catholic Cathedral -
The Former Zurich Building, Portsmouth UK

Vacation Day 2.
I’ve always liked this building, and now it is being converted into a hotel or student accommodation – I’m not sure which. It still looks good to my eye. I last took a picture of this building in November 2007.
-
Victoria Park and Playground

Victoria Park Playground. Copyright © 2017 Gary Allman, all rights reserved. Vacation Day 2 – A stroll through Victoria Park.
The lighting under the trees was very surreal – calming and peaceful. I failed to capture it.

Victoria Park, Portsmouth. Copyright © 2017 Gary Allman, all rights reserved. -
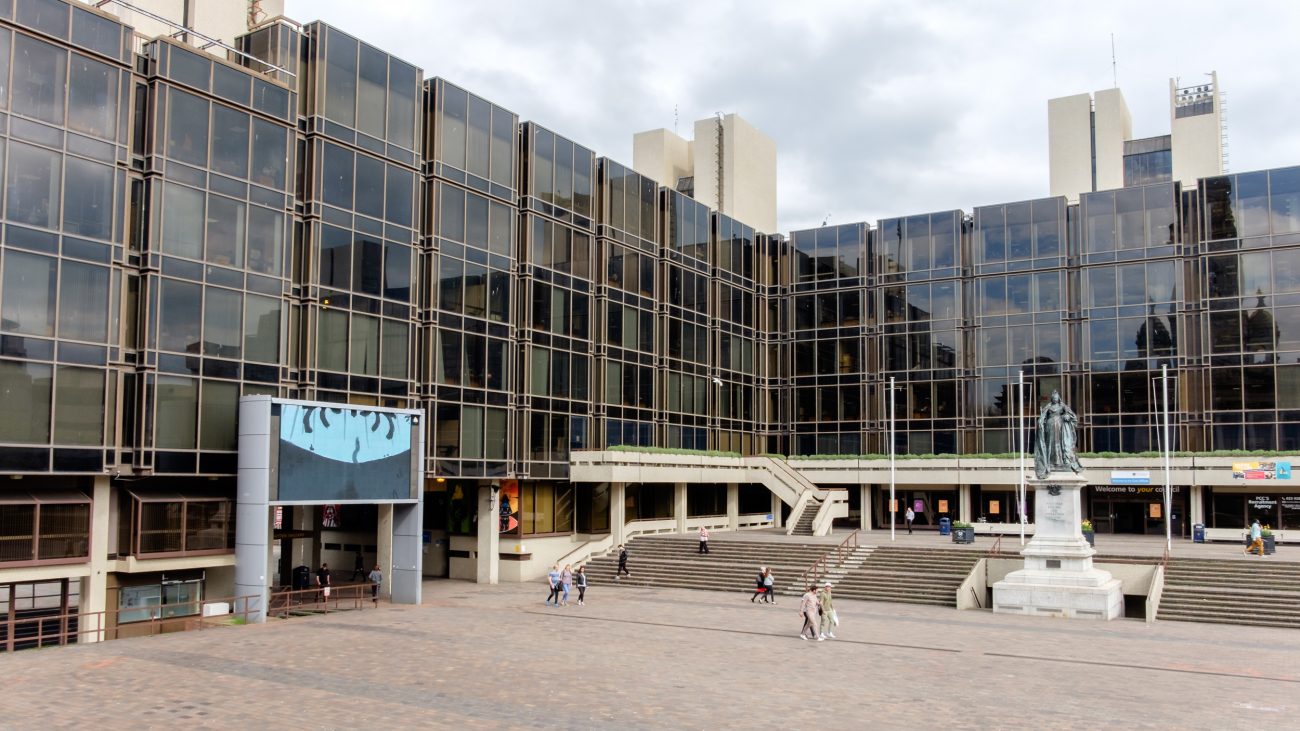
The Norrish Central Library, Portsmouth Guildhall Square

The Norrish Central Library, Portsmouth Guildhall Square. Copyright © 2017 Gary Allman, all rights reserved. Another ‘odd’ picture I’ve had published. This one appeared in a German exhibition, ‘SOS Brutalism’ curated by Deutsches Architekturemuseum, Frankfurt, Germany.
-
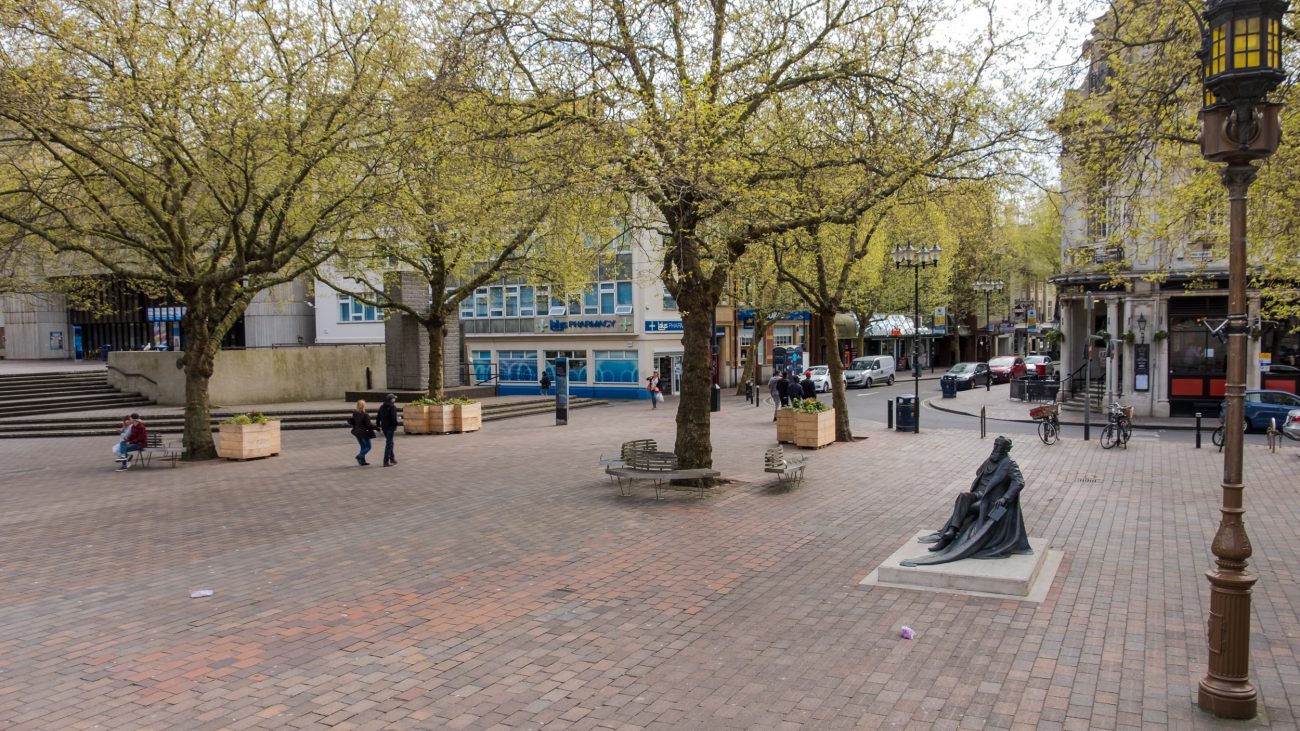
Portsmouth Guildhall & Guildhall Square

Portsmouth Guildhall. Copyright © 2017 Gary Allman, all rights reserved. Vacation Day 2 – Portsmouth Guildhall Square.
After sorting out the rental we went back and worked (more on that later). Our jet-lagged brains not being at their best we decided to take a break from work and go and get some essential shopping done at Commercial Road.
Essential shopping proved to be a tie and some socks for me, and lingerie for Ginger. She says the UK has much better offerings in this department. This, of course, meant I was abandoned in the Marks and Spencer lingerie department while Ginger’s intimate apparel was selected. Ginger sent a text to Lanie resulting in additional purchases (Trans-Atlantic shopping is so easy nowadays…).
Shopping complete we went for a stroll to Guildhall Square and then on through Victoria Park and back to where we’d left the car. Once at the car park I had to grapple with the concept of parking metered by number plate recognition. Technology is wonderful when it works – and fortunately, on this occasion, it did.


-
Bit Of A Cock-up On The Car Rental Front

Bit Of A Cock-up On The Car Rental Front – What’s that stuck in the middle of the console? Copyright © 2017 Gary Allman, all rights reserved. Vacation Day 2 – Sleep, rent a vehicle, and go buy some essentials for our stay.
I booked our rental online. I was trying to use my reward points but something went wrong and I had to restart the booking process. Somehow I managed to get switched between the US and the UK website. When you book from the US, it is standard for the rental vehicle to be an automatic. I didn’t notice the changeover and so didn’t realize I’d booked a manual. In fact I didn’t notice until I got in the car to drive off.
I prefer to rent an auto as it is one less thing to think about. It’s bad enough to have to cope with the UK’s packed, narrow roads, and driving on the correct side of the road, let alone waggling the gear shift and remembering to depress the clutch.
They didn’t have any other vehicles so we had to go with the manual, and it wasn’t a problem, even though I’ve not driven a manual in ten years.
I should add that apart from my little blue car, I’ve been driving autos for around thirty years. Enterprise did offer to swap the vehicle for an auto after the weekend, but I was used to it by then so we kept the car for the trip.
-
Southsea Beach

Southsea Beach. Copyright © 2017 Gary Allman, all rights reserved. Vacation Day 1 – The flight out, a walk to the beach, and beer.

The flight arrived early, immigration was a breeze, and our bag was one of the first on the carousel. So we had to wait for Robert to come and pick us up.
Once back in Portsmouth we took a short nap. We then decided that a visit to the beach was in order to stretch our legs and clear out the cobwebs.
Somehow, our feet led us into a pub … We couldn’t stay long, just enough time for a pint (or two) and a quick chat with Clive before we headed off for dinner with Gail and Robert.

Southsea Beach — Uncropped, Black and white. Copyright © 2017 Gary Allman, all rights reserved. 
Southsea Beach — cropped in color. Copyright © 2017 Gary Allman, all rights reserved. 
These four versions of the same picture are causing me a bit of a problem, as I like each one, and couldn’t pick out a clear favorite. Right now I’m favoring the crops, but in a few weeks? Who knows?
-
My watch strap is loose

Copyright © 2017 Gary Allman, all rights reserved. I say it is because I’ve lost weight. My wonderful wife says I’m retaining less water.
I prefer my version.
-
Photobooks

Felix – May 2016. Mike & Diffi’s Wedding May 27th 2016. Copyright © 2017 Gary Allman, all rights reserved.
That’s another couple of projects completed – a photobook of my grandson, and another of my sister’s wedding.They are both still wrapped in cellophane (hence the strange highlights and spots), and they will remain that way until I hand them over. It’s rather like the magazine I edit, once they are printed, opening the pages to take a look is a mixed emotional bag because you never know quite how they are going to turn out. This is especially true with these photobooks where there are no opportunities to check proofs and make corrections.
-
The Ridge Wallet and Journal

The Ridge Wallet and Journal. Copyright © 2017 Gary Allman, all rights reserved. The Ridge Wallet, holding nine cards, with eight bills in the billfold and my work / personal journal.
This is hopefully the final step in honing down my everyday carry.
When I first made my work / personal journal I included a wallet insert. My idea being that I’d carry the journal with me everywhere – because I needed my wallet with me. That worked fairly well and the complete thing would fit in my pants pocket. I ran with this set up for several months, and was, on the whole, quite happy with it. But it was big and heavy. It was also a pain having to take the whole lot when just popping out to buy some groceries.
I began to think about splitting my journal into a work journal and a personal journal with wallet. I tried that for about a month. I found that I neglected my personal journal, and carrying both when going out to customers was worse than carrying one big journal. So I started searching for minimalist wallets – which is where The Ridge Wallet comes in. It popped up as an advert on Facebook. Normally I ignore Facebook ads, but this was one I wanted to follow up on. I loved the look and design.


I did a lot of checking of reviews, and decided that this was the solution I’d been looking for. Before I bought it I did some final checks. I put my personal journal back in with my work journal, and I’ve kept the wallet insert in what will now be my hiking and backpacking journal. I dug out an old bi-fold wallet and checked how that worked out for a week. That went okay, so I went ahead and bought The Ridge Wallet. Now to see if it really does work as part of my everyday carry system. The Ridge Wallet
Note: quick photograph taken on my desk. The monitor-mounted lighting is making me lazy when it comes to taking pictures like this – just pull my monitor out until it is in the right place and take a picture.
Updates
- Journal: After a month’s use I removed the leather journal closure, as it kept getting caught on things and stopped the journal lying flat when I was writing. Maybe thinner, more flexible leather would have worked better.
- Journal: When I started going out backpacking again I decided to move my personal journal to a separate leather binder. I added a new notebook to my work journal which I use just for ‘Collections’ you’ll have to read up on how bullet journaling works to find out what collections are…
- Ridge Wallet: After nine month’s use, I am very happy with The Ridge wallet. I’m still slow getting cards out, but that’s because I don’t spend a lot of money!
- 2023, six years later and I’m still using it, and I’d buy another if I somehow lost this one!
- 2025, eight years later and it’s going great, and I’d still buy another one.

Pocket Dump — The things that are always in my pockets. My knife, wallet, and lighter. I deliberately angled the wallet to show the minor scuffs and scratches it has picked up in two years of everyday use. Copyright © 2019 Gary Allman, all rights reserved. -
The Ridge Wallet – My minimalist wallet for everyday use

The Ridge Wallet comes in a neat box along with a screwdriver tool for removing the ‘cheeks’. Copyright © 2017 Gary Allman, all rights reserved. With a footprint the size of a credit card you cannot get a wallet much smaller than this without getting rid of some of the things you carry.
The Ridge Wallet has a built-in RFID block so that credit and ID cards inside the wallet cannot be read. The wallet comprises two plastic cheeks which house the RFID block, and screwed to the outward-facing sides of those are decorative/protective faceplates. Sandwiched between the face-plates and the plastic cheeks is the strong elasticated band that holds the wallet closed.
There are several different finishes to choose from. As much as I liked the look of the burnt titanium finish, I couldn’t justify the cost, so I bought a wallet with an aluminum finish that closely matches the look of my favorite Zippo lighter.
There are two options available for holding your cash — one uses another elasticated band to hold the cash, and the one I opted for, uses a money clip. I’ve never used a money clip before so it will be interesting to see how I get on with it. Fortunately, If I don’t like the money clip I can buy the band and install it.
The Ridge Wallet is well made and looks good. It feels heavier than I expected, although checking on the scales I found that it weighs 2.12oz empty, and fully loaded (for me) with eight bills and nine cards: 4.09oz. My everyday carry knife and lighter each weigh more than that. Having some ‘heft’ at least you know you have it in your pocket.
Accessing the cards takes practice, but is quite easy. There are lots of videos on YouTube, showing how to use it. The only downside so far is the cost, which is about right for a fully-fledged leather wallet but seems a little expensive for what you get. However, it works and should last for many years. It looks good too, and I was prepared to pay the price for what might just be the last wallet I buy.

Eight bills in the money clip. Copyright © 2017 Gary Allman, all rights reserved. 
Nine Credit / ID cards. Copyright © 2017 Gary Allman, all rights reserved. The official Ridge Wallet website
Updates
March 2026 — Nine years of constant use, and it’s still as functional as it was on day one. Yes, the surface is marked, but it’s spent nine years rolling around in my pocket with my knife and whatever else, so no surprises there. Would I buy another if I lost this one? Absolutely.
March 2019. Two years on and the Ridge Wallet is still my everyday wallet. I’ve not had any reason to change it. I’ve not been tempted by other designs, it’s still working fine for me. I keep it in my pocket with my knife, so it’s a bit scuffed up. But I look on that as ‘character’. And I’m sticking with the money clip; it is working fine for me.
Pocket Dump — The things that are always in my pockets. My knife, wallet, and lighter. I deliberately angled the wallet to show the minor scuffs and scratches it has picked up in two years of everyday use. (March 17, 2019). Copyright © 2019 Gary Allman, all rights reserved. I’d still buy another. I see on Amazon there are now a lot of low-cost ($20)
knock-offscopies.December 2017. Would I buy one again? Yes, it’s working fine for me. Apart from a few minor scratches on the surface — which is only to be expected — it’s just as good as it was on the day I got it.
A note about the links. The links marked with a this icon – – are affiliate links, if you buy through them, it doesn’t cost you more, and I get a tiny percentage which helps me offset the cost of keeping this website running. However, please buy from the source that makes the most sense for you!


